Classic confectionery decorations for cakes (cream, fruit, meringue, chocolate, jelly) are already familiar and tested by many housewives who are fond of confectionery baking. However, sometimes you need to prepare a special cake with a spectacular decoration - for an anniversary, wedding, New Year or other holiday. In this case, the advice of experienced confectioners who know how to make a cake decoration and who can turn ordinary sour cream into a culinary masterpiece will be useful.
Mastic - sweet confectionery plasticine
Mastic is an elastic confectionery material made from powdered sugar, reminiscent of plasticine; various figures, flowers, reliefs, three-dimensional inscriptions, plot compositions are sculpted from it, or the cake is completely covered with it. To prepare mastic, you can use special tools - rolling machines, scrapers, stencils, molds and curly knives. If there is no pastry equipment, use a regular board, rolling pin, knife, cling film and cookie cutters. Mastic is tinted with natural or artificial food colors, but this is done at the initial stage of preparation - when mixing the ingredients. To reduce the sugariness (after all, a lot of powdered sugar is used), lemon juice is sometimes added to the mixture.
Types of mastic and the subtleties of its preparation

The viscosity of the material is given by starch, gelatin, condensed milk, chocolate, marzipan, honey, marshmallows and marshmallows. In accordance with this, there are different types of mastic - gelatin (pastillage), marshmallow, milk, sugar and honey. Pastilage hardens quickly, but remains elastic, so it makes spectacular flowers. Honey mastic is very soft and pleasant to sculpt, just like milk mastic - it has a very beautiful snow-white color and pleasant texture. Some confectioners add a little oil to the mastic to make it more plastic.
Preparing mastic is not very difficult - all the ingredients are thoroughly mixed, and sometimes heated in a water bath, if this is specified in the recipe. If necessary, add a little more powdered sugar, which acts as flour when kneading the dough. The board and rolling pin are usually sprinkled with starch so that the mastic does not stick, and the finished confectionery “plasticine” is stored in cling film. And an important point - decorating cakes with mastic usually begins when the top layer of cream has hardened.
Making your own mastic

Gelatin mastic is made from 2 tbsp. l. gelatin powder, which is mixed with cold water, and after swelling, the container with gelatin is placed in a water bath for several minutes until it is completely dissolved. Add 450 g of powdered sugar to the gelatin, “knead” the mastic, roll it into a ball, and then wrap it in cling film.
Chocolate mastic is a very tasty and beautiful decoration for, to prepare it you will need 100 g of dark chocolate, melted in a water bath, and 90 g of marshmallows, which are added to the melted chocolate. First, it is recommended to keep the marshmallows in the microwave - literally for a few seconds so that they soften. In this case, it is necessary to carefully stir the mass all the time so that it does not burn. When the marshmallows are half melted, add 40 ml of cream with 30% fat content, 1 tbsp. l. butter, 1-2 tbsp. l. cognac, mix well and add 90-120 g of powdered sugar. First, knead the mastic with a spoon, and when it becomes thicker, do it with your hands.
Milk mastic is easy to prepare - mix 200 g of condensed milk, 2 tsp. lemon juice and 250 g of powdered sugar. All ingredients are ground to a uniform texture, and then the mastic is rolled out on a board and beautiful figures are cut out of it.
To completely cover the cake, roll out a large round pancake and place it on the cake, making sure that the top and sides are completely covered. The mastic is smoothed out with your hands and the excess is removed, which can be stored in the refrigerator for up to two months. When the mastic hardens, confectioners recommend warming it slightly in the microwave or in a water bath.
Almond marzipan from children's fairy tales

Marzipan, often mentioned in Andersen's fairy tales, is another confectionery "plasticine" that is made from powdered almonds and sweet syrup (or powdered sugar), with sugar making up more than one-third of the mass. Marzipan is a very elastic material from which you can sculpt complex shapes and fairy castles without adhesive additives. Real marzipan is made from almonds; if you add other nuts, the mass will lack plasticity. There is another secret to preparing this product - for 20-50 sweet almond kernels, take 1 bitter nut, which can be bought in specialized confectionery stores. This slight bitterness helps marzipan fully reveal its taste and aroma and gives it a special piquancy. If you can't find bitter almonds, you can replace them with a few drops of almond extract, bitter almond oil or almond liqueur. However, adding these ingredients to decorate the cake is not at all necessary. The absence of bitter notes will not reduce the plasticity of marzipan, it will simply not have that characteristic taste.
Decorating cakes with marzipan

German confectioners know about 200 ways to prepare marzipan. All these methods can be divided into two - hot and cold. With the hot cooking technology, sugar syrup is boiled, which is mixed with almond crumbs, but the plasticity of this mass decreases as it cools, so to cover the cake with marzipan, you need to sculpt decorations as quickly as possible. The cold method is the easiest, since the almond flour is combined with powdered sugar and kneaded well. If the almonds are of poor quality, you won’t get a homogeneous mass, so confectioners in such cases recommend adding an egg to hold the ingredients together. Of course, the egg must be very fresh, and such products cannot be stored for a long time. Various flavorings are added to marzipan - liqueurs, cocoa, orange zest, spices and rose water.
First you need to cook it - preferably cold, as it is much easier. To do this, pour 350 g of almonds with hot water for a few minutes to make the skin come off easier. The peeled nuts are lightly dried in the oven, preventing them from changing color, and then ground into flour. Beat 2 eggs, add 175 g of powdered sugar and cook the mixture in a water bath until it reaches the consistency of cream. Remove from heat, add almonds to eggs, add 1 tsp. lemon juice, then thoroughly beat the marzipan. Sprinkle the board with powdered sugar, place the nut mixture on it and knead the almond “dough” until it thickens completely. You can add dyes to marzipan, and then sculpt whatever you want - objects, flowers, animals and architectural structures.
Fondant for cake decoration

Fondant is boiled sugar syrup that is whipped with a mixer and cools, turning into a thick, sticky glaze or brittle and hard fondant. It all depends on the composition of the syrup and the method of its preparation. The syrup can be cooked without additives, in this case we are talking about fudge. If you add milk or cream to it, you get milk or cream fudge. Fudge can be chocolate, fruit and berry, nut, protein, creme brulee - depending on what ingredients are added to it.
For fudge, mix 100 g of very heavy cream, 1 cup of sugar, 40 g of butter and bring the mixture to a boil over low heat, stirring constantly. Boil the fudge until it becomes creamy, and to check its readiness, add a drop of milk mixture into the water. The finished fondant easily rolls into a plastic ball.
Protein fudge is very tasty, for which 2 chilled egg whites are beaten with a pinch of salt until fluffy foam, and then 300 g of powdered sugar and 2 tbsp are gradually added to them. l. lemon juice.

It is better to store the finished fondant in the refrigerator, covering the bowl with cling film to prevent drying out; apply it to the surface of the cake using a pastry brush or a pastry bag.
You can decorate the cake with grilled cake, marshmallows, marmalade, or use a simple stencil and powdered sugar. Involve children in decorating confectionery products - they will certainly enjoy making masterpieces from mastic or marzipan. Decorating cakes together brings you closer together, and sharing tea with delicious desserts turns life into a series of endless pleasures!
Homemade sweet pastries are, without a doubt, much healthier and tastier than store-bought offerings! However, even experienced housewives should not forget that not only tasty, but also beautiful cakes are much more enjoyable to eat. If you are not entirely experienced in the art of decoration, use the simple recipes and interesting tips from the article.
Cake decorating cream
Before decorating the cake at home, pay attention to the buttercream. It is considered a classic option for decoration - especially if you are preparing it for a wedding or as a gift for a girl’s birthday.
Recipe
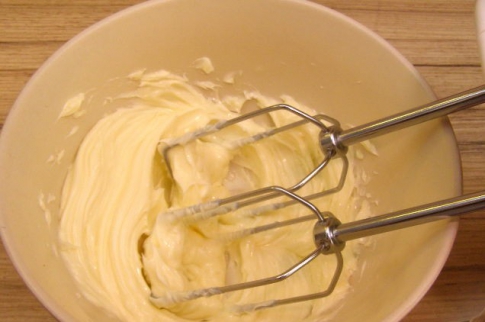
It is butter cream that is best used by novice confectioners - it is prepared very quickly and requires minimal time and effort. You will only need 8 tablespoons of condensed milk and a 200 gram pack of butter.
- Take the food out of the refrigerator in advance - you need it to be at room temperature, otherwise the cream will not turn out.
- Heat the slightly melted butter in a water bath - the consistency should resemble thick sour cream. Just don't overdo it and melt it!

- Using a mixer, beat the creamy mixture for 3-4 minutes until fluffy and white.
- Keep whisking the butter. Gradually pour the condensed milk into the bowl. If, when opening the can, you notice that the milk has become candied, you must first bring it to a boil and cool it again to room temperature.
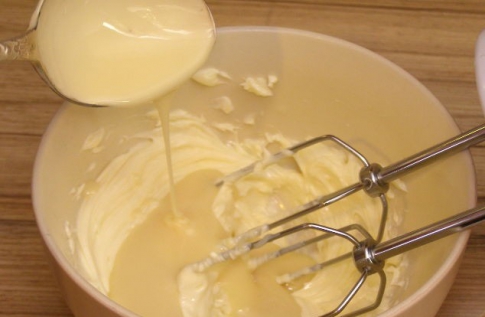
- Continue whisking the mixture for 10-15 minutes until smooth.
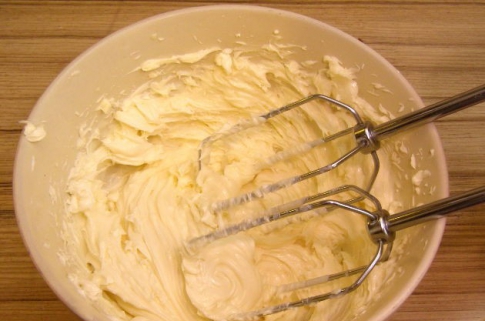
Your homemade cream is ready! If you need to add color to the mixture, give preference to natural food colors - they are easier to find in stores. In addition, you will be sure that nothing chemical has got into the confectionery product.
You can get a closer look at the process from this video tutorial:
For example, yellow color can be easily obtained by adding saffron diluted in warm water, red - with beetroot or cherry juice, and it is better to use spinach juice as a green dye.
Unfortunately, due to the semi-liquid consistency of the cream, you cannot sculpt various figures. Nevertheless, you can decorate the cake with cream in such an original way that no one has ever managed before.
There are many tricks in this matter. For example, professional confectioners use a special syringe with nozzles of different sizes and shapes. At home, they can be easily replaced by making a homemade syringe from an ordinary bag or A4 sheet - just roll the paper into a cone and cut off the bottom corner.
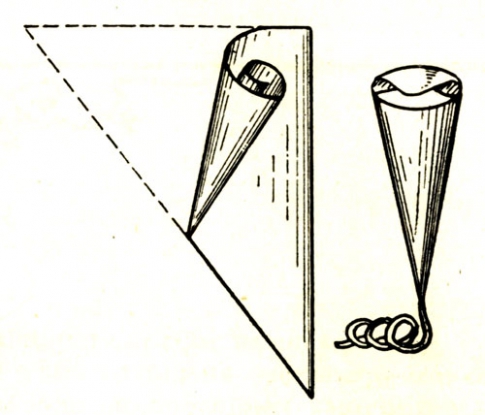
If you need to apply the cream in thin strips, cut off a very small part of the tip. For a wider strip, cut a larger corner.
Depending on the chosen thickness and shape of the jet, the possible patterns also change. Thin, quick lines are convenient for drawing on the flat surface of the top cake.

A line of medium thickness cream is suitable for edging the edge of the product.

Thick corrugated short lines are used more often than others - with their help you can lay out interesting flowers, similar to roses, at home.

In addition, you can evenly coat the entire product with cream.
Cake mastic: sweet recipe
Mastic is a plastic confectionery material that is used for modeling. The working process is reminiscent of sculpting from salt dough, but the resulting figures can ultimately be eaten.
Preparation
To decorate a cake with fondant at home, you will need ingredients such as two hundred grams of chewing marshmallows, powdered sugar, 2 tablespoons of water, and dye.
- Pour the marshmallows into a deep bowl and add water at the rate of 1 tablespoon per 100 grams. You can use lemon juice instead of water if you like your products not too sweet.
- Cover with a plate and microwave for 30-40 seconds at 800 W, or melt in a water bath.

- Add dye. Gradually add powdered sugar, sifting it through a sieve - there should be enough of it so that the consistency of the mixture becomes like plasticine and does not stick to your hands. Mix with a spoon at first; when it becomes difficult, mix with your hands.

- Wrap the finished mass tightly in plastic and place in the refrigerator for about half an hour.

The mastic is ready! Take out the required amount, sprinkle your work area with powdered sugar, roll out the material on it and sculpt.
The process of making confectionery mastic is described in more detail in this master class:
You need to remember that the mastic quickly hardens upon contact with air, so be sure to wrap the excess in plastic and hide it in the refrigerator - in this position the mass can be stored for up to three months.
Design ideas
Thanks to its plasticity, mastic has recently become especially popular among confectioners - with its help you can make any fantasy come true! Some cakes have become like works of art: paintings, statues and sculptures, shimmering with all the colors of the rainbow.

It will be easy for you to decorate a cake at home for both your birthday, wedding, New Year or Valentine's Day.
There are 2 main ways to use mastic:
- as a background - the material is rolled out into a thin sheet, which is used to completely wrap the cake;

- as a material for sculpting various products.

Beginning cooks are advised to refrain from sculpting large figures until they learn how to prepare mastic perfectly - if the proportion of ingredients is not quite correct, the product may crack when it dries.
Cake decoration: other options
In addition to traditional ways to beautifully decorate a cake at home, there are many more wonderful options. For example, foods such as chocolate, fruits and nuts should not be discounted. Even the smallest ingredients like powdered sugar can add zest to your dish.
Chocolate
Confectioners use chocolate not only as an independent dessert, but also as an excellent decorating material. The main ways to use chocolate are as follows:
- crumb - grate the tile to obtain a powdery mass in which you can roll the sides of the cake or sprinkle on top;

- shavings - large shavings are cut from a slightly softened block with a thin knife, which are then sprinkled on the product in any order;

- fondant - the dessert is melted in a water bath, in the oven or microwave, after which the entire cake is coated with chocolate.
However, you can come up with your own original version of how to decorate a cake at home using a cocoa product.
Fruits and flowers
Fruits go wonderfully with cream cakes - the product turns out airy and bright. Use one type of fruit to decorate sweets with a specific color or create a fruit mix - it all depends on your imagination. For example, you can decorate the surface with berries.
The decoration looks beautiful with thinly sliced fruits placed in the top layer. To make them stick better and look glossy, fasten them with a special compound: dissolve gelatin in water (the solution should be very concentrated) and brush the fruit layer with a wide soft brush.

In addition, decorating cakes with natural flowers has recently become increasingly popular. Some plant varieties are even edible. The rest can simply be removed before use.

Don't forget about nuts and regular powdered sugar. Cut out a stencil of a certain shape from thick paper, place it on the cake, sprinkle with decorations and remove. Only the outline will remain on the cake - laconic, but very interesting.

Finally, watch a video with one of the options on how to decorate a cake at home with mastic.
Decorating a cake with chocolate: patterns, balls, fences
Lettering and drawings made from liquid chocolate are an ideal method that allows you to decorate a cake yourself at home. Using this technique, you can put words of congratulations on any dessert that will be addressed to the hero of the occasion. You can use several methods at once. For example, how to draw an openwork or a beautiful ornament using chocolate, or decorate a cake with curls, leaves... In general, choose, think, use our tips.
How to draw, make inscriptions with liquid chocolate on a cake: instructions, examples of inscriptions and drawings, photos
A festive pie looks much more interesting from the outside if it has a beautiful inscription, which is also made with all the love. And it is not necessary that your handwriting be excellent, plus you do not need to have the skills of a professional artist. The most important thing here is the technique with which the words will be applied.
To begin with, you should practice a little so that while writing the inscription your hand does not accidentally tremble. If you have never written chocolate, but would like to learn this activity, you need to study the following recommendations given by experienced confectioners. In order to make the inscription, you will need to melt the chocolate. You can learn more about melting chocolate here.
- The most ideal method of applying chocolate inscriptions is to use special felt-tip pens that are designed for decorating cakes. The tube that contains the chocolate mixture has a small hole. Liquid chocolate is squeezed out through this hole, resulting in the inscription on the cake being neat and even.
- Before adding the chocolate lettering, lightly sketch the surface of the cake icing using a toothpick. This way the words will always look even and beautiful.
- Try not to write a large number of words on the congratulatory cake. Remember - congratulatory words should be concise and clear.
- If you make a mistake while applying chocolate, do not remove the letter. Apply the inscription completely, put the cake in the refrigerator. Only after the decoration has hardened, remove the damaged element, and instead write a new letter that is missing.
- The most ideal surface on which chocolate elements are applied is mastic or glaze that has a contrasting color.
- Do not use hot chocolate for application. Because of it, glaze and other similar surfaces will simply melt and flow.
- Do not use the preposition “from” in inscriptions. It is considered a sign of mourning language.
- Do not allow repeating words to be present in the inscription. For example, “To the best teacher on his teacher’s day.”
- Space each word evenly so that they are only on one line. Do not separate words, do not move letters to another line.


You should also follow these rules when decorating the cake:
- Cool the cake before you begin lettering.
- Practice on glass first. After that, if your words turn out beautiful, you can put them on the cake
- Replace chocolate for training with a mixture made from cocoa powder and butter. Combine them in equal proportions
How to make patterns from white and dark chocolate and decorate a cake: ideas, decoration examples, photos
To easily squeeze out a specific chocolate pattern, use chocolate or chocolate-hazelnut fondant for the job, as it has the perfect consistency. Take a cornet that has a small star-shaped attachment. Place chocolate fudge in it. Make a border for your cake in the shape of a star, shell, or curls.
It is difficult to squeeze liquid chocolate out of a metal nozzle, since the cold of the metal causes the chocolate to harden faster than necessary. You can add a little glycerin to the chocolate fudge. It will thicken the chocolate without waiting for the fudge to harden; squeeze it out very quickly.
In order to squeeze out threads and strips from chocolate, use a cornet that does not have an attachment. Remove the tip so that you have a hole of the required diameter. Pipe the fondant in thin, wavy, straight, angular or zigzag lines.


You can also make decorations from white chocolate by coloring it with dyes. Use only those dyes based on vegetable oil or dye powder. Liquid paints, when they get into chocolate, make it very viscous and deprive it of its beneficial qualities.
- Melt the chocolate (25 g). Apply the pattern you want to decorate the cake with on the paper. Cover with a piece of wax paper and secure each corner using masking tape.
- Pour chocolate into the cornet, wrap the edges of the cornet inward, then remove the tip
- Carefully squeeze out a thin thread of chocolate along the outline of the pattern. Once the figure has hardened, remove it using a spatula knife.
- Make a few more of these drawings.
- Decorate your cake or cookies with them
How to make a mesh, chocolate openwork and decorate a cake: ideas, photos
Openwork chocolate designs allow you to make your birthday cake more colorful and beautiful. You can make them too if you stock up in advance:
- Chocolate
- Paper or cellophane culinary bags (you can take a syringe with a thin nozzle)
- Stencils
- Light-colored baking paper or cling film
For the openwork, preferably use confectionery chocolate. However, you can substitute regular store-bought chocolate. Just buy one that has no additives or fillers. The best chocolate for decoration is dark, even bitter. It is harder than milk, therefore, it tends to hold its shape better.


The process of preparing openwork:
- Take some chocolate.
- Melt it down.
- Close the stencil that you prepared for decoration. To do this you need to take cling film or paper.
- Place the chocolate that you melt in an envelope and trace the design on the stencil with it.
- Place the openwork decoration in the refrigerator until it completely hardens.
- After hardening, carefully remove the decoration and use it to decorate the pie.
How to make curls, feathers from chocolate and decorate a cake: ideas, photos
The next option for decorating cakes is a variety of curls, feathers, and spirals.
Chocolate curls:
- Take chocolate (125 g). Melt it down. Place the chocolate on something hard, such as a wooden board. Smooth using a spatula until the surface is perfectly smooth.
- When your chocolate has hardened a little, but not completely, use a knife to scrape out the thin curls from the layer. Try to hold the knife so that there is an angle of 45 degrees between it and the chocolate layer.
- To get large curls or straws, run the knife across the entire layer.
- If you want to get small curls, then use the knife you use to peel potatoes to work with.


Chocolate spirals:
For work you will need to take: a chocolate bar and cooking film.
Manufacturing process:
- Melt the chocolate bar. Cut the film along its entire length. Pour the chocolate onto the film and set it aside to cool. Run a fork through the chocolate and divide it into several parts.
- Roll the film into a spiral and place it on the mat. Place in the refrigerator.
- Carefully remove the cling film. As a result, you will get thin spirals with which you can steal any dessert.


You can make feathers in the same way. Only apply the appropriate design to the film.
How to make chocolate leaves and decorate a cake: ideas, photos
This method is considered very simple to implement. You can get a little creative by using leaves of various shapes for the base.
To make it, stock up on:
- Chocolate
- Brush
- Real green leaves


Manufacturing process:
- Wash the leaves thoroughly and dry well. Melt the chocolate
- Take a sheet, turn it over, apply chocolate on the back side. Then spread with a brush. Place in the refrigerator to let the chocolate harden.
- Carefully remove the base leaf from the chocolate. Make as many leaves as you need to decorate the cake.
Chocolate roses:
To make chocolate roses, stock up on:
- Chocolate mastic – 200 g
You can take any: white, dark, milk chocolate.


Cooking process:
- Knead the mastic in your palms. It should be soft. Cover the white chocolate mastic with powdered sugar, the dark one with cocoa powder. Roll out the chocolate mastic using a rolling pin until the layer is thin.
- Cut out circles from it. For a rose, 9 pieces will be enough for you.
- Make a cylinder from the first circle. Twist the remaining circles so that you form a bud.
- The edges of 2 petals should be under 1, the edges of 3 under 2, and so on.
- Attach all the petals in this way, turning the edges of each outward. When you have a rose, trim it.
- Leave the flower to harden completely.
Make several roses using this method.
How to make chocolate figures and decorate a cake: ideas, photos?
Figures with contours:
Unlike the figures, which are made in the form of openwork, these decorative decorations have a chocolate background, plus they have an outline along the contour.
To make it, stock up on:
- Chocolate (white, dark, milk)
- Parchment paper
- Paper for drawing the figure
Also for work you will need a paper cornet or a regular pastry bag.

Manufacturing process:
- Place the parchment on the sheet on which the figurine is depicted.
- Melt dark chocolate or milk chocolate. Squeeze it onto parchment paper along the contours of the figure, wait until the chocolate hardens.
- Melt the white chocolate. Fill the empty spaces of the figure with it. Give it time to set completely. Turn it over.
Regular cutouts:
Anyone can make such figures, even those who have no experience. Therefore, you can involve your child in the work; he will definitely like to help you.
For this figurine, stock up on:
- Chocolate
- Parchment paper


Manufacturing process:
- Melt the chocolate
- Using a knife or spatula, spread the chocolate evenly (approximately 2mm thick) onto the surface of the parchment paper.
- As soon as you notice that the chocolate has begun to harden, use a mold to cut out the desired shape.
If the chocolate sticks to the mold while cutting, it means it has not cooled completely. If the chocolate breaks, it means it has hardened too much, so reheat it again.
How to make chocolate chips and decorate a cake with chocolate chips: photo
Decorating birthday cakes and pies with chocolate chips is one of the tried and true methods. After all, you can simultaneously combine shavings of different shades, shapes, and sizes. Plus, there are several methods for making chocolate chips.
Method 1:
Take an ordinary chocolate bar that does not contain any filler. Place it in a warm place for a short period of time. When the chocolate bar has softened a little, cut a thin layer at an angle using a sharp large knife so that it takes the shape of a tube. Before decorating the cake, place the chocolate decoration in the refrigerator. It will harden and keep its shape wonderfully.

Method 2:
This method is considered more complex. First, turn the chocolate into glaze, spread it in a thin layer on cling film, cool, and then cut off the thin layers using a sharp knife. Once the decorations have set, you will end up with large shavings.
Method 3:
Take a chocolate bar and grate it. Choose the size of the grater itself at your discretion.


Method 4:
Melt a bar of white chocolate and add coloring to it. Choose the color yourself. Use, for example, method 3. Make shavings of different colors, decorate the cake with it, laying out some kind of design. You can completely cover the cake with one color of chips or mix different shades.
Decorating a cake with openwork flowers: ideas, photos
Have you prepared your own cake for your sister’s or beloved mother’s birthday? Decorate it with beautiful decor. For example, openwork flowers. You won't need dye or mastic. Because you can make wonderful decorations from chocolate. Therefore, be inspired, fantasize, but remember to be attentive and careful.
So, take for the cake:
- Pastry bag or syringe
- White chocolate bar (melt it in advance)
- Cling film or some parchment paper
- Simple pencil
- Wooden stick with a thin tip


Manufacturing process:
- Draw a sketch of future flowers on paper. Turn over the paper
- Fill a syringe or bag with chocolate. Trace the outline with chocolate. To make your flowers delicate, draw thin lines to the central part using a thin stick
The first flower is ready. Make several of these decorations and cool them. When the flowers are completely frozen, separate them from the paper. Decorate the cake.
Decorating a cake with chocolate balls: ideas, photos
Chocolate decoration is the perfect addition to every dessert. To get this decor right the first time, the chocolate needs to be sweet, thick and decadent. Listen to our useful and simple tips, then you can turn your cake into an unforgettable work of art.
1 method
To make these chocolate balls, take:
- Chocolate bar
- Iron tube
- Pastry bag


Manufacturing process:
- Place the iron tube in the freezer for a while.
- Melt the chocolate and pour into a pastry bag.
- Take out the tube and cover it with chocolate using a bag.
- The chocolate will cool instantly on the cold iron tube, then carefully remove it.
- Immediately roll the chocolate into a ball.
You can make these balls in several colors and sizes. Place the resulting balls on top of the cake and add other decorations.
Method 2
For the second method you will have to take:
- Round ice cube trays
- Chocolate tablets (white, black)

Manufacturing process:
- Melt dark chocolate tablets. Apply the paste to the inside of the molds. Make it a little casual.
- Apply white chocolate on top of the dark chocolate.
- Place the molds in the freezer.
- When the chocolate has completely hardened, remove the molds.
- Place in warm water for a couple of seconds. After this you can easily remove the hemispheres.
- Connect two hemispheres together to make a ball.


You can place any filling in the middle of such a ball. For example, pieces of fruit or berries.
How to make chocolate drops on a cake and decorate a cake: ideas, photos
A very good option for decorating cakes is chocolate drops. You can use them to decorate cakes, homemade pie, and cookies. But those drops that are sold in the store are not always of high quality. Therefore, make these drops yourself. You will definitely not doubt their quality and taste.
To prepare, stock up on the following products:
- Cocoa powder – 1 tbsp
- Coconut oil – 1\2 tbsp
- Honey – 4 tbsp.
- Vanilla extract – 1 tsp.


Cooking process:
- To work, take a pastry bag.
- Melt the coconut oil. When it begins to gradually melt, remove from the stove, pour into a separate bowl, and cool. You should have clear oil.
- Add cocoa and other ingredients to it.
- Stir the paste until it is smooth. Chill in the refrigerator for half an hour.
- When cool, fill a piping bag with paste.
- Squeeze out drops of different sizes, placing them close to each other to save space on the surface.
- Place the surface with the drops in the freezer for about 25 minutes.
How to make a fence for a chocolate cake: chocolate patterns, photos
Chocolate openwork is the best decoration that can be used to decorate the sides of the cake and make a fence out of it. Such decorations are made from any chocolate, there is not much difference.
The thinner the layer of chocolate, the more fragile the figures will be.
Option 1
For this fence take:
- Aluminum foil
- Cooking pouch
- Spatula
- Chocolate (any)


Cooking process:
- Melt the chocolate bar. Place it in a piping bag
- Draw an openwork fence on the foil using chocolate paste.
- Place the foil with chocolate in the refrigerator for about 60 minutes
- Use a spatula to separate the chocolate and decorate the sides of the cake.
Option 2
- Cut a ribbon of parchment paper long enough to fit around the circumference of the cake.
- Draw a design onto the paper using white chocolate. For example, peas, flowers, butterflies, rings and so on
- Place in the refrigerator for a while to let the chocolate harden a little.
- Using a spoon, pour the black melted chocolate over the design, carefully using a knife or spatula, spread the chocolate over the entire ribbon. Try not to touch the drawing
- Wrap the cake with ribbon and refrigerate
- After some time, remove the paper. You will get an unusual and interesting fence


As you can see, the variety of chocolate cake decorations is varied. Don't stop at one option, experiment. It’s so nice to please your loved ones with masterpieces made with your own hands.
Video: How to assemble and decorate a birthday cake?
Hello, dear readers of a culinary blog with step-by-step photos! ! This time we will look at how to beautifully decorate a cake at home. For novice confectioners, this information will be very useful.
Many of them are wondering how to put together a beautiful cake in order to surprise others with their skill. A video recipe and a detailed description of all steps will help you with this. Let's get to the main point.
Components:
1. Classic sponge cake (diameter 16 cm) - 2 pieces
2. Cream cheese cream - 500 grams
3. Syrup - for impregnation
4. Dark chocolate - 100 grams
5. Heavy cream - 50 grams
6. Fruits - for decoration
Inventory:
1. Long saw blade
2. Cake stand
3. Pastry bag
4. Tall glass
5. Pastry spatula
Cooking method:
1. We take the biscuits out of the refrigerator and find some kind of book or lid that is equal in thickness to our future cakes. Never cut a biscuit while it is still warm, let it cool!

2. Now we place a knife flat on the lid and begin to make notches on the biscuit, rotating it in a circle. And then again, using the same rotational movements, we cut the biscuit to the end. Cut off the top.

3. We should have smooth shortcakes, there will be 4 of them.
Let's prepare the cream:

4. Now let's prepare the cream. To ensure even cream layers, you need to use a pastry bag with a round nozzle. Take a tall glass, put a bag on it and put the cream there. We use cream cheese cream, it holds its shape well.
Here is his recipe. Take 300 gr. chilled cream cheese, 100 gr. softened butter and 100 gr. powdered sugar. Whisk all ingredients thoroughly for 5 minutes. The cream is ready.

5. At the next stage, we begin assembling the cake. Take a dish or pastry mat and place a little cream on it, and place the first cake layer on top. Now we need to soak the shortbread with syrup.
To prepare the syrup:
take 100 gr. water and 100g. sugar, mix and bring to a boil. Then cool the mixture and saturate the biscuit with it.

6. Then pipe the cream onto the cake using a pastry bag, the layer will be even. But if there is no bag, then simply spoon the cream out with a spoon and carefully level it out.
You can put the filling on top of the cream if you wish. It can be with chocolate, strawberries or other fruits.

7. We perform the same manipulations with the rest of the cakes: impregnation, cream, filling as desired. Watch carefully so that the shortcakes do not lie crookedly. We need an even cake! Always place the bottom layer upside down on top to ensure the top of the cake is perfect.
Now let's spread the cream on the empty space between the cakes. It’s convenient to use a rotating stand for this, but if you don’t have one, just turn the plate over, place the cake on it and rotate it by hand.

8. Using a pastry spatula, we need to level the surface and remove excess cream.
After this, we put the dessert in the refrigerator for 30 minutes so that all the layers set and the cake does not wobble.

9. Next, we plant strips of cream vertically at a distance of 3-4 cm from each other. Rotate the cake counterclockwise and smooth the sides with cream using a spatula. If there is not enough cream, add more.
We coat the top in the same way. Remember to clean the spatula on the edge of the plate. We need to achieve as smooth a surface as possible, and this may take some time.
We have a “naked” cake, you can leave it like that, decorating it with berries. But we will consider several other options. To do this, the cake must be cooled.
Decor options:

10. Option “scales”. Hold the piping bag perpendicular to the sides of the cake and pipe the cream circles vertically. Then we need to smear one edge of the circle with a teaspoon. We do this with each “bump,” and don’t forget to wipe the spoon after each one. Then we plant the next row and so on until we have a completely “scaly” cake.

11. Ombre option. To do this, we need to color one part of the cream with food coloring in a different color, for example, pink. Then we apply it to the cake to the desired height.

12. Then take a spatula, rotate the cake and level its surface. When holes form, add cream and continue leveling. This can take a long time if you want the perfect result.

13. The cake can be left even, but if the “ideal” did not work out the first time, then do a little trick. Take a teaspoon and apply horizontal, vertical or diagonal lines to the surface of the cream. This will hide irregularities and blemishes.

14. Let's prepare chocolate ganache to get beautiful brown smudges. To do this, take 100 grams. chocolate and 50 gr. cream. Heat the ingredients in a water bath and stir.
Video recipe for making ganache:
This video recipe was filmed specifically for those who need to see the entire cooking process.

15. Apply to the cooled cake with a teaspoon. The thickness of the ganache can be controlled by heating. On a cooled surface, the chocolate cools quickly, forming beautiful smudges.
As for decorating the top of the cake, everything is limited only by your imagination. Nuts, berries, fruits, gingerbread, chocolate chips, etc. Our cake is assembled, we put it in the refrigerator, then we take it out and try it. I recommend viewing the set, I'm sure you'll like it. Bon appetit!
To prepare a delicious dessert, you can use not only cream cheese cream. Take your favorite, or my favorite. But for decoration, the cream must be thick and hold its shape well, without spreading! Whipped cream, buttercream, etc. will work.
If you don’t have a pastry bag, then just take a food-grade plastic bag and carefully cut a corner of it. The hole should not be too large.
For impregnation, instead of syrup, you can use fruit or berry juice, coffee, cocoa, or liqueur. There are plenty of options, it all depends on your taste.

To decorate the top, you can use whatever your heart desires! The decoration can be with mastic, this is a more complex version. An easier option is fruits, berries, ready-made figures, chocolate. Don't be afraid to experiment and invent your own “masterpieces”!
Dear readers, please comment on the recipe and add to it! Subscribe to blog news and tell your friends about it! See you again!
Biscuit is one of the simplest dough recipes: to enjoy delicious and tender pastries, all you need are eggs, flour, sugar and butter. However, from such a simple set of products you can get a masterpiece of culinary art.

The secret is in decorating the sponge cake with cream, cream, fruit and other methods. This is a great opportunity to show your imagination. At home, it is easy to create a cake that is not inferior in taste and beauty to desserts from the restaurant menu.
Cream decoration
Biscuit is a rewarding dough; it goes well with many additives. Decorating with cream is one of the top popular ways to decorate a cake. If the household has a pastry syringe, then the process turns into an exciting activity.
Decor classic - butter cream
The simplest cream recipe is based on butter and condensed milk, taken in equal proportions.

Ingredients:
- 350 g (1 can) condensed milk;
- 300 g butter (tastier with 82.5% fat content);
- cognac - optional.
Steps for making delicious buttercream:
- Soften the butter first. To do this, either leave the pack for several hours at room temperature or heat it in a water bath.
- In a mixer bowl, combine soft butter and condensed milk.
- Beat everything at maximum speed.
- Add a little cognac for taste if the dessert is intended for adults.
- Squeeze the cream through the curly nozzles pointwise or in one stripe. If desired, add butter decor with confectionery beads, multi-colored sprinkles, and coconut flakes.

Cream cheese cream: decoration and layer
To fill the layers of the sponge cake, you will need a dense mass. Cream cheese cream is perfect for this. It holds its shape well and has a delicious taste.

Ingredients:
- cream cheese - 300 g;
- butter - 100 g;
- powdered sugar - 100 g.
How to make cream:
- Cool the cheese and soften the butter.
- Combine all ingredients in a deep bowl. Stir with a mixer for 5 minutes, starting at low speed and gradually increasing the speed.
- To apply the cream to the top of the cake, use a syringe with a round nozzle.

Essential custard
Delicate, airy and aromatic - custard has remained a favorite for many adults and children for many years. The mass is perfect for decorating cakes and pastries.

You will need:
- 2 eggs;
- 250 ml milk;
- 350 g condensed milk;
- 4 tbsp. l. flour;
- 200 g butter;
- vanilla to taste.
Advice
The richest taste comes from vanilla extract. One drop is enough for the cream to acquire a pronounced aroma of sweet spice.

Cooking steps:
- Beat the eggs with a whisk until foam forms.
- Pour in condensed milk and mix everything.
- Add warm milk and vanilla, mix again.
- Add 4 tbsp. l. flour.
- Place the pan over medium heat and cook the mixture while stirring constantly.
- When the cream thickens, remove from heat and cool at room temperature. In this case, be sure to cover the dishes with film so that the mass does not air out.
- Beat the butter and mix it with the cooled cream.
Curd cream is a biscuit's best friend
The best option for combining with fruits and berries.
Ingredients:
- cottage cheese - 300 g;
- powdered sugar - 400 g;
- 70 g butter;
- vanillin.

Recipe for delicious cottage cheese cream:
- Soften the butter and combine with cottage cheese.
- Using a blender or mixer, puree the ingredients.
- Add powdered sugar in small portions, constantly stirring the cream with a spoon.
- After all the powder has been added, puree the mixture again.
A cake made from sponge cakes can be completely soaked in cream. Between the layers, the air mass will not only look beautiful, it will make the dessert more voluminous and more tender. For beauty, food coloring is added to the cream intended for layering the cake. But if berries or fruits are placed on the cream, it is better to leave it white or slightly tint it to match the decoration.

Whipped Cream: A Versatile Topping for Any Dessert
To make the perfect whipped cream, you need to know a few secrets. How to achieve curvy peaks?

To prepare you will need:
- heavy cream (at least 33%).
- Cool the cream well. Cold is the main secret of hard peaks.
- Pour the cold cream into a deep bowl. The dishes should also be cold; it is better to keep the mixer in the freezer for a little while. Cleanliness of equipment is a prerequisite for obtaining a thick mass.
- Fat accumulates on the walls of the cream box. You need to remove it with a spoon and add it to the bowl.
- Beat the cream with a mixer at medium speed. In about 10 minutes they will turn into a stable thick mass. It is not recommended to whip for longer as the cream will turn into butter.

Chocolate to the rescue
In skillful hands, a chocolate bar becomes an elegant decoration not only for sponge cakes, but also for other baked goods. The most popular options: melt the chocolate and pour it over the dessert, turn it into shavings or break it into small pieces.

Drawings
Using melted chocolate, you make beautiful drips on the side of the sponge cake.

Ingredients:
- dark chocolate - 100 g (one bar);
- milk - a glass.

Step-by-step instruction:
- Place a broken chocolate bar in a dry frying pan and melt over low heat.
- When the chocolate melts, pour in the milk.
- The mass must be stirred with a wooden spatula until all the chocolate has melted, otherwise the mass will burn.
- Pour the liquid chocolate into a pastry bag and cool slightly to thicken the mixture.
- Smoothly circle the edges of the cake, periodically pressing the piping bag so that the chocolate is distributed unevenly. Where there is more of it, it will flow down beautifully.
- Liquid chocolate is used for drawing. The simplest thing is to draw a grid of thin stripes.
Grated chocolate
Chocolate chips or crumbs are a simple and economical way to decorate biscuits and other sweets - pancakes, cheesecakes, pancakes. One mini tile makes a lot of sprinkles.

Ingredients:
- dark chocolate bar;
- white chocolate bar.
How to make a velvety chocolate decoration:
- Place the bars in the refrigerator to harden - this way the chocolate will not break and melt in your hands while working.
- Grind the dark chocolate on a coarse grater.
- On the shallow one - white tiles.
- For better adhesion of the topping to the biscuit, it must be covered with a bonding layer. Regular sugar syrup, which will at the same time soak the cakes, or a thin layer of cream will do. It will be even tastier if you first cover the sponge cake with melted chocolate and then with shavings.
- Sprinkle the center of the cake with fine white chocolate dust. If the dessert is being prepared for a themed holiday, then in the central part of the chocolate, form a design, for example, a heart for Valentine’s Day, or a number in honor of a birthday. To get an even outline, use paper stencils
- Sprinkle large swirls of dark chocolate around the edges of the cake.
- The side of the sponge cake is also covered with impregnation and chocolate chips.

Advice
Chocolate lovers will love the ensemble of chocolate chips and cream, tinted with cocoa powder.
Jelly as decoration
A translucent cold gelatin mass with pieces of fruit will make the dessert very beautiful and appetizing.

Ingredients:
- 50 + 75 ml water;
- 5 g gelatin;
- lemon juice;
- 2 tbsp. l. granulated sugar;
- vanilla to taste.

How to make jelly:
- Dissolve gelatin in water (50 ml).
- Add a pinch of vanillin for flavor.
- Add sugar and mix the mixture well.
- Strain.
- Squeeze the juice from the lemon and pour into the mixture.
- Add the remaining water.
- Stir again.
- Place a jelly mold on the top cake layer or place the entire sponge cake in a wider mold.
- Pour the jelly mixture into the mold.
- For beauty, add pieces of fruit or berries.
- Place the biscuit in the refrigerator for a couple of hours until the jelly hardens.
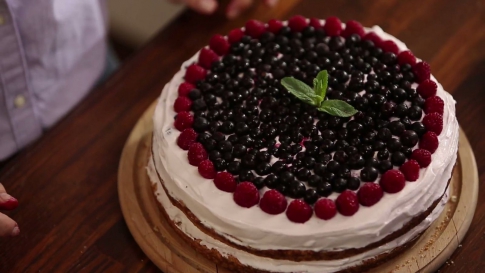
Fruit ideas
Fruit decoration is prepared quickly and is always received with a bang. It is recommended to add fresh fruits to children's desserts, as they are rich in vitamins. For a beautiful design, just place the pieces on the cream. If you have time, you can create an intricate “flower” arrangement from ordinary apples.

You will need:
- red apples - 2-3 pcs.;
- 100 ml water;
- 100 ml sugar.

Steps for preparing apple decoration:
- First prepare the syrup. To do this, add sugar to the water and bring to a boil. The sugar should completely dissolve.
- Wash the apples and cut them into thin slices: divide the fruit in half, then in half again, then separate the slices from each quarter with a knife.
- Dip the first apple plastic into syrup and roll it into a tube.
- Dip the second piece of plastic in syrup and wrap it over the first one.
- To get a beautiful “rose”, you need to roll together about 5 apple plastics in syrup.
- The resulting flowers are placed in the center of the sponge cake on any cream. Twigs are depicted from mint leaves.

Condensed milk: favorite classic
Cheap and cheerful: a can of condensed milk turns a simple sponge cake into a desirable dessert that makes your mouth water when you look at it.

Ingredients:
- 1 can of condensed milk;
- 1 can of boiled condensed milk;
- nuts to taste.

Step-by-step decoration recipe:
- Mix the contents of two jars.
- Chop the nuts with a knife and fry in a dry frying pan for flavor. All nuts for decoration must be cleaned of hard lintels and burnt parts. If “dust” is needed, then the nuts are crushed in a blender.
- Coat the biscuit with condensed milk. If the cake is multi-layered, then each layer is coated.
- Sprinkle nuts on top of the condensed milk.
- As an option: nuts are combined with chocolate chips, sour cranberries, and fine cookie crumbs.
How to decorate a sponge cake without much hassle so that it turns out delicious, beautiful and professional? The best tips for quick decoration that will save energy and the family budget:
- Store-bought sweets can be useful in decorating a sponge cake. If you place multi-colored M&Ms, small chocolate candies, pieces of marshmallows, marmalade and cookie crumbs on the cream, you will get an original and interesting dessert.
- If there is a lot of cream between the cake layers, then the top of the cake is decorated to a minimum. Conversely, a dry single-layer sponge cake needs voluminous decoration.
- If fruits and berries are used in decoration, they are additionally placed between the cake layers.
- Fresh mint leaves go well with chocolate.
- If you don't have a pastry bag for the cream, take a thick sheet of paper and roll it into a tight ball. A shaped hole is formed from the tip of the bag using scissors.
- The simplest recipe for soaking sponge cakes: mix 100 g of water and 100 g of sugar and bring to a boil, cool. Without impregnation, the biscuit will not be soft enough.
- Other soaking options: sweet coffee, tea, berry syrup.
- If you are too lazy to prepare the cream, Nutella, chocolate or peanut butter comes to the rescue.
- A natural sweet from Canada, maple syrup is also used in desserts.
- If the cream turns out to be too sweet, then sour berries are added to it: cranberries, currants, blueberries. The sourness will balance the taste of the dessert.
- If the drawing or inscription is made from bulk products - powdered sugar, nuts, chocolate chips, confectionery sprinkles, etc. - for a clear edge, use cookie cutters. You can make a stencil out of paper.
- When cutting the cakes, the edges of the sponge cake remain. They are also suitable for decoration. You need to grind the dough, dry it in the oven until it becomes breadcrumbs, grind it and sprinkle on the finished cake.
- When warm, the thin sponge cake easily rolls into a roll. Closer to the edge you need to place the filling (cream, berries, jam, condensed milk, etc.). Start rolling the sheet from this edge. The filling should be in the center. If you cover the entire sponge cake with cream, stepping back a little from the edge, the filling will be distributed evenly.

As you can see, it’s easy to make a confectionery masterpiece at home. All that is required from the hostess is a flight of fancy and a good mood. Sometimes the most unusual decoration ideas, thought up impromptu, become loved by the whole family.
