Autumn gives us a lot of materials for creativity. These include leaves of various colors, chestnuts, dried flowers, acorns, and a decorative miniature pumpkin.
But, before you start making souvenirs from them, you need to properly prepare them, namely dry them and, if necessary, coat them with varnish or paint.
If you make a craft from unprepared raw materials, it will be a short-lived product.
As soon as the material dries on its own, the souvenir will lose its shape and will have to be thrown away. And besides this, half-raw leaves can simply rot or become moldy.
So let's start by drying out our autumn finds.
Let's prepare the leaves for the herbarium as follows:
1 way:
Place them between the book sheets and place them back on the shelf, pressing them tightly with other books to the side. In about a week to a week and a half, the leaves will be suitable for crafts.
This method is the best because natural color leaves do not change and then they for a long time don't break.
Method 2:
This method is good if you don’t have the strength to withstand a week and a half and want to get to work quickly. Place the sheet between two white sheets of paper and iron with an iron set to the lowest setting.

In this case, the yellow and red leaves retain their color, but the green ones may darken and become an ugly, brown shade.
We dry chestnuts, acorns and decorative pumpkins.
1 way:
Dry outdoors in the shade. It will be necessary to wait quite a long time before these materials acquire the dryness we need.
Sometimes this process takes a month. Especially it concerns decorative pumpkins, which make wonderful DIY autumn crafts.
You will see for yourself when the moment of readiness for the gifts of autumn comes. Acorns and chestnuts will become lighter, and the pumpkin will become like a rattle, as the cavity inside will dry out and shrink, and dry seeds will beat against the walls.
Method 2:
We use the oven for this. It needs to be set at a temperature of up to 60C and dried until tender, stirring occasionally.

The main thing is not to rush and do not put on high heat, as the fruits will simply cook and become completely unusable.
Drying dried flowers
There is only one way and it takes a long time. Flowers need to be strung on a thread threaded through the stems and hung in a dry place, with the flower stems facing down.
Drying in a book or with an iron will not work, as the shape will be lost and they will become flat. After the dried flowers are completely dry, they need to be covered with a layer of hairspray. It will give them the desired density and will not allow them to crumble at the slightest touch.
Well, now, let's move on to specific master classes and examples.
1. Panel of autumn leaves
We are offering to you great idea DIY leaf panel. It’s not at all difficult to make, but the result is quite impressive.
It would be nice if you placed other autumn decorative elements next to the finished leaf painting. For example, pumpkins, spikelets and other things that suit the style. Then you will have a whole autumn ensemble.

What we need for work:
- 1. Dried maple leaves of yellow-red color.
- 2. Tree branch for the trunk
- 3. A square piece of plywood
- 4. Stain or dark varnish
- 5. Simple pencil
- 6. PVA glue
- 7. A bunch of dry spikelets
- 8. Wicker basket for pumpkins
- 9. Several Jack Be Little or Baby Boo pumpkins
If you don’t have such pumpkins, you can fill the basket with chestnuts and acorns. But on next year It wouldn’t hurt to grow them, as they look very colorful and festive. Of course, if you have a plot of land.
Look at the variety of varieties and how harmoniously they combine with each other:

Master class step by step:
1 step. Sand the board, paying special attention to the edges. They should be smooth.
Step 2. Cover it with stain or varnish, preferably with a brownish tint. Apply the coating in several layers, trying to make the board not a uniform color, but a slightly “spotty” one.
Step 3. Freehand draw a large maple leaf.
Step 4 Start gluing on the maple leaves. Start from the edges, gradually approaching the middle. The edges of the leaves should match the edges of the sketch as best as possible. The next row of leaves should overlap the previous one. Do not glue the ends, they must be “overhanging” to create a volume effect.
Step 5 Glue the selected twig in place of the stem.
Now hang it up autumn panel, created with your own hands, over a cabinet and place other decorative elements around it.
2. Topiary from herbarium and other autumn materials

Topiary is a decorative tree. In autumn, you can collect beautiful leaves and make such a wonderful and cozy decorative element.
Any leaves, dried flowers, acorns, spikelets will be used here. The main thing is to understand the essence and do it the right basis. And what to fill it with - your imagination will tell you.
What we need for work:
- 1. Ceramic pot of a dull color
- 2. A straight tree branch for the trunk
- 3. 1 ball made of foam rubber, polystyrene foam or special floral foam
- 4. Dry moss, sesame or a handful of beautiful pebbles, acorns, dry rowan
- 5. Glue gun
- 6. Dry plaster
- 7. Decorative elements: herbarium, dried flowers, rowan, acorns, etc.
Master class step by step:
1 step. Let's start with the basics. Take a foam ball and place it on a branch that will serve as your trunk. Then remove it and drop some glue from the gun into the hole formed. Reattach the ball and let it dry.

Step 2. Secure the trunk in the pot. To do this, drop a drop of glue onto the free edge of the branch and attach it to the base of the pot.
Then, dilute the plaster with water to the consistency of liquid sour cream and fill the container. Don't forget that you will still need to decorate everything on top with moss or acorns, so leave a gap of about 3-4 cm from the top.

Step 3. Now we insert leaves and dried flowers into the ball, sticking them with their stems inside. If you want to add acorns to the composition, then first place them on pieces of wire.
Step 4 Now all you have to do is decorate the top of the pot so that the plaster is not visible.
That's all. Using this simple scheme, you can make a wide variety of autumn crafts with your own hands, not only from leaves, but also from dry peas, nuts and so on. They will all look just great!
3. Roses from maple leaves

Looking at this elegant bouquet of roses, you wouldn’t even think that it was made from ordinary maple leaves!
But, nevertheless, it is so. You just need to learn how to fold them correctly and you will get a great basis for many ideas.
Such roses can be included in various autumn topiaries, wreaths, compositions and panels. They look great in combination with any natural materials.

Well, let's get down to business.
What we need for work:
- 1. Maple leaves are not dried
- 2. Thread or soft wire
- 3. Matte hairspray
Master class step by step:
1 step. We form the middle of the bud. To do this, fold the sheet as shown in the pictures below. Try to twist it as tightly and evenly as possible. First in half and then into sausage.

As a result, we should have something like this:

Step 2. Now take the second sheet, fold it in half again and wrap it around the base.

Sharp edges maple leaves you need to carefully hide it inside, like this:

Step 3. We continue to build up the mass around the base, adding more and more leaves. If you want to end up with a bud, then twist it more tightly, and ate more lush rose, then loosen the twist a little.

Step 4 When you see that a real rose has “bloomed” in your hands, you need to secure it with threads as tightly as possible.

Step 5 We trim the edges with scissors and place the rose on a lining of leaves, preferably already dry. We cover the composition with varnish and admire it!

These leaf roses last quite a long time, definitely enough for the entire autumn season. You can make as many of these flowers as you like. The more there are, the more chic this autumn composition, reminiscent of a fabric motif, looks.
4. Compositions of decorative pumpkins
Even if you do not grow this vegetable on your own plot, in the autumn you can freely buy them at the market and then dry them yourself. We have already told you how to do this above, so let’s not waste time talking.
Let's get creative!
There will be no master classes in this block, we will simply show you examples of such decor, and how to make them is already quite clear from the photo.
Of course there are more complex techniques, for example, carving or painting on dry lagenaria, but this is a broad topic and worthy of a separate article. Here we will consider only the simplest compositions that even a schoolchild can do.
Option 1. Basket with a scattering of pumpkins. It couldn’t be simpler, and the view is spectacular!

Option 2. Candlesticks made from mini pumpkins. To do this, you need to cut a hole with a knife of such a size that you can place a foil-based candle in it.

Or this option:

Incredibly simple, right?
Option 3. Pumpkin door wreath. Take any circle as a basis, for example, an embroidery hoop, and attach mini-pumpkins to it.
Pierce the tails with wire and screw it to the base, circle. Use berries, acorns, twigs and autumn leaves as additional decorative elements.
It will look something like this:

5. Chestnut topiary

To create this spectacular autumn craft with your own hands, we will need the same materials for the base as for creating a decorative tree from the herbarium. And for decoration you just need other elements.
For work we will need:
1. Ceramic pot
2. Styrofoam ball
3. Dry plaster
4. Glue gun
5. Tree branch for the trunk
6. Cones, chestnuts, acorns
7. Harsh thread or twine for forming decorative balls
Master class step by step:
- 1. We form the base of the tree in the same way as in the case of topiary from leaves.
- 2. Secure the base in the pot using glue and plaster
- 3. Apply drops of hot glue to chestnuts, acorns and other elements and attach them in a chaotic manner to the foam crown ball.
- 4. Wreath on the door made of chestnuts

Such a wreath of chestnuts on the front door will cheer up not only you, but also passers-by. It's very easy to make. Follow all the steps given to make a pumpkin wreath.
Find some kind of dense base, then pierce the chestnuts and other elements through reverse side, insert the wire, form a hook and use it to screw them to the circle.
Complete the chestnut composition with leaves, acorns, berries and other autumn decorative elements provided by this fertile time of year.
6. Autumn garland “Leaves” made from salt dough

This is a very impressive DIY autumn craft. The big advantage of such a garland is that it is not seasonal and will decorate your home for many years.
After all, it is not made from natural materials, but from salted dough, which does not spoil for years. The only thing is that such products are fragile and you need to handle them carefully so as not to break them. But, even if this happened, they can always be glued together, and the joint will not be noticeable.
What we need for work:
1. 2 cups flour
2. 1 glass of salt
3. 0.5 cups of water
4. Gouache
5. Sewing pins with hook eye
6. Twine
7. Oven
8. White landscape paper, pencil
Master class step by step:
1 step. Draw leaf patterns on a landscape sheet various types, but about the same size. Let's cut them out.
Step 2. Knead a stiff dough from flour, salt and water. If the dough turns out to be unplastic, you can add liquid drop by drop. Knead the resulting material thoroughly and roll it out on a board. The layer should be approximately 5 -7 millimeters.
Step 3. Place the templates on the rolled out dough and cut them along the contours with a knife.

As a result, we should have approximately this many blanks.

Step 4 We make holes with pins and carefully secure the heads. We will hang our leaves on them. Use a knife to squeeze out the veins.
Step 5 Dry the dough in the oven at 50-60C until completely dry.
Step 6 We paint the dough pieces with gouache, trying to create natural tones and transitions.

Step 7 We string the garland onto a twine, making a knot over each leaf so that they do not move.

So our DIY autumn craft is ready. You can hang it anywhere, it will be in place in any corner of the house, especially if you have some other decorative elements in the autumn style.
7. Vases and houses made from ordinary pumpkin
Autumn is the time for pumpkins to ripen. It costs mere pennies and can be found beautiful shape and coloring is not difficult.
And making an element of autumn decor based on it is as easy as shelling pears! There's no need for any step-by-step technologies and accessories.
The only thing you need: pumpkins, a knife for carving, a tablespoon to pick out the pulp and flowers with which you will fill these colorful vases.
Look at our selection of photos of pumpkin vases. It looks very decent and autumn-like.


As you already understood, you just need to cut off the top and clean out the core of the vegetable. Then fill the container with water.
Or you can make pumpkin houses. To do this, you just need to cut holes in the right places. You can see exactly where they are located in the picture below. Kids love these things!

8. Wreath on the door made of natural materials
We have already given above an example of wreaths made of pumpkins and chestnuts. You already know how to make them. Here we simply present a selection of the most effective, in our opinion, ideas.


9. Acorn frame for a photo or mirror
Decorating any base in this way is very simple. We think no explanation is needed here.
The only thing we can advise is that you should not glue acorns with a glue gun or PVA. It's much better if you use plasticine.
Because, most likely, you will soon get tired of this decor and will have to throw it away. And so, you can always dismantle the acorns and get a regular photo frame back for use.
This is what it will look like.

On the photo frame there are whole acorns, and on the mirror there are only caps. This way you can create a variety of autumn crafts with your own hands and decorate any surface: boxes, bread bins, etc.
10. A bunch of grapes made from acorns

This autumn craft will look the best way, if you paint the “berries” in natural colors, and instead of grape leaves add a herbarium of maple leaves of various colors.
Also, bunch of grapes made of acorns is a wonderful element of any autumn wreath on the door or large topiary. After all, it can be made not only tabletop, but also human-sized!
But instead of a foam ball, you need to take a large plastic one. Making grapes from acorns is very simple, we will now tell you exactly how.
What we need for work:
1. Acorns without caps
2. Shilo
3. Wire
3. Glue gun
4. Acrylic paint
5. Autumn leaves for decoration
Master class step by step:
1 step. We poke holes in the base of the acorn with an awl.
Step 2. We break or cut the wire into pieces 7-10 cm long.
Step 3. Dip the ends of the wire into a drop of glue from the gun and insert it into the punctured holes.

Step 4 We paint the acorns any color you want. The main thing is that it is combined with leaves that will complement the composition.
Step 5 We collect acorns in a cluster, forming a wire rod on top. Then we attach leaves to it.
Now you can make any decoration based on this autumn craft. Panel, wreath, etc.
11. Autumn crafts from felt
Working with this fabric is a pleasure! The material does not crumble and holds its shape perfectly. This means that any beginner can make an autumn craft from felt with their own hands and it will turn out no worse than the products of experienced craftswomen.
We offer you a selection of the best and simple decors in autumn style, and you can choose any of them! They are so simple that there is no need to describe their step-by-step technology in detail.

As you can see, based on felt leaves, you can make both a wreath and a garland, like the one we already made from salt dough. Here are a couple more options autumn wreaths with your own hands.

All you need is to draw the templates, cut out the felt and design it according to our photos.
12. Garlic and red pepper braid

How cozy it is when bundles of garlic, onions, and red peppers hang in the kitchen! But if you hang them in fresh, they will very soon lose their appearance or simply run out because they will be eaten.
Let's do something like this, but for centuries! Now we will look at how garlic and pepper are made, from which we will form a nice braid for the kitchen.
For work we will need:
1. Nylon tights white or a plastic bag (for the garlic base)
2. Cotton wool or padding polyester (for filling)
3. White coarse thread (for dressing and forming lobules)
4. Glue gun
5. Buckwheat or twine (to imitate garlic roots)
6. Fabric for sewing peppers or salted dough for sculpting them
Master class step by step:
1 step. We form the body of the garlic. To do this, we need to cut into squares either nylon tights or simple plastic bags. Garlic made from nylon looks, of course, more realistic.
But even from the packages it looks good. But the main thing is that this material is always at hand. So, cut out a square, approximately 7 by 7 cm in diameter.
Step 2. We roll a ball out of cotton wool or padding polyester, put it inside a piece of nylon and form a head of garlic. It looks like the one shown in the photo.

Step 3. Then we begin to tie a harsh thread around the head, forming cloves of garlic. First we divide it in half, then into quarters, then into 8 parts.
Look at the photo, the process is clearly shown there.

Step 4 In the place where the roots of real garlic are located, drop a drop of glue and sprinkle this place with crushed buckwheat. If you want, you can replace it with twine, which needs to be unraveled and finely chopped.
Step 5 We make a braid from twine and attach the resulting garlic cloves to it.
Step 6 Now it's time to deal with the pepper. You can sew it, but peppers made from salt dough look much better.
We have already given the recipe for the batch, in the subsection “Garlands of autumn leaves.” These are the peppercorns you should end up with.

Step 7 We make holes in the tails of the peppercorns (we will then thread twine through them and use it to secure them to the braid with garlic). You can do this with an awl or any available item.
The main thing is to make them large enough so that you can thread the thread freely later. Otherwise, after drying, you will not be able to attach it in any way. ready product to the composition.
And one more thing: if you make a hole, make sure that the edges of the leg remain more or less large. Otherwise, after you thread the thread, the thin walls may crack and the pepper will fall to the floor.
Step 8 We dry them in the oven, paint them with acrylic paint, and once dry, coat them with varnish. When the pepper shines, it looks more natural.
Dry at a low temperature, do not rush, otherwise your work may burst and you will have to sculpt everything again. You can't paint a cracked pepper the way you would like.
9. Attach the pepper to the garlic and hang this autumn composition in the kitchen. You can make several such bundles. You can make carrots from salt dough, and a bunch of onions from brown tights.
The principle of making bulbs is the same as garlic, only even simpler. There is no need to form slices.

Also, a bunch of mushrooms on the wall will look great, which you can also sculpt from dough and paint realistically.
Our big review has come to an end. You have seen many examples and any kind of autumn crafts with your own hands. We really hope that our master classes will be useful to you and that you will definitely take something into account.
Autumn is the time interesting ideas and inspiration that allows you to create a lot of original things from salt dough with your own hands. We have collected many the most interesting options, as well as recipes for preparing mass for creativity. This will allow you to organize exciting leisure time together with your child!

What you need for dough sculpting
To get started you will need to prepare sufficient quantity the material itself. To do this you need:
2 cups of flour.
1 glass of plain water.
1 glass of salt.
For better plasticity, you can add a few tablespoons sunflower oil. This master class will demonstrate the cooking sequence, where you will also learn about the features of storage and use.
In addition, you can add various dyes to prepare a multi-colored mass. Do you want to make autumn crafts from dough? different colors? You can find the recipe here:
Salt dough: advantages
If you are planning to make autumn crafts, you won’t find better material:
1. It is safe for humans, unlike plasticine and plastic.
2. For creation, improvised materials are used, the cost of which is quite low.
3. Easy to make! To create large quantity Modeling material takes only 10 minutes.
4. Does not stain your hands or work surface, and is easy to clean and wash.

Original ideas: crafts from salt dough on an autumn theme
Existing dough crafts on autumn theme incredibly diverse! You and your children can create individual figures, create a real decorative panel to decorate your home. For example, as in the version in the video, a basket with mushrooms will decorate every room! These autumn crafts made from salt dough, the step-by-step creation of which can be seen in the recording, are incredibly easy to make!
In addition, autumn dough crafts can be made in the form of figures of various animals. The plants also look great: maple and oak leaves as in the photo, you can use it to create an autumn garland, tabletop composition, or painting.
Also, traditional autumn crafts made from salt dough include hedgehogs! This small animal is very popular in children's creativity. So don’t forget about it when working with your child!

In general, when choosing an idea for joint creativity, focus primarily on the child’s wishes. Offer a choice of several of your ideas, or let the child come up with his own version to implement! There are other things you can do to please your kids even more!
From this article you will learn how to make salt dough yourself and how to dry it. Lots of photos and step-by-step instructions will help you make a dough craft for any holiday.
For modeling lessons with small children, it is better to use salt dough or Play Doh plasticine.
How to make dough for crafts: recipe
You can make the dough yourself; all you need is a few simple ingredients: flour, fine salt, citric acid, vegetable oil and water.
First mix 1 cup of flour with 0.5 cups of salt and 2 teaspoons citric acid. Pour into a saucepan, add 1 tablespoon of oil to the dry mixture. Place over medium heat, gradually add water and stir. No more than 0.5 cup of water should be used. When the mass pulls away from the walls of the pan and becomes one lump, remove the pan from the heat. Take out the mixture, place it on a board sprinkled with flour, and regular dough, knead with your hands.
If you want to do colored dough for modeling, first you need to dilute dry food coloring. It is also possible already in ready dough add a little gouache and knead it well until the color becomes uniform.
How to prepare salt dough for modeling?
Prepare salt dough. Color it in different colors, depends on what you want to sculpt. The dough can be made uncolored, divided into balls and add a little gouache of the desired color to each and knead. It's better to make the dough in regular colors, and then mix them to achieve the desired one.
Keep the dough in a bag, or wrap it in cling film, can be placed in a closed container to prevent it from drying out. If it is still dry, add a little water, and if it is too wet, add a little flour.


- Make the dough thinner and simply spread it on the base of the craft, so you can make butter on a piece of bread, or make it from brown dough chocolate glaze for the cake
- Try on the food you made with the toy plates that you will later play with so that they match in size
- To stick the salt dough pieces together, use a wet brush. Apply a brush to the joint and stick the parts to each other
- When making food for dolls, it is very important to make the dough as much as possible the same color as the original, for example, the carrots should be orange, not yellow or red
- To prevent the colors from fading, open the craft with varnish. For activities with children, you need to use special harmless varnishes; they do not have unpleasant odor because they are water based


Drying figures from salt dough for modeling
There are two ways to dry salt dough crafts.
- Air dry crafts. It is best if you place them on a smooth surface and leave them for several days. When the craft is dry, turn it over or lay it on its side so that it dries on all sides.
- Baking in the oven. Preheat the oven well, place baking paper on a baking sheet, place crafts on top, place in the oven and turn off the heat. The oven should be closed and not opened until completely dry. You can also bake crafts at a temperature of 100°C, but in this case you need to watch them so that they do not burn
These two methods can be combined, for example, dry it in the oven for an hour, then leave it in the air, after a while in the oven, and so on until it dries.
Of course, if the craft contains other decorations (beads, beads), you need to dry it using the first method.
New Year's crafts made from salt dough
The child will really enjoy decorating the house before the New Year and making handicrafts together with his parents.
Christmas tree toys made from dough
 You can make excellent ones from salt dough Christmas decorations, and even kids can handle making them.
- Prepare play dough in different colors or uncolored
- Roll out a flat cake and squeeze out a shape; you can use cookie cutters
- Make a hole with a cocktail straw so that you can hang the figurine on the Christmas tree.
- Decorate the toy as you and your child want: stick colorful balls on the Christmas tree, make a garland for it, let it rain, add a white snowball to the toy
- Unpainted dough can be dried first and then painted with paints or markers
- Dry the dough or bake in the oven
- Pass the ribbon through the hole and hang the toy on the tree
You can make a lot of holes in the figures.


Or stick beads, beads and other beautiful stones into the dough, but in this case these toys cannot be baked in the oven.


You can decorate toys with ribbons or decorative ropes.

After the dough has dried, apply PVA glue to it and sprinkle the figures with glitter.


Color the uncolored dried dough with a permanent marker.


Cut out a figure in the shape of a mitten, make it a beautiful colored ribbon from colored dough and decorate it with a homemade button. This figurine can be baked in the oven.


Print your baby's palm and draw Santa Claus in it - it will not only be a wonderful toy for christmas tree, but will also remain as a memory.


You can also make a Santa Claus toy like this. To give him a beard, use a garlic press. 
Make these other gingerbread toys from brown dough.


Making a New Year's candle from dough
To make a New Year's candle you will need modeling dough of different colors, a cardboard cylinder, for example, from a roll of paper napkins and red and yellow napkins.
- Let your child roll colorful sausages.
- Cover ours with them cardboard base


- Decorate it with colorful balls
- You can simply cover a cardboard cylinder with one color and then decorate it


- Make a fire out of napkins and attach it to the top of our candle

Christmas tree made from dough
- First make a blank for the Christmas tree, for this you will need cardboard packaging from juice or milk. First cut off its top, cut along the side folds, and open it. You need to cut off the excess from the rectangles so that you get isosceles triangles. See how to do this in the diagram below


- Glue a cardboard base for your Christmas tree

- Now let your child decorate it: let him cover it with green dough - you will get a Christmas tree. All that remains is to add balls, a garland, a star, and don’t forget about the gifts under the Christmas tree


You can also make a Christmas tree like this


Easter crafts made from salt dough
For Easter you can make the following crafts from salt dough:
- Decorated eggs made from flatbread dough

- Bunny figures cut from salted dough flatbread.
- Decorated three-dimensional Easter egg


- Egg cup

Easter eggs made from dough
Even a baby can cope with this task.
- Take the dough and mold it into an egg-shaped figure.
- Decorate it as you and your child want.

You can use mixed dough of different colors for the base, or you can make a base from unpainted dough and then paint it with paints or markers. Open the eggs with glue and sprinkle with cosmetic glitter. Glue the multi-colored balls; to do this, moisten the joint with a wet brush. Press beads, pasta, cereal, and other decorations into the eggs. Make prints with different objects.
In general, fantasize!


Dough egg cup
For this you will need a cardboard cylinder, dough and paints.
Cover a cut circle of cardboard with unpainted dough and mold it into a tail, head and other parts, as shown in the diagrams below.


Don't forget to cover the stand on all sides with dough.


Decorate the craft as your imagination dictates; you can use gouache or watercolors.

Open with water-based varnish to make the colors brighter and the craft to last longer.

Dough crafts for February 14th for Valentine's Day
What does everyone associate with this wonderful holiday? Of course the heart! Let's make a festive heart with your child and give it to your parents.
Salt dough heart


Here, as everywhere else, we first make the base, in our case the heart, and decorate it!

You can decorate it with roses, it will be very beautiful. How to sculpt roses, see step-by-step instructions with photos below.


You can make a keychain like this with paws.


These cute couples are made very quickly and easily.

You can make a lot of these heart figures, make holes in them and make a garland out of them, which you can use to decorate a wall in your house.


Dough photo frame
Make an empty heart, decorate it and use it as a frame for a family photo, securing it on the back with colored cardboard.


Salt dough decoration
This kind of love fish will definitely suit your mother’s outfit on this special day.

Crafts from dough for March 8
On March 8th you can make these flower keychains for mothers, grandmothers, aunts and sisters. They can be done with younger children. You can use multi-colored dough or uncolored dough, and then decorate it with paints.

You can make this flower candlestick for a gift.


Make such interesting medals with your children, and most importantly, they are all different. Let the child give them himself.

Make figures in the shape of a figure eight and decorate them with flowers, stones, beads, in general, whatever your imagination allows.


Make a pendant with your child, for example, in the shape of a heart and decorate it: make flowers, leaves, decorate with paints, sign a congratulation.


Salt dough roses
- Take play dough, need colors
- Making a cone


- Roll the ball, flatten it carefully into a round cake
- Stick the ball to the cone


- We make a second ball and glue it on the other side - we have a bud
- We make a few more balls and also sculpt petals from them. We chain them in a circle


- We bend the upper edges of the petals slightly back, and press the sides to the center


- We make several side by side, depending on how lush you want the flower to be.
The rose is ready!
 If necessary, make leaves from green dough, press the veins with a toothpick. Make legs from sausages. Combine all the details into one flower.
Crafts from dough for February 23


You will definitely like this medal.

Airplane - craft made from salt dough
A wonderful gift for dad or grandfather would be a salt dough airplane.
- Roll out the base for the figure - this will be the body
- Bend one side of it a little - this will be the tail. Attach the remaining parts to it

- Roll up the wheels and fenders for it


- Go over with a damp brush and attach the parts to the body

- Blind and attach wings in the form of triangles on toothpicks


- Make a propeller and also attach it to the body using a toothpick


- Let the figurine dry for several days

- Decorate the airplane with gouache


Crafts from dough for Maslenitsa
Maslenitsa is an ancient holiday that has many symbols and traditions. Crafts for this holiday are very diverse, you have plenty to choose from.
For the little ones, you can suggest making a sun, which symbolizes the onset of spring.
 This is some sunshine for older children.
 Invite your child to make their own pancakes from salt dough.

 Pancake keychains


Panels and pictures made from salt dough
With older children, you can make a picture from salt dough.
For example, it could be a fruit basket. Follow step by step instructions from the photo below.
- Roll out the uncolored dough to about 0.5 cm thick
- Prepare a basket template and, applying it to the dough, cut out the basket from it.
- Squeeze out the dough using a garlic press, twist it into flagella, stick it, moistening the joint first, onto the handle of your future basket. You can also add flagella to the rim


- Using a stack or knife, push through lines to imitate basket weaving


- Squeeze out the rolled out dough with a mold or cut out several leaves according to the template. Sell them veins
- Stick leaves on the basket


- Now prepare the fruits: apples, plums, grapes, etc. Roll them into balls of different sizes and give them the required form. For apples, stick cloves in the place where the dried inflorescence should have been, the apples will look like real ones
- Combine everything in one picture


- Leave your craft to dry for several days, preferably naturally
- Decorate as you wish
This is a simpler picture you can make with smaller children.
- Draw a background for it
- Draw the outlines of the character figures
- Ask your child to stick the dough without going beyond the outline.
- Leave the painting to dry
- When it's dry, invite your child to decorate the characters with paints.
- Add small details
- Open the picture with varnish, put it in a frame and you can hang it on the wall

Step-by-step dough crafts
Below are some step-by-step instructions with photos for modeling salt dough with children.
Salt dough beads
- We take colored dough, it can be one color, it can be different
- We roll balls out of it, preferably evenly and of the same size. You can make the size descending
- Pierce the balls carefully in the center with a toothpick
- We leave them to air dry for several days. Periodically turn them over to different sides.
- When the balls are dry, carefully remove the toothpicks
- We string the resulting beads onto a string or ribbon.
- You can paint the beads with paints or markers

Horseshoe made of salt dough
- Roll out the dough into a flat cake, 1 cm thick
- Attach the horseshoe template and cut out the figure with a knife
- Blind the leaves, cut off the excess, press the veins on them
- Make berries and a flower, use a toothpick to make holes in the berries and stripes on the flower
- Lubricate the horseshoe with water and stick all the parts
- Use a toothpick to make holes around the perimeter of the horseshoe. Make two through holes at the top to hang the figurine on a cord
- Leave the horseshoe until completely dry or bake in the oven
- The dough can initially be taken of a certain color for each part, or you can decorate it with paints at the end

Dough star
- Roll out the dough into a layer approximately 1cm thick
- Using a cookie cutter, cut out a star or other shape
- Gently lubricate the corners with a wet finger so that they are smooth
- Decorate the figurine: make eyes, mouth, nose, poke holes with a toothpick, add decorations
- Bake in the oven or air dry
- Open with varnish


Dough caterpillar
- Rolling a sausage from green dough
- Cut it into equal circles and roll them into balls
- We stick the balls together, do not forget to moisten the joint.
- Making a face for the caterpillar
- We pierce the figure with a toothpick or a pin in the place where we will attach it to the ring
- Drying our craft


Salt dough apple
- Roll out the ball of dough into the shape of half an apple. To ensure an even cut, press it onto a flat surface.
- Add a flat white center
- Roll apple seeds and a tail from brown dough. We make leaves from green
- We collect the figurine and dry it

Crafts made from salt dough - hedgehog
- Form the body and head of a hedgehog from uncolored dough.

- Make him a nose and eyes, you can use black dough or peppercorns

- Using nail scissors, cut the dough, making needles, lift them up a little. Cut the second row in a checkerboard pattern, and so on until the end.


- Leave the hedgehog to dry. When it has completely hardened, you can decorate it with paints and spray it with varnish.

Crafts made from salt dough - animals
You can sculpt many animals from salt dough with children. Below are some step-by-step instructions with photos.
Dough sheep
- Roll 4 balls - these will be the sheep's feet. Place them in a square, pressing their sides tightly against each other (look at the photo)
- Fold up a piece of foil and place it inside the dough ball. Roll it into a ball - this will be the body of a sheep
- Add a head to the sheep, make balls-eyes, horns and ears from sausages
- To imitate wool, make a lot of small balls and stick them around the back of the figure, pressing them down a little
- Dry your craft and decorate with paints and/or markers

Salt dough owl
- Roll out the dough into a round cake
- Use a felt-tip pen cap to press waves, imitating plumage.
- Fold the sides inward - these will be wings
- Fold the top part towards the center too, extending it a little on the sides - this will be the head and ears
- Stamp the eyes with a cap and add a beak with a toothpick
- Dry and paint


Dough elephant
- Roll the ball, stretch it out a little - this will be the body of the elephant
- Make 4 thick sausages - these will be the legs
- Make a trunk from another one
- Make a tail out of a thin sausage
- Roll out two flat cakes, put plates of smaller diameter and pink color on them - you will get ears
- Collect everything into one figurine and don’t forget about the eyes
- Dry the elephant and open it with varnish

Dough crafts - cat
- Cut out a cat template from cardboard


- Roll out the dough into a 0.5 cm layer
- Attach the template and cut out the cat from the dough


- Let the dough dry
- Using sandpaper, sand around the perimeter of the figure.


Paint the cat with a pencil and then with paints, let dry

Frame the panel


Making fish from salt dough
- Roll out the dough to a thickness of 0.5 to 1 cm
- Cut out the fish according to the template
- Decorate it: make voluminous eyes, fins and a tail, imitate scales with caps from felt-tip pens or other improvised means
Let the mushroom dry and decorate it


Dough crafts - fruits and vegetables
You can make a lot of salt dough various vegetables and fruits, with which you can then play and feed the dolls.
Remember that the colors of food for dolls should be matched as closely as possible to the original ones.


By following step-by-step instructions and photos, you can make interesting figures from salt dough, which you can then give to friends and family on holiday. different holidays. We hope in this article you found many interesting works and useful information. Have fun activities and beautiful crafts!
VIDEO: Craft from salt dough “Owl”
Autumn crafts from salt dough. Average - senior group kindergarten
Mendgalieva Olga Gennadievna, teacher
Place of work: MBDOU d/s No. 53 "Teremok" Volzhsky, Volgograd region.
Handicraft master class "Caterpillar on autumn leaves." Testoplasty.
Description: The master class is designed for middle-aged and older children, teachers, parents, and educators.Purpose: Interior decoration, gift.
Target: Continued acquaintance of children with the technique of testoplasty, consolidation of the ability to reproduce the sequence of all actions when composing a composition.
Tasks:
- consolidate skills in modeling salt dough;
- develop fine motor skills and coordination;
- develop creativity, imagination, imagination and the ability to complete work;
- develop attention and observation.
Required materials and tools:
- Flour
- Salt
- Water
- PVA glue
- Gouache
- Brush
- Stack
- Ballpoint pen case
- Blank templates: leaves
- Colored cardboard
Master class progress:
Works made from salt dough are called testoplasty; currently this is a common type of needlework. In ancient times, probably ever since people learned to make flour, they began to make figures from dough. This creativity is widespread in all countries of the world. And how much joy testoplasty classes bring to little fidgets! Dough is a pleasant and pliable material that children work with with great pleasure. Testoplasty is one of the types of folk applied art. Why did I decide to do testoplasty with preschool children?! Scientists have proven that the development of hands is closely related to the development of a child’s speech and thinking. Working with a test is a kind of exercise that helps in the development of subtle differentiated movements, coordination, and tactile sensations necessary when working with young children.
The leaves sparkle with bright colors -
The wind blows - they fly around...
Like butterflies, the leaves are fluttering,
Spinning in the sky, flying, flying
They lie on the ground like a motley carpet
They rustle under our feet -
Everyone is talking about autumn coming soon!
Everything crawls along the leaf
And it gnaws at the edges.
And when he grows up a little,
The body will be wrapped in a cocoon.
And a moment later,
To everyone's surprise,
Having escaped from captivity,
She will flutter like a butterfly.
1. Prepare required material.

Making the dough:: 1 cup salt, 2 cups flour, 0.5 cup water. For elasticity, add 2 tablespoons to the dough. vegetable oil, you can also add cosmetic cream, 2 tablespoons of wallpaper glue. I added some PVA glue. Mix salt, flour and PVA glue, gradually add cold water, mix thoroughly, determine the readiness of the dough by whether it sticks to your hands or not. As soon as the dough stops sticking to your hands, it is ready.

2. Roll out the dough, divide into pieces, apply a template of leaves and cut out in a stack. We need three leaves.

3. Next, place your palm on the next piece of salt dough and press it slightly. The result is a piece of paper in the shape of a child’s handprint.


4. Then make a caterpillar from the remaining pieces of dough: 6 circles different sizes in descending order and the 7th circle in the form of a leaf. We attach eyes, draw a mouth in a stack, and lines on the leaves. We make decorations on the circles with a ballpoint pen.
5. Let’s start coloring our leaves, using any gouache colors, as your imagination allows.

6. Glue the parts to colored cardboard.
This is how the autumn leaves and caterpillar turned out. Undoubtedly, such a souvenir will definitely decorate any interior.
LESSON SUMMARY A MUG OF MODELING FROM SALT DOUGH
ON THIS TOPIC:
"AUTUMN SOUVENIR"
Child Tatyana Alekseevna,
teacher of a class for children with mild mental retardation
GBS(K)OU for students and pupils with disabilities general education boarding schoolVIIIview of the village of Ilsky, Krasnodar Territory
Target: continue teaching students how to work with the test; develop manual skills, tactile sensations, visual perception; correct motor-motor memory, voluntary attention, imagination; help instill accuracy and perseverance.
Equipment:sound recording “Seasons” by P.I. Tchaikovsky, tape recorder, multimedia projector
Materials and tools:salt dough, modeling boards, stacks, rolling pins, leaf templates, plastic straws, hand wipes, water glasses, brushes, paints, glue, cards with safety rules.
PROGRESS OF THE CLASS
When guests arrive, the song “Autumn” is performed by students.
I.Organizing time.
Educator:Good afternoon, good hour!
I'm so glad to see you.
They looked at each other
And everyone sat down quietly.
II.Updating attention.
Educator:Hello, dear guys and distinguished guests!
We are very pleased to welcome you within the walls of our school. Today you are attending a salt dough modeling class, and we will be happy to show and teach you what we can do. First, let's get acquainted and introduce ourselves to each other /introduction of guests and children/
Educator:And now, I would like to ask: “Do you know what testoplasty is?”
Testoplasty is modeling from salt dough.
In recent years, salt dough has become a very popular modeling material. Although dough crafts are an ancient tradition, they also have a place in modern world, because now everything that is environmentally friendly and made with one’s own hands is especially valued.
Salty dough It has ancient history. Since ancient times, people have baked not only bread from dough, but also decorative items. Initially, products made from it had a cult significance: figurines of deities, images of animals, and amulets were made from it.
The Slavs believed that animal figures made from dough would bring wealth and abundance to the house; they were sculpted in the hope of increasing the number of livestock. Dolls were made from dough for children, which also served as amulets.
In Germany and Scandinavia, it has long been customary to make Easter and Christmas souvenirs from salt dough. Various medallions, wreaths, rings and horseshoes were hung in window openings or attached to doors. It was believed that these decorations brought good luck and prosperity to the owners of the house.
Dough figures are made in Poland and the Czech Republic, Slovakia, Greece and Spain; even in distant Ecuador, craftsmen make crafts from brightly colored dough. As we can see, the geography of use of salt dough is wide and varied. Nowadays, dough crafts are purely decorative, but that doesn’t make them any less popular.
Educator:Today the guys and I will teach you how to work with salt dough and we really hope that you enjoy this activity.
It is no coincidence that at the beginning of our meeting a wonderful song about autumn sounded. Because autumn is one of the most beautiful times of the year. Whatever shades you see in nature. Going to the forest, autumn takes the most bright colors. Birches and maples are covered with lemon yellow, aspen leaves resemble ripe apples, and mighty oaks are dressed in copper bronze.
Autumn festival in the forest,
And light and cheerful.
These are the decorations
Autumn is here.
Every leaf is golden
Little sun,
I'll put it in a basket
I'll put it on the bottom.
I take care of the leaves
Autumn continues.
I've been at home for a long time
The holiday doesn't end.
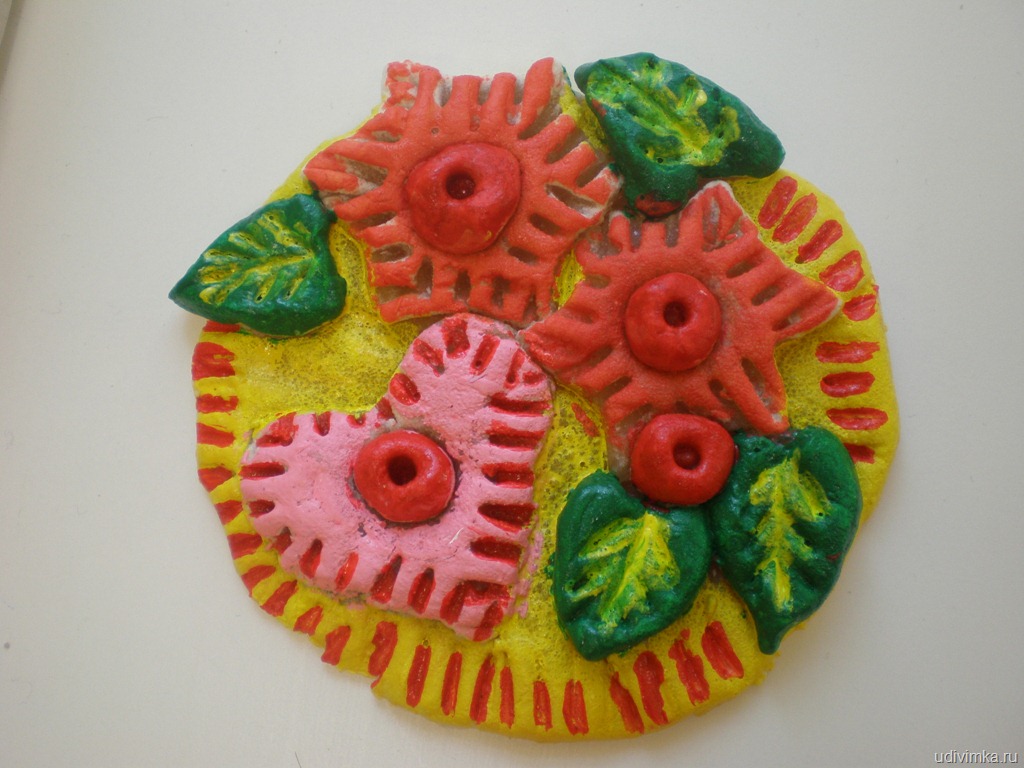
Educator:Dear guests! Today we invite you to make autumn souvenirs in order to preserve the beauty and charm of this unique time of year for as long as possible. /Product sample display/
Educator:
- What tools will we use to work with the dough? /children answer using past experience/
STACK –tool for modeling from soft materials /clay, plasticine, dough/.
ROLLING ROLL –tool for rolling out dough.
We will begin our work by making a leaf. To do this you need to use a template.
- What is a template?
Sample- This is a blank made of cardboard, of the required shape.
Who will tell us how to use the template in our work?
I suggest you choose the template that you like best, with the help of it you will give the shape to your product, /master class participants choose leaf templates as desired/
Repetition of the rules for working with the test and TB
/work with cards/
– Guys, we are learning to work in pairs, so now I will name who will work with whom.
Determination of pairs for work.
Before starting work, we must perform a hand massage.
Performing a finger massage. /Annex 1/
Now, look carefully, everyone, I will show you how to sculpt a leaf.
PRACTICAL PART
Show a presentation about the sequence of work.
Slide No. 1. Roll a piece of dough into a ball.
Slide number 2.Roll the ball into a flat cake 5 mm thick.

Slide No. 3. Place sheet-shaped templates on the rolled out dough.

Slide number 4.Trim the product along the contour of the template in a stack.

Slide number 5.Draw veins in a stack.

Slide No. 6. Place the finished product to dry.
Educator:Now you are ready to do the work yourself.
PERFORMING THE WORK OF MANUFACTURING A SHEET.
/The teacher helps MK participants in the process of making a souvenir/
Educator: Guys, let's rest a little and do some physical exercise.
FISMINUTKA /application No. 2/
Continued work.
Demonstration of the presentation “Modeling a ladybug”.
Slide No. 1. Roll a small piece of dough into a ball.

Slide number 2.With the help of big and index finger shape the ladybug's head.

Slide number 3. Use a stack to outline the wings and head of the ladybug.

Slide No. 4. Using a juice straw, squeeze out dots on the ladybug's wings.

Slide number 5.Place the finished product to dry.
Educator:At this stage, our lesson could come to an end, since according to the rules for working with salt dough, the product must first be dried and then painted. But we couldn’t deprive you of the opportunity to show your artistic abilities and therefore prepared the dried products in advance.
Upon completion of work: cleaning the workplace.
Lesson results:
What did we do in our circle class today?
Dear guests and guys, did you like our lesson?
What did you like most?
Educator:Our meeting has come to an end, I will be very glad if working with salt dough gave you pleasure and you want to do it further. Wish you luck!
Now the moment of farewell has come,
My speech will be short.
I say to you, “Goodbye!”
Back with us, see you again!
Appendix No. 1
Hand massage.
Using circular movements with your right hand, massage the back of your left hand. Do the same on your right hand.
Using compacting movements from the base of the finger to the nail phalanx, massage each finger.
Holding the wrist joint of your left hand, rub it with your right hand /2-3 twisting movements - “nettle”/.
Perform circular movements in the wrist and elbow joints of both hands.
Relax your hands with shaking movements.
Rub your palms together, let them feel the warmth of your hands.
Appendix No. 2
FISMINUTKA /relaxation for hands/
Hands need care
After all, they have a lot of work
It's hard to write all day long
And sculpt and draw.
/HAND JERKS IN FRONT OF THE CHEST/
Let's stand up right now
We will sit down eight times.
Five times slow and three
We have to sit down quickly.
/SIT-UPS, HANDS IN FRONT OF CHEST/
We reached up, then
Let's spread our arms wider
/PULLING, HANDS UP AND TO THE SIDE/
That's all. End of charging.
The boys are back at their desks.
/WALKING IN PLACE/
