Children are delighted with chocolate eggs with a surprise inside. You can imagine how happy they will be to have a huge cake in the form of this popular sweet. There are many recipes. All you need is time, the necessary ingredients and a creative spirit.
"Kinder Surprise" with mastic
Preparing one of the most desired holiday gifts for a child is not difficult. It will take about 5 hours to prepare, but the result is worth it. Let's look at a step-by-step recipe for Kinder Surprise cake with mastic. Required components:
- a stencil of the required size in the shape of an egg;
- 2 sponge cakes;
- cream;
- food colorings;
- mastic;
- marzipan letters;
- food glue;
- mastic cream;
- rolling pin
The preparation of the cake begins by laying the stencil on rectangular cake layers. After cutting out the egg, the remaining cakes should be saved. Now you need to place the surprise prepared in advance in the center of the cream-smeared cakes. If the gift is small, then simply place it in the center of the bottom layer. For a larger box you will need to make holes in the cake layers. You need to carefully pack it in a box, wrapping it in cling film.

To equalize the thickness, cake trimmings are used. The pieces are placed around the surprise, achieving the same height as the box. You need to grease the surface of the cake with cream again and cover it with a second egg-shaped cake.

The crushed remaining pieces of biscuits are mixed with cream, and the resulting cream crumbs are covered with the sharp tip of the egg.

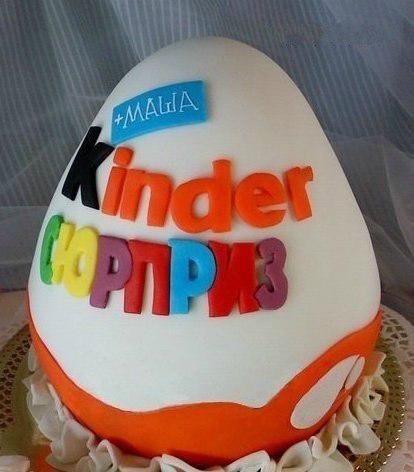
After this, mastic cream is applied to the egg and put in the refrigerator for a couple of hours until completely hardened. The next step is to cover the future cake with rolled out white fondant. To create the decor, you will need to make red mastic using food coloring. It is also rolled out and cut out in the form of waves inherent in the original Kinder Surprise egg.

Now comes the painstaking work of making letters. It is better to use pre-prepared templates. You will need to make multi-colored mastic. To reduce work time, you can buy already painted mastic in sets. The finished letters are glued onto the cake. If you wish, you can also try to make pens, a cap and other decorative elements. The baby will be delighted!

Cream cake "Kinder Surprise"
To prepare a “Kinder Surprise” cake from cream, designed for 10 servings, you will need the following ingredients:
- sponge cakes;
- cream (curd or butter);
- ganache;
- mastic.
Its calorie content is very high, cooking time will be about 3 hours. You can save time if you purchase ready-made cakes, cream, and a set of colored mastic.
First you need to decide on the placement of the cake on the dish; it can be horizontal or vertical. You need to bake round cakes of different diameters from sponge dough. We recommend dough using margarine or sour cream; such a cake will hold its shape better. Delicious cakes are made with the addition of cocoa. The finished cakes are cooled.
Now you need to prepare the creamy curd cream; it will hold its shape well. The coated cakes are placed in the refrigerator to freeze for about a couple of hours. If desired, you can provide a place for a gift in the center of the structure, where you can place a box with a surprise for the child. Once cooled, the cakes are trimmed to create an egg shape. The scraps, crushed in a blender, are mixed with the remaining cream. You need to coat the entire surface of the egg with the finished mixture, giving the cake a uniform round shape, and put it back in the refrigerator.
Now you need to prepare the ganache to create a layer between the cream and mastic, coat the future cake with it and put it back in the refrigerator for 1 hour. The next stage: the mastic is rolled out on the table in a layer up to 0.7 cm thick, the table is sprinkled with powdered sugar or starch. The central part is made thicker.
The resulting layer is used to cover the egg. The mastic sliding down is evenly distributed over the cake. The excess can be trimmed off and the surface carefully leveled using a regular washed plastic card. All that remains is to make letters from multi-colored mastic and decorate the cake with inscriptions.
 Read how to cook delicious - several options for a delicious snack for the holiday table.
Our version of cooking chicken liver - by adding mushrooms, you will get a very tasty dish, to which you can add rice or vegetables as a side dish.
Read on and quickly cook beef tongue in a slow cooker.
Homemade cake made from chocolates and sweets

This masterpiece of culinary art will definitely bring great joy to children. The cake is large, it contains a lot of children’s favorite sweets, and it looks very solemn. The work will take no more than 2 hours, it depends on your skill and ability to do needlework. To make it yourself, you will have to spend a little money on the necessary components:
- Kinder chocolate slices (for a small cake you need 15–20 pieces);
- several Kinder surprises;
- candies;
- 2 sets of cardboard: colored and white;
- thin pharmaceutical eraser, a simple pencil, a ruler, scissors, PVA glue or a hot gun.
In addition, you may need additional decorative elements: beads, ribbons, paper flowers, lace. The choice depends only on excellent imagination and inspiration. The calorie content of the cake is very high, but Kinder chocolates are created specifically for children and contain milk, calcium and vitamins.
We present a detailed master class. To determine the diameter of the cake, you need to tightly lay out all the chocolates in one line, placing a sheet of thick paper under them. Now you should outline the resulting rectangular row with a pencil. Add 2 cm allowances for gluing on the bottom and left sides. The long allowance is lined with cloves. All that remains is to cut out the template.
The workpiece is glued together in the form of a cylinder. The teeth are bent inward or outward so that they can be glued to the base. The resulting cylinder is placed on cardboard and outlined with a pencil. The resulting circle needs to be increased in diameter by a couple of centimeters and cut out.
You will need PVA glue. The cylinder is installed on the backing circle with the teeth down. They can be bent in any direction, it doesn't matter. The workpiece must be glued strictly in the center and dried. After this, a pharmaceutical rubber band is put on the cylinder. You need to push the chocolates under it, placing them with the front part facing out. Sweets should stand tightly, exactly along the perimeter of the circle. If you don’t want to glue the chocolates to the base of the structure, you can tie them with a beautiful ribbon around them.
The cake lid is made of thick cardboard. The disk is cut smaller than the round substrate at the base of the structure. The top of the lid should have a rim a couple of centimeters wide. They make it in the same way as a cylinder, fixing it to the lid using bent teeth and glue.
The most interesting stage of preparation is filling and decorating the resulting cake. The lid can be decorated with foil, colored paper, fabric, lace, and ribbon bows. You can also put sweets or Kinder Surprise eggs in it. The inside of the cake can be filled with Kinder Surprise eggs, sweets, and candied fruits. Chocolate eggs with surprises of a certain series that the child likes will be a wonderful gift.
If the baby has not reached 2 years of age, then you need to use a minimum of tinsel and decor so that the child does not taste them. The Kinder Surprise cake is always festive and colorful. Such a gift will delight not only a child, but also an adult. It can be of any size and will be appropriate for any occasion.
Kids love sweets very much, so parents always want to please their children with an original gift for the holidays. An excellent solution would be to make your own cake from sweet eggs and chocolate - you can do without dough, cream and sugar mastic, but the result will exceed all expectations. A detailed guide will help you figure out how to make a kinder cake with your own hands and surprise your son or daughter.
Making a sweet cake begins with purchasing materials. To create an unusually delicious gift, you will need:

- Various chocolates: kinder milk slice, kinder penguin, kinder bueno, kinder milk and others;
- Kindersurprise chocolate eggs from one or more series;
- Candies "Raffaello";
- Multi-colored dragees “Mmdems”;
- Thick cardboard, 1-3 cake boxes of different sizes or polystyrene foam;
- PVA glue or silicone gun;
- Thin pharmaceutical elastic band;
- Scissors;
- Multi-colored corrugated paper (red, white, etc.);
- Red satin ribbon, a piece of organza, artificial butterflies, flowers, soft toys, rhinestones and beads.
The number of kinders and chocolates needed depends on the size of the future cake. A two-tier cake will require more sweets than a small one-tier cake.
Kinder surprise cake

If you want to make a Kinder Surprise cake, the step-by-step recipe below will make your task easier. If the base for the gift is hollow, you can put a beautiful chocolate egg from a Kinder Surprise (4-10 pieces), small toys, cookies and other sweets that the child loves inside the cake.
If the base of the cake is dense, you can decorate its top with chocolate eggs and decorate each of the tiers. A two-tier kinder cake made with love will leave magical memories for the birthday boy and his guests.
Kinder cake
What is the frame made of?

Kinder cakes can have different shapes and heights. The most common shape is round, but some artists prefer a heart- or star-shaped base.
The frame for the model is made of thick paper or cardboard if you plan to hide several more gifts inside the cake. Another kinder cake can be prepared by making the base from one or several pieces of dense foam. A large or small Kinder Bueno cake, richly decorated with multi-colored ribbons and Mmdems dragees, can consist of one, two or even three tiers.
Kinder and chocolate cake

It’s easy to make a cake from kinders and chocolates with your own hands at home. Follow the following recommendations before starting a master class on creating this product from the world of suite design.
- Before starting work, carefully study the photographs of the finished models and think about what your dream sweet cake should look like.
- Depending on your idea, purchase all the necessary supplies;
- Since sweets contain perishable products, store chocolates and eggs in the refrigerator before starting work;
- The child receiving such an unusual gift must be over 2 years old, otherwise there is a risk that the baby will choke on small parts of the toys.
- Glue all decorative elements very carefully so as not to violate the integrity of the composition.
Detailed instructions will help every adult make a pleasant surprise for children. You can also make a romantic kinder cake for your other half on Valentine's Day or any other holiday.
Master class with step-by-step instructions
Let's figure out how to make a kinder cake with your own hands; step-by-step photos of each stage will greatly facilitate your work and improve its quality.
- First, choose what material you will use to make the frame of the product.

If you prefer foam, then cut two or three cylindrical pieces of different diameters from it. The height of the cylinders should correspond to the length of each kinder chocolate.
If you decide to work with paper, place all the chocolates (or each of the two groups, if the cake is two-tiered) in a row on a piece of cardboard, and mark on it a rectangular part of the desired length and width. Step back 2 cm from the resulting outline and draw another rectangle.
On the longer sides of the shape, draw triangular-shaped teeth. For the first tier you need to draw teeth at the top and bottom, for the second - only at the bottom of the rectangle.
Cut out two paper pieces along the outline
- Glue the 2 pieces of foam together, placing the smaller diameter cylinder on top of the larger shape.

If you are making a paper frame, then it's time to prepare a round base for each of the tiers. Glue tubes from two rectangles using their short sides without teeth.
From very thick cardboard, cut out a circle with a diameter 2-4 cm larger than the diameter of the first tier tube. Prepare another circle with teeth, the diameter of which corresponds to the diameter of the tube - this will be the lid of the bottom of the cake.
To create the lid for the top tier, you will need a cardboard circle with a diameter that matches the diameter of the second tube, and a narrow paper strip with teeth on one side, approximately equal to the length of this circle.
- We assemble the paper frame of the product from kinders.

Assemble all the frame parts together using PVA glue. Glue the cylinders of the first and second tiers. Then attach the first cylinder to the base, and place the second on top of the first.
Separately glue the lid for the second tier and check whether it tightly closes our secret compartment in the sweet gift.
- We move on to decorating our frame with kinders.

Decorate the first and second tiers of the cake with red and white corrugated paper on the sides. Secure it to the cake with tape or glue.
Stretch two thin rubber bands over the corrugated paper at two levels. Under these rubber bands we place vertically all the chocolates, one at a time, thus filling the entire cake on the sides.
To hide each elastic band, tie it on top with a scarlet satin ribbon, from which you make a large fluffy bow. You should get two bows - on the first and second tiers.
- The final stage of decoration is decorating the top of the first tier and the lid.

To do this, use Kinder Surprise chocolate eggs, Rafaello candies, organza, beads, plastic figures of cartoon characters or small soft toys (cute bunnies, bears). If this doesn’t seem enough, add multi-colored “Mmdems” dragees, wafer sweets, artificial butterflies or flowers.
The recipe for the Kinder Surprise cake will be unique in each case, and the abundance of master classes only serves as the basis for the flight of your imagination. Engage in sweet creativity and give joy and pleasant moments to your loved ones.
How to make a two-tier cake from kinder chocolate. Detailed master class.
As the old aphorism says, children are the flowers of life. And sometimes these flowers need to be pampered. Sweets are perfect for this purpose and all toddlers, without exception, adore them. You can buy your child expensive toys, branded clothes and even modern gadgets. But all this will never replace his mother’s pies, pancakes and other delicacies. Looking to expand your recipe library? Then you have come to the right place. After all, in this article we will discuss the recipe for the Kinder Surprise cake. Do you want to please your child with new delicacies? Read this article!
Cake "Kinder Surprise" - what is it?
All children simply adore Kinder Surprise. Bright packaging, a delicious chocolate egg and a toy inside - that’s what kids really love. So why not make a delicious Kinder Surprise cake for your children's party? Why not pamper the kids with a new and original dessert?
The Kinder Surprise cake (you can see a photo of the finished dessert at the end of the article) is not just a delicacy, a mother’s love and care. To understand the majesty of this dessert, just look at its appearance. Bright colors that please the eye, a cream that beckons. Just the sight of this delicacy makes you excited. But this is just the tip of the iceberg. The main thing is taste. Thanks to the successful combination of ingredients, it seems as if thousands of tiny ballerinas are dancing on your tongue. The cake is very tender and literally melts in your mouth. But that's not all. The same “surprise” that gave the cake its name was always hidden inside the delicacy.
Do you think it will be very difficult to prepare such a magnificent dessert? You are wrong. The Kinder Surprise cake is not only delicious, but also simple.
Ingredients
To make the Kinder Surprise cake, you will need:
- butter (softened) - 300 grams;
- eggs - approximately 6 pieces;
- salt - 1 pinch;
- sugar - 400 grams;
- sour cream - 300 grams;
- flour - 400 grams;
- low-fat cottage cheese - 200 grams;
- cream - 200 milliliters;
- - 1 tsp;
- marshmallows - 100 grams;
- lemon juice - 1 tbsp. l.;
- baking powder - 18-20 grams;
- powdered sugar - approximately 1.5 cups;
- and starch - at your discretion.
Cake "Kinder Surprise": step by step recipe
First you need to prepare. To do this, grind 300 grams of sugar and 300 grams of butter. Then break the eggs and separate the yolk from the whites. Add the resulting yolks to the oil mixture and beat well. After this, add sour cream and beat the mixture again. In another bowl, add a pinch of salt to the whites, then beat the substance until thick foam. We add approximately a third of the proteins to our sour cream and butter mixture and mix. Add baking powder and gradually pour in flour (in about 3-4 additions). Finally, pour in the remaining whites and mix everything thoroughly. Then we cover the cake pan with parchment and pour out the resulting substance. Depending on the shape, you should have about 1-2 cakes. After this, put our dough in a preheated oven and bake the biscuits for half an hour at 180 degrees.
Next, you need to give the resulting biscuits the shape of an egg. For this it is best to use a stencil. After attaching the stencil to the dough, cut off the excess using a knife. Then you need to make a hole for the gift. Attach the gift and cut out a rectangle of the appropriate size.

Now you need to start preparing the cream. Mix the remaining sugar (100 grams) with cream. After this, add our vanillin and beat the mixture until thick foam. Next, mix the cream with the curd mixture and coat the bottom cake with the resulting cream.
Then you need to put the gift in the prepared recess. The surprise must first be placed in a box and wrapped in cling film.
Next, you need to bring the level of the cake to the height of our gift. To do this, lay out the cake scraps around the gift and grease it with cream. If you still have scraps left, you can make a second layer for the cake.
Now we need to give our cake an egg-like appearance. First, remove all excess with a knife. Mix the crumbs with the remaining cream and cover all the holes and cracks with the resulting mixture. Your goal is to coat the cake completely so it is even and smooth. After this, we put our dessert in the refrigerator and wait a couple of hours.

Design
To give the cake the appearance of original sweetness, you need to prepare mastic. You can use regular marshmallows for this. But first you need to think about what colors you need (as a rule, white and red shades are used for the Kinder Surprise cake). Place the marshmallows in a bowl, add lemon juice and microwave (for about 20-30 seconds). Meanwhile, dilute the dye with a small amount of vodka. After this, pour the resulting substance into the marshmallows, mix and periodically add powdered sugar. The finished mastic must be wrapped in cling film and left in the refrigerator for half an hour. Then we take out the white mastic and roll it out on the table, previously sprinkled with starch. We place the resulting layer on our cake, cutting off the excess with a knife. To prepare red mastic we use the same technology. After preparation, cut out a wave from it and glue it onto a white layer. In the same way we make letters and other details that are on the original packaging.
Bottom line
Thus, we prepared a wonderful cake. Although the preparation took a couple of hours, the delighted looks from the children are worth it.
Step-by-step preparation of Kinder surprise cake:
- Grind the softened butter with sugar.
- Separate the whites from the yolks.
- Add the yolks to the butter mixture and beat.
- Pour in sour cream and beat.
- Combine the whites with salt and beat until thick foam.
- Add 1/3 of the whites to the butter-sour cream mixture and mix.
- Add baking powder and flour. Stir.
- Add the remaining whites and mix.
- Pour the dough into the mold and place in the oven preheated to 180 degrees for 30-40 minutes.
- Cut the finished cake lengthwise into 2 sheets.
- Attach a cardboard egg-shaped mold to the crust and trim off the excess.
- Make a hole in the cakes for the gift.
- For the cream, beat the cottage cheese in a blender until smooth.
- Mix it with cream, sugar, vanilla and beat into thick foam.
- Combine cream and curd mass.
- Spread the bottom layer of cake with cream and place the second cake.
- Place the gift into the prepared cavity.
- Cover the cake scraps with cream and level the level of the biscuit to the height of the gift.
- Using a knife, cut off any excess, giving the cake an egg shape.
- Place the cake in the refrigerator for 2-3 hours.
- For the mastic, place the marshmallows in a bowl, add lemon juice and microwave for 20 seconds.
- Dilute the dye in vodka and pour into the marshmallows. Stir and add powdered sugar. When it becomes difficult to mix, transfer to a table sprinkled with powdered sugar and continue mixing with your hands.
- Wrap the mastic in cling film and keep it in the refrigerator for half an hour.
- Take out the white mastic and roll it out into a thin layer on a table sprinkled with starch.
- Cover the cake with it. Cut off the excess.
- Roll out the red mastic, cut out a wave from it and glue it to the white mastic, which you moisten with water.
- In the same way, make the letters and other details that you apply to the egg.
The Kinder Penguy cake recipe may seem complicated, but if you study the action plan in detail, it is quite possible to make it. The only thing is that it will take longer.
Ingredients:
- Eggs - 5 pcs. (for biscuit)
- Sugar - 100 g (for biscuit), 50 g (for cream)
- Flour - 120 g (for sponge cake)
- Baking powder - 1 tsp. (for biscuit)
- Cocoa powder - 3 tbsp. (for biscuit)
- Vegetable oil - 2 tbsp. (for sponge cake), 1 tsp. (for glaze)
- Milk - 2 tbsp. (for biscuit), 3 tbsp. (for glaze)
- Cream 30% - 500 ml (for cream)
- Vanillin - 1 packet (for cream)
- Mascarpone cheese - 250 g (for cream)
- Gelatin - 2 tsp. (for cream)
- Dark chocolate - 100 g (for glaze)
- Milk chocolate - 100 g (for glaze)
- Butter - 50 g (for glaze)
- Beat the whites to stiff peaks. Add sugar and beat until completely dissolved.
- Add 1 yolk to the mixture and continue beating.
- Pour in butter, milk and stir.
- Add flour, baking powder, cocoa to the mixture and mix.
- Pour the dough into the mold and bake at 180 degrees for 30 minutes.
- Cool the finished biscuit, then separate it from the edge of the mold and remove it.
- Whip the chilled cream to stiff peaks, adding powdered sugar and vanilla.
- Beat mascarpone with cream mixture and add to cream.
- Pour boiled hot water over the gelatin and stir until it is completely dissolved.
- Add diluted gelatin to the cream.
- Combine the chocolate, broken into pieces, with all the ingredients for the glaze. Place it in a water bath and heat until dissolved. Cool.
- Cut the biscuit into two parts.
- Place the bottom layer on a serving plate, spread with half the cream and fill with chocolate glaze.
- Apply the remaining cream and the second sponge cake layer on top.
- Drizzle with chocolate glaze and place the cake in the refrigerator.

The recipe for Kinder-slice milk cake is very quick to prepare and turns out very tasty. Try preparing a delicate combination of thin chocolate sponge cake and an airy layer of milk cream and please your loved ones with a delicious product.
Ingredients:
- Flour - 35 g
- Cocoa powder - 25 g
- Water - 1 tbsp.
- Honey - 10 g (in dough), 1 tsp. (in cream)
- Sugar - 80 g
- Eggs - 4 pcs.
- Cream 33% - 350 ml
- Condensed milk - 180 g
- Gelatin - 10 g
- Vanilla extract - 1 ml (in dough), 2 ml (in cream)
- Separate the whites from the yolks.
- Beat the yolks with half a portion of sugar, water and vanilla extract. Gradually add honey.
- Beat the egg whites until stiff peaks form, gradually adding sugar. Gently fold into the yolks. Mix smoothly.
- Sift flour and cocoa and mix.
- Combine flour and egg mixture.
- Stir and place on a parchment-lined baking sheet.
- Bake in an oven preheated to 220°C for 7 minutes.
- Cool the finished cake.
- To make the cream, soak gelatin in cold water for 10 minutes.
- Heat the cream, without bringing it to a boil, and dissolve the gelatin in it.
- Combine condensed milk, honey, vanilla extract and mix.
- Add cream with gelatin.
- Cover the cream with film and refrigerate for 1 hour.
- Cut the biscuit in half.
- Grease the bottom cake with cream and cover with the second cake.
- Wrap the cake in cling film and place in the refrigerator for 1 hour.
This beautiful cake will be the best dessert option for a celebration. All children love to find toys in a chocolate egg, and the Kinder Surprise cake will remind them of their favorite treat. Therefore, this cake will be a special dessert at children's parties. But adults will also enjoy this dessert with pleasure, because it will remind them of their own childhood.
Ingredients:
For the test:
- 300 grams of butter (72% fat is best);
- 300 grams of granulated sugar;
- 6 eggs;
- 300 grams of sour cream;
- a pinch of salt;
- 400 grams of sifted flour;
- 18 grams of baking powder.
For cream:
- 100 grams of granulated sugar;
- 200 grams of low-fat cottage cheese;
- 200 milliliters of cream;
- 1 teaspoon vanilla sugar.
For mastic:
- 100 grams of marshmallows;
- 1 tablespoon freshly squeezed lemon juice;
- 1.5 cups powdered sugar;
- food coloring (depending on the desired color).
Making Kinder Surprise cake step by step:

- Let's start cooking with biscuit dough. Pre-prepare the eggs, separate the yolks from the whites. Mix pre-softened butter with granulated sugar. Add the egg yolks to the resulting mixture and mix everything thoroughly. Add sour cream to our mixture, then mix everything thoroughly again.
- Beat the egg whites along with salt in a separate container. Add one third of the whipped whites to the butter mixture and mix thoroughly. Add baking powder to the resulting mixture, and while stirring, add flour, preferably gradually in three to four additions. Then add the remaining whipped whites and mix thoroughly.
- Preheat the oven to 180 degrees. Pour the resulting dough into a prepared form, which is previously covered with parchment paper. You should get 1 or 2 cakes, the quantity depends on the chosen forms. Place the pan in the oven and bake for about 40 minutes.
- While the sponge cake is preparing, cut out an egg template from cardboard. Cut out eggs from the cakes according to the resulting template. We will attach a gift for the hero of the occasion in the center of the cakes and cut out the necessary hole.
- Let's prepare the cream by using a blender to beat the cottage cheese until smooth. In a separate container, mix sugar, cream and vanilla sugar until thick foam. Add the resulting mixture to the curd mass and mix thoroughly. Grease the bottom cake with the resulting cream.
- Let's prepare a gift; to do this, place it in a rectangular box and wrap it in cling film (preferably several layers). Place the gift in a pre-prepared cavity in the cake. In order for the sponge cake to be the edge of the gift, we will place it around the trimmings, spreading with cream if we get more than one layer. And we close the structure with a whole second egg cut from the cake.
- Let's prepare the mastic, for this we put the marshmallows in a microwave-safe container, add lemon juice. Place in the microwave for thirty seconds.
- Let's prepare the dyes by diluting them in vodka. Pour the desired coloring into the required amount of marshmallows and mix thoroughly, adding powdered sugar. Mix the resulting mass thoroughly. Place this mixture in the refrigerator for half an hour.
- Let's start decorating, take out the white mastic and roll it out, first sprinkling the surface with starch. Cover the cake with the resulting layer, trim off the excess.
- Then, we take out the red mastic, roll it out and cut out a wave on it. Using water, glue it onto the white egg. We do the same with the rest of the decorative elements of the Kinder Surprise.
Bon appetit and have a great holiday!
