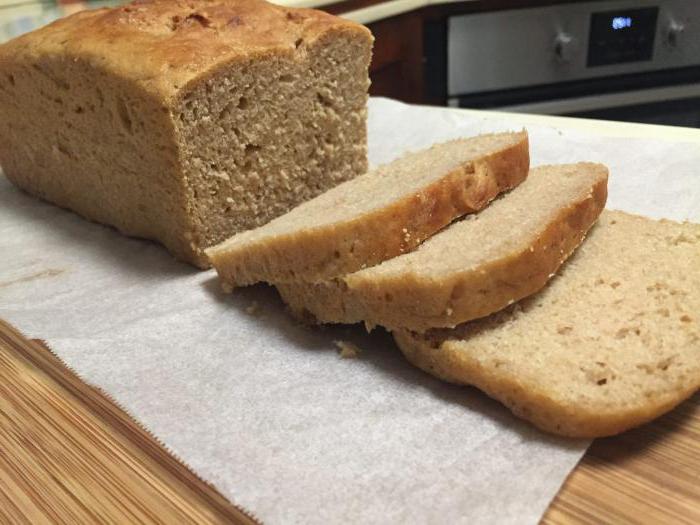
What should your home smell like? Comfort, love, care and... bread! Warm, fresh (fresh from the oven!) with a golden crispy crust. In our modern houses and apartments there is no Russian oven, from which grandmother’s hands took out fragrant round breads.
But you can create real magic with the help of modern kitchen gadgets - an oven or an oven. What is needed for this? Flour, patience, a few simple but very important tips and tricks (for the younger generation - life hacks!).

Main Ingredients and Flavorings
You can’t make delicious homemade bread in the oven without high-quality flour. The result depends on its grade, amount of gluten, ripening period, ash content, and humidity. , wheat, finely ground, whole grain - different flours for different breads.
Buns, loaves, and saits with a white fluffy crumb will be made from premium wheat flour. It is better to prepare lunch bread from whole grain flour - there will be more benefits from such bread. All the strength of the grain is preserved - its shell is ground together with the inside of the grain. By replacing part of the wheat flour with rye flour, we get a fragrant, everyone’s favorite “chernyashechka”. By increasing the content of rye flour, you can enhance the rye taste and aroma of bread.
Important! Before cooking, the flour must be sifted. Saturated with oxygen, it will give the dough a quick rise and an airy structure of the finished product.

Bakery products with various additives are becoming increasingly popular: corn, oat, buckwheat, soy, pea flour, seeds, nuts, dried fruits, vegetables, olives, spices and herbs. Such additives make the taste of baked goods varied, rich, and unusual. Fitness bread, focaccia, ciabatta, bran, onion - the basis for them is dough prepared according to a basic recipe, with all kinds of additives.
The important ingredients for making bread are yeast and water. The yeast must be fresh; before purchasing, you need to check the expiration date. Instead of water, you can use whey or yogurt. They shouldn't be cold. The ideal option is 35-37 degrees.

Cooking methods: sponge, straight, yeast-free
Same ingredients, but completely different taste of the finished product. It's all about the method. The straight method is simpler - all the products are combined and kneaded. When rising, the dough is kneaded 2-3 times, the formed products are put out for proofing. The last stage is baking.

The sponge method is more troublesome. How to make sourdough bread? Yeast is first diluted in a small amount of warm water with the addition of some flour. The mixture is left for 1-2 hours so that the yeast begins to “work”. The finished dough is mixed with the rest of the ingredients, wait until it rises and bake. Dough makes the bread structure denser, reveals all shades of taste - with a barely noticeable and pleasant sourness.

Another possible option does not involve the use of yeast. Sourdough is prepared from flour and water (4 tablespoons of each) for 6 days. Every day it is “fed” with flour and water, keeping it in a warm place until lactic acid fermentation begins. Delicious homemade bread in the oven without using yeast is the healthiest.

Bake in the oven - in pans or on a tray
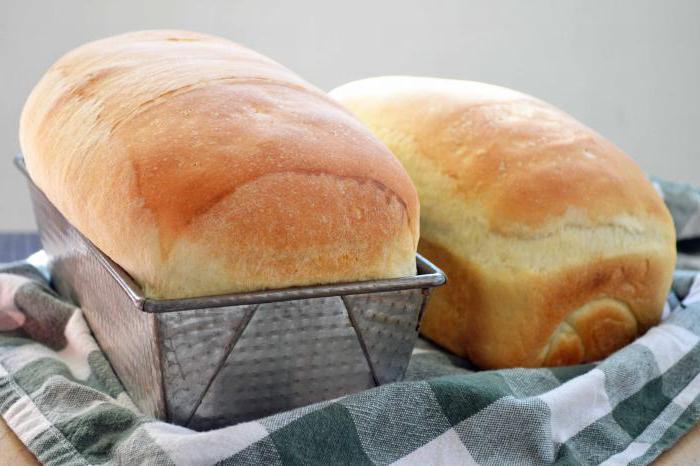
Homemade bread is baked in two types: in molds (tin) and on a sheet in the form of a round loaf (hearth). Both of these options are equally convenient in the oven. To prepare the usual “bricks,” you need special molds: cast iron or light non-stick alloys. It is better to bake bread in molds on dough - the dough is liquid and will spread.

Hearth bread was baked in a Russian oven. The dough rolled into “rounds” was placed on the hot surface of the stove, with cabbage leaves or burdock leaves placed under them. In the oven, you can use baking paper or parchment for these purposes and cover a baking sheet with them.

Classic wheat bread recipe
For two “bricks” of white wheat bread you need to prepare flour, warm water, salt, sugar, yeast, and vegetable oil for greasing the molds. This bread “loves” long and thorough kneading - it’s best to knead it with your hands lubricated in sunflower oil.

Ingredients
- Fine flour - 600-650 g
- Water – 300 ml
- Salt - 1 tsp.
- Sugar - 1 tsp.
- Dry yeast - 1.5 tsp.
- Vegetable oil - 1 tbsp.
Preparation
Sift the flour. Mix it with salt, sugar, yeast.

Let's knead the dough. It should be elastic. To prevent the dough from sticking to your hands, add a little flour.

Leave the dough in a warm place. After rising, knead it 2 times.

Place it in greased molds.

Bake in the oven - 180 degrees/40-45 minutes.

10 minutes before cooking, lightly moisten the bread crusts with water - they will become shiny and rosy.

Carefully “knock” the loaves out of the molds and cool.

Homemade bread in the oven - how to bake delicious bread at home
5 (100%) 3 votesI baked my first homemade bread in the oven according to the simplest recipe: flour, water, yeast, salt and sugar. When I took out the ruddy crust, my pride knew no bounds! Even though it turned out lopsided, it rose and baked perfectly. For me this is the most important thing, and we’ll add beauty later. Inspired by the first success, I repeated the recipe for homemade bread a couple more times and took up loaves with cuts, round loaves, and bricks. But I want to tell you and show you how to bake delicious bread in the oven at home according to a basic recipe. Because it’s better to start getting acquainted with bread baking with the basics in order to understand what to do and why and what will come of it.
Homemade yeast bread in the oven. Recipe
If you have bread baking experience, feel free to start cooking, but I advise beginners to first read the tips and recommendations under the recipe.
Basic bread recipe. Once you master it, you will be able to bake delicious bread with various additives. For example, aromatic, with sesame, Provençal herbs, give it different shapes. The recipe will also help you out during fasting - uneatable wheat bread is baked without eggs and milk, and butter can be removed from the ingredients. Lean yeast dough is prepared in water, kneads very easily, the bread turns out fluffy and tasty.
Ingredients
For homemade yeast bread we will need:
- warm water – 250 ml;
- sugar – 1 tbsp. l. without slide;
- salt – 1 tsp. without slide;
- wheat flour – 480 g (180 for the dough + 300 for the dough);
- fresh yeast (cube) – 15 g;
- Sunflower oil – 3 tbsp. l.
How to make homemade bread in the oven
Let's start preparing bread dough by preparing the ingredients. We measure out the required amount of yeast, making sure that it is suitable (expiration date on the package). Add salt and sugar. Grind all the ingredients to a liquid paste using a spoon or spatula.

We heat the water and test it with our hands. Warm until you feel a pleasant warmth. Pour warm water into the yeast and stir.

Add sifted flour. Stir and get rid of large lumps.

The thickness of the mass will be medium, like pancake dough.

Cover the container. Place in a warm place for 30-45 minutes or longer. The ripe dough will rise several times and become holey with a sour smell.

Stir the dough, releasing carbon dioxide and making it liquid again, so that after kneading the yeast can raise the dough again.

Sift the flour, add not all at once, but in parts - this makes it easier to bring the dough to the desired density. Immediately add about 250 grams.

Make a hole in the flour mound and add sunflower oil to make the dough more elastic and the baked goods delicious.

Mix everything with a spoon until you get a thick, loose ball of dough. Add a little flour to a board or table, lay out the dough and begin to knead it, rolling it away from you and pulling it towards you. Wrinkle the back of your hand with smooth but strong movements.

After a few minutes, the dough will no longer be so rough and sticky, it will become denser, drier and easier to knead. Knead for another ten minutes. At the end of kneading, you will feel how air bubbles seem to burst under your palms, the dough is soft and plastic.

Roll the dough into a bun, like the one in the photo. Trim and sprinkle with flour.

A small saucepan with a round bottom, bowl, or cauldron is suitable for proofing the dough. Cover with a towel and sprinkle thickly with flour.

Place the dough sprinkled side down, leaving the top smooth. If there is no flour, the dough will stick to the towel and you won’t get a beautiful kolobok. We wrap the edges of the towel over the bun, put the dough in a warm place to rise twice.

The dough for yeast bread should rise to the edge or slightly higher. There is no need to knead the dough. Turn on the oven and leave it to warm up to 180 degrees.

When it heats up, very carefully turn the bowl with the dough over, placing the bun on a baking sheet lined with paper. We try not to damage the dough, it is very tender. I cover the bowl with a baking sheet and turn it over. The dough comes out easily, does not knead, all you have to do is remove the towel from the bun.

Place the baking sheet on the middle level and bake homemade yeast bread for 35-40 minutes at 180 degrees. The crust should turn golden and golden brown.

Remove the delicious bread from the oven and cool on a wooden board or wire rack without covering it with anything.

Slice the warm or cooled bread and serve.
I’m sure your first yeast bread will turn out great, because now you know how to bake delicious bread in the oven at home and you’ll definitely want to consolidate your success. I have collected simple and tasty ones in the appropriate section, there are a variety of them, all with detailed descriptions and tips.
Now traditions are being revived, and homemade bread baked in the oven at home is again perceived as a symbol of the comfort and homeliness of the housewife. In a house where it smells of fresh baked goods, it is warm and calm, they are waiting for you, there you relax and forget about all your problems. And the taste of homemade bread cannot be compared with store-bought loaves! The bread may not be in perfect shape, but you baked it with love, put a piece of your soul into it, and such bread will definitely be delicious.
Which flour to choose for bread
For the first time, I advise you to choose the simplest bread recipe at home and bake delicious wheat bread. Other types of flour require certain dexterity and skills, but wheat flour dough is very easy to work with. It contains a lot of gluten, so the dough rises well and can be given different shapes - roll a loaf, a bagel, bake a loaf, a brick.
If you add whole grain flour, the dough will rise less, but this bread will be healthier. The dough with the addition of corn flour will be bright yellow, crumbly to the touch and heavy. It rises easily, but you can’t leave it for too long; it may fall off in the oven if it’s left for too long. It’s best to leave rye bread recipes for later; rye flour is capricious and unpredictable. There is no gluten in it, so the dough hardly rises and baking such bread is a real art.
Wheat flour comes in different grades: premium, first, second and coarse. They differ in the degree of grinding and gluten content (the more gluten, the better the dough will rise). Usually a flour mixture of different varieties is sold, so it is generally accepted that unlabeled flour has an average percentage of gluten (25-28%). Types of flour with markings are valued higher, but also cost more. They contain 28-30% gluten.
As such, the concept of “grade of flour” does not imply the quality of the product, but its intended purpose for a specific use. For example, butter dough is made from the highest grade, but for bread it is better to use the first or second grade. The baked goods do not go stale for a long time, they come out with a delicate porous crumb, are tasty and hold their shape well.
Why sift flour?
Flour can contain not only debris, bugs and worms, but also various additives that manufacturers do not skimp on. For example, starch. During storage, it cakes and sticks together into plates. By sifting flour, you remove all impurities from it, break up lumps and saturate it with oxygen. Any baked goods made from sifted flour turn out more fluffy and soft - tested from my own experience. Buy a fine-mesh sieve or a special sieve mug and your homemade bread will always be fluffy.
Preparing bread dough
There are two types of bread made at home - sponge-based and straight-bread. Dough is a liquid dough made from flour, liquid, yeast and sugar. It is easy to prepare. Yeast is diluted with water and sugar, flour is added, and the mixture is left warm to ferment for at least 30 minutes, but usually takes about an hour. Readiness is determined by volume, appearance and smell. Yeast, interacting with sugar, releases carbon dioxide, which raises the batter. Ripe dough will increase in volume, become loose, and a sharp sour smell will appear. But the main sign of readiness is that it will begin to settle, as if to fall through - this means it’s time to knead the dough.
How to knead the dough
Flour and butter are added to the dough and bread dough is kneaded. You need to knead the dough until the bun is soft and smooth, about 10 to 20 minutes. At the first stage, the dough will be rough, dense, wet, and will tear when stretched. As you knead, certain processes occur in it, the state of the gluten changes, the dough becomes soft, elastic, and stops sticking to your hands. After kneading, the yeast dough is proofed to increase in volume. After one or two hours, the dough becomes fluffy, smooth, and easily takes the desired shape when molded.
Bread forming
You can bake homemade bread in the oven in different shapes: round, oval, loaf, brick. First, the dough is kneaded by hand to release carbon dioxide, then rolled into a bun or placed in a rectangular, round shape or on a baking sheet, where it is allowed to rise again. In some cases, immediately after kneading it is placed in the mold. There it fits, and then it goes into the oven. In order not to explain for a long time how to do what, I suggest watching a video on shaping round bread.
How to bake bread in the oven
The oven needs 15-20 minutes to preheat. Usually bread is baked at a temperature of 180-200 degrees on the middle tier. For the first ten minutes it rises, then the crust thickens and there will be no rise. The door should not be opened at first, so as not to disturb the temperature regime; the cold air may cause the dough to settle. Too high a temperature is also undesirable - the bread may tear at the top or sides. Cooking time and temperature depend on many factors, so it is better to follow the recommendations in the recipe, and in the future you can rely on your experience and intuition.
Happy baking! Your Plyushkin.
To make delicious bread, you don’t need to buy special equipment; it can be easily prepared in the oven. You can purchase a baking pan or shape it into a round loaf. Read the article and choose your favorite recipe for bread in the oven at home.
To prepare rye bread, two types of flour are mixed: wheat and rye. The first helps the dough become soft and pliable. For faster cooking, yeast is used.
Ingredients:
- water – 400 ml warm;
- sugar – 1 tbsp. spoon;
- salt - spoon;
- rye flour – 300 g;
- Sunflower oil – 2 tbsp. spoons;
- wheat flour – 300 g;
- dry yeast – 10 g.
Preparation:
- Pour warm water into a bowl, add salt and yeast.
- Add sugar. Mix.
- Leave for a quarter of an hour. During this period, the fermentation process will occur and a foamy “cap” will appear on the surface.
- Pour in sunflower oil and stir.
- Sift two types of flour through a sieve.
- Now you need to combine the dough with the dry mixture.
- Knead. The dough will turn out cool. Cover with a bag. Set aside for a couple of hours.
- The mass will increase the volume a couple of times.
- Knead. Place in the form. Cover with a bag. Leave for an hour.
- Set the oven to 180 degrees.
- Bake for approximately 40 minutes.
In baking, it is important to maintain temperature conditions when preparing dough and baking it.
A simple recipe for kefir without yeast
You can bake bread with a minimum amount of ingredients. Without the use of yeast, the product is healthy and tasty.
Ingredients:
- flour – 300 g wheat flour + a little more for kneading;
- kefir – 300 ml;
- salt – 1 teaspoon;
- soda - half a teaspoon;
- sugar – 1 teaspoon.
Preparation:
- Prepare the container.
- Pour a spoonful of kefir into the soda, thereby extinguishing it.
- Add to flour.
- Pour in kefir.
- Knead the dough, adding flour if necessary.
- The mixture should not stick to your hands, but do not overdo it with adding flour.
- Now the dough needs to rest. To do this, cover with a bag and leave for an hour.
- Roll up a round piece of bread.
- Use a knife to cut the top.
- Sprinkle with flour.
- Place in the oven.
- 220 degree mode.
- Time 50 minutes.
- Then switch to 200 degrees.
- Cook for half an hour.
- Pierce with a skewer; if it is dry, the product is ready.
Wheat custard bread in the oven
This bread differs from other cooking options in that the flour must be brewed with boiling water. This will make it light and porous. The mass will rise well, the crumb will be loose, the crust will be ruddy and thin. Homemade bread in the oven is the easiest and most successful option; it will definitely turn out delicious.

Ingredients:
- water – 150 ml warm;
- yeast – 15 g fresh;
- boiling water – 150 ml;
- Sunflower oil – 3 tbsp. spoons;
- salt – 1.5 tbsp. spoons;
- wheat flour – 410 g.
Preparation:
- Pour wheat flour (50 g) into boiling water.
- Grind the mixture with a spoon and leave until cool.
- Crumble the yeast into a bowl.
- Add sugar (tbsp), add salt. Grind.
- Pour in warm water.
- Add flour (50 g).
- Mix. For best effect, use a whisk.
- Leave for a quarter of an hour, the ingredients will work, the dough will grow.
- Sift flour through a sieve (200 g). Pour into container.
- Pour in the dough, stir.
- Place the flour mixture.
- Stir, add oil.
- Send the mixture to the table. Pour in the rest of the flour and knead the dough. Watch the consistency; the entire volume may not be needed. You should get a smooth, soft, springy structure.
- Roll into a ball.
- Coat the container with oil, place the ball, cover with film.
- Place in a warm place, avoid air flow, leave for an hour.
- Roll out using a rolling pin.
- Roll tightly, without pressing too hard.
- Prepare the oven by setting it to 180 degrees in advance.
- It is better to use a special rectangular pan designed for bread. Coat it with oil.
- Move the workpiece and cover it. Set aside.
- In half an hour it will grow and you can put it in the oven.
- After 30 minutes a golden crust will appear, remove.
How to bake with sourdough?
To make a successful bread, all products must be weighed.
Ingredients:
- flour – 45 g, you should choose whole grain flour;
- salt – 11 g;
- wheat flour – 340 g;
- warm water – 330 g;
- sourdough – 210 g.
Preparation:
- Prepare a tall dish and add the indicated flour.
- Place the starter.
- Pour in water. Knead.
- Transfer to the table, knead without adding flour.
- When the mass becomes smooth, add salt.
- Stir for a few minutes.
- Twist it to make a ball. Return to the bowl and cover with a bag.
- After an hour and a half, stir and cover again for an hour.
- Roll into a ball and place on a baking sheet. Leave for 17 hours. The temperature should not exceed 20 degrees.
- If there is not enough time to rise, leave more.
- Take a knife and cut the dough.
- Preheat the oven to 250 degrees.
- Place a baking tray.
- Cook for five minutes.
- Reduce to 220 degrees.
- Bake for half an hour.
With cheese in the oven
Very aromatic crispy bread.

Ingredients:
- loaf of bread with bran – 1 pc.;
- butter – 75 g;
- parsley;
- cheddar cheese – 100 g;
- garlic – 2 cloves.
Preparation:
- Wash the parsley, dry it, chop it.
- Finely chop the peeled garlic.
- Use softened butter. Stir in garlic and herbs.
- Make one and a half centimeter cuts in the loaf without cutting completely.
- Place the filling into the slits.
- Grate the cheese and sprinkle on each cut.
- Wrap in foil.
- Place in the oven.
- Heat the oven to 200 degrees.
- Time - quarter of an hour.
Whole wheat bread
The healthiest type of bread. Well suited for those who pay attention to their figure.
Ingredients:
- whole grain flour – 620 g;
- salt – 3 g;
- warm boiled water – 250 g;
- granulated sugar – 5 g;
- yeast - 3 teaspoons.
Preparation:
- Place yeast in water, add salt and sugar. Mix.
- Add flour (more than half).
- Knead the dough.
- Cover with a bag.
- Leave for an hour and a half. The place should be warm.
- After the mass has grown, add the rest of the flour.
- Knead.
- Grease the mold with oil.
- Lay out the workpiece.
- Cover with a bag.
- Give me another hour.
- The oven must be set to 200 degrees.
- Submit the form.
- Wait 2/3 hours.
With milk
Delight your family with natural, unadulterated bread by preparing tender, airy, aromatic pastries.

Ingredients:
- dry yeast – 10 g;
- sugar – 1 tbsp. spoon;
- sunflower oil;
- cow's milk – 300 ml;
- flour – 430 g;
- salt - half a tbsp. spoons;
- egg – 1 pc.
Preparation:
- Pour salt into heated milk and add sugar. Pour in the egg.
- Mix.
- Pour in the yeast.
- Place flour. Knead the dough.
- Cover with film and place in the oven or any warm place. Leave for about two hours.
- Knead.
- Transfer to a mold that has been coated with butter.
- Set 180 degrees in the oven.
- Cook until golden brown.
When the bread is cooked, cool it gradually, for example, by covering it with a towel. Do not place in the cold, as this will make the crumb sticky. Cut only after complete cooling.
Fast way in the oven
No store-bought loaf can replace home-baked goods. Due to their busy schedule, many housewives are afraid to try making bread at home. But you can prepare soft, airy pastries with a minimum of time.
Ingredients:
- wheat flour – 320 g;
- warm water – 210 ml;
- sugar – 1 teaspoon;
- sea salt - half a teaspoon;
- olive oil – 30 ml;
- dry yeast – 1 teaspoon.
Preparation:
- Pour all bulk products into a bowl and mix.
- Fill with water and oil.
- Knead. If necessary, add flour.
- The result will be an elastic workpiece that will not stick to the surface.
- Cover with film and leave.
- When the volume has tripled, knead. This will happen in half an hour.
- Roll into a loaf shape and cut.
- Place on a baking sheet for half an hour.
- Sprinkle with water.
- Transfer to oven.
- 200 degree mode
- After half an hour, the surface of the product will be covered with a golden crust. Feel free to take it out.
Made from corn and wheat flour
These are sunny baked goods with an amazing aroma and perfect porous structure.

Ingredients:
- wheat flour – 250 g;
- oil – 1 teaspoon;
- corn flour – 150 g;
- yeast - 1 teaspoon dry quick action;
- egg – 1 pc.;
- warm milk – 250 ml;
- sugar – 2 teaspoons;
- salt – 1 teaspoon;
- butter – 1 teaspoon.
Preparation:
- Pour sugar, salt, yeast into a container.
- Pour in the previously melted butter.
- Then milk.
- Stir until everything is dissolved.
- Pour in the egg. Stir.
- Add flour.
- Knead. Cover with film.
- Wait an hour.
- Mash the grown mass. If necessary, sprinkle with flour.
- Place in a pre-greased mold.
- Heat the oven to 195 degrees.
- Move the form.
- Cook for half an hour.
With added yeast
You will delight your family and surprise your guests at the festive table with aromatic, delicious pastries with minimal ingredients.
Ingredients:
- dry yeast – 1 teaspoon;
- warm water – 350 ml;
- salt – 10 g;
- wheat flour – 500 g.
Preparation:
- Pour water (60 ml) into the bowl and add yeast. Dissolve.
- Pour in the remaining liquid.
- Add some salt. Mix.
- Mix with flour. You will get a sticky mass. You can't put flour in it!
- Be patient and knead, stretching in different directions. The dough should absorb more oxygen.
- When it finally becomes smooth, roll it into a ball.
- Cover and leave for a couple of hours.
- When the volume increases, knead the dough.
- Transfer to a form coated with oil.
- Place in the oven (180 degrees).
- After 2/3 hours, take it out.
Homemade Borodino bread
By preparing this option, you will get the rich taste and aroma of familiar baked goods.

Ingredients:
- wheat flour (grade 2) – 170 g;
- sea salt – 1 teaspoon;
- rye flour – 310 g;
- rye malt – 4 teaspoons;
- honey – 2 teaspoons;
- sunflower oil – 2 teaspoons;
- pressed yeast – 15 g;
- cumin – 1 teaspoon;
- water – 410 ml;
- coriander – 2 teaspoons.
Preparation:
- To brew malt: pour boiling water (150 ml).
- Stir. Leave. It must cool completely.
- Pour warm water (150 ml) into another bowl, add honey, crumble the yeast and stir.
- After a quarter of an hour, the mass will increase in volume.
- Pour flour into a high container and add salt. Stir.
- Pour in the yeast base. Place the malt that has brewed. Add the remaining water.
- Add sunflower oil, stir.
- Cover and keep warm.
- After an hour and a half, put it into shape.
- Sprinkle with cumin, then coriander. Press lightly.
- Leave for 2/3 hours.
- Heat the oven to 180 degrees.
- Place the form.
- Cook for about an hour.
Baked goods prepared with your own hands at home are highly valued. Thus, freshly baked bread, exuding a unique aroma, already stimulates the appetite by its very appearance. Modern housewives are returning to traditions and prefer to cook homemade bread in the oven using dry yeast.
Benefits of homemade bread
Baking production technology often involves the addition of various preservatives. The store-bought product contains dextrose, soy flour, vegetable fat, vinegar, wheat protein, emulsifiers and food additives. This allows the manufacturer to improve the appearance and taste of the finished product and extend its shelf life. It is also possible to use low grade grain. These factors significantly reduce the beneficial qualities of store-bought bread.
Homemade baked goods have an unsurpassed taste. It's inexpensive and useful. Anyone can master the skill of making bread. Having acquired some skills in working with dough, you will be able to constantly delight your household with the most delicious and healthy bread. You can also experiment with different recipes by adding interesting ingredients.
What do you need to make delicious homemade bread?
In the old days, bread was baked in an oven. Today, many housewives have bread machines and multicookers in which they can quickly prepare it. Now we will learn how to prepare delicious bread, even without such special devices, using a regular electric or gas oven.

Every housewife has devices for baking bread at home. Otherwise, they can always be purchased at any supermarket. In order to bring this to life in the oven, you will need the following kitchen utensils:
- a large bowl in which it will be convenient to knead the dough;
- a wooden spoon or a special spatula for kneading the dough;
- baking dish (with thick walls and high sides);
- cling film to cover the dough (you can use a cloth napkin or a small towel).
The main ingredient for preparing the dish is yeast. The result of our efforts depends on their quality. The use of yeast makes the dough fermentation process fast and stable.
Types of dry yeast
Dry yeast (granulated) comes in two types:
- Active or sponge. They look like small balls. Yeast must be diluted in water, whey, milk until completely dissolved or a “cap” of foam is obtained.
- Unpaired. They look like a light brown powder. This product is used for baking quick bread. Yeast is simply mixed with flour and other ingredients.
Rye bread
There are many recipes for homemade bread with dry yeast that even a beginner can quickly prepare. Rye is considered one of the most useful, as it contains a lot of useful substances. Compared to wheat flour, rye flour contains more valuable microelements such as potassium, magnesium and iron.

For preparation you will need the following components:
- dry yeast - 2 teaspoons;
- rye flour - 5 glasses;
- water - 400 ml;
- salt - 2 teaspoons;
- refined sunflower oil.
Recipe step by step
Let's look at preparing the dish step by step:
- using a sieve.
- Add water, yeast and salt. The result was a dough made with dry yeast for bread.
- Knead the dough thoroughly and, covering it with cling film, place it in the refrigerator for 15 hours. The dough should increase approximately one and a half times.
- Remove the dough from the refrigerator and place it on a floured counter.
- Spread the dough by folding it overlapping on four sides. You should have a five-layer cake.
- Lightly flour the dough and leave it to proof on the counter, covered with a towel.
- grease with vegetable oil and place it in an oven preheated to 250 °C for 5 minutes.
- Carefully transfer the dough into a floured pan. Put it in the oven.
- Bake for 40 minutes. Homemade bread in the oven with dry yeast is ready!
White bread
To prepare wheat bread with dry yeast in the oven, you will need simple ingredients. This:
- wheat flour - 600 g;
- water - 400 ml;
- dry yeast - 1.5 teaspoons;
- sugar - 1 tablespoon;
- salt - 1 teaspoon;
- vegetable oil - 2 tablespoons.
Recipe step by step
The recipe for delicious bread in the oven involves the following steps:
- Pour water into a bowl, dissolve yeast and sugar in it. Add salt and sifted flour.
- Using a spoon, mix the mixture thoroughly. The flour should absorb all the water. Leave the dough for 5 minutes.
- Pour in vegetable oil and continue kneading. When the dough becomes elastic and stops sticking, leave it in a warm place for 4 minutes. Now you should knead it again. Then let him come again. Knead the dough again.
- Place the resulting ball into a baking dish. Leave it to come up one last time.
- When the dough has doubled in size, brush it with egg yolk or milk.
- Send the future bread to bake for 50 minutes in an oven preheated to 180°C.
Features of preparing dough
Experienced housewives advise taking the preparation of dough very seriously:
- Water for the dough should be heated to 35-40°C. Maintaining the temperature is an important condition. In cold water, yeast bacteria will not multiply, but in too hot water, they will die.
- Don't add all the flour at once. First, dissolve dry yeast, salt, sugar and a few tablespoons of flour in water. Stir the mixture with a whisk until the lumps disappear completely. The solution should have the consistency of liquid sour cream.
- Add the remaining flour to the water, but not vice versa. This will allow you to adjust it to the amount of liquid and not increase the volume of the finished dough by adding additional water.
- Dough made with dry yeast does not like drafts or loud sounds.
- The readiness of the dough will be indicated by its appearance: it should increase significantly in volume and become covered with bubbles.

How to knead the dough?
This question often arises among beginners. After all, this is the first time they are preparing homemade bread in the oven with dry yeast. Therefore, let us dwell on this stage of preparation in more detail.
- Wash your hands before kneading the dough. Kneading involves working with bare hands. Before touching the dough, remove all decorations from your fingers.
- Gather the dough into a pile. When you first touch it, it will have a fairly sticky consistency that will be difficult to pull together. Work with the mass, pressing and gradually creating a spherical shape. This should be done until the dough becomes homogeneous and stops sticking to your hands. If stickiness remains, sprinkle the mixture with flour, stirring it gently.
- Kneading. Gently push the dough forward by pressing your palms into it. “Hit” until it begins to spring back. Usually 10 minutes is enough. The kneading process should be rhythmic, not too slow. After this treatment, the dough will completely get rid of lumps and stickiness. Its surface will become smooth, shiny, and its consistency will be elastic.
- Test form. Now you should check whether the dough holds its shape. Roll it into a ball and leave it on your workbench. The shape of the dough after such manipulations should remain unchanged. Poke him with your finger. If the dough is ready, it will return to the shape of a ball.

The quality of the baked goods depends on the kneading. If done correctly, the prepared bread will be soft and have a beautiful crispy crust. If the dough has not been kneaded thoroughly, the product will end up flat with a hard, dense texture.
Cooking secrets
To make delicious bread, you should follow these helpful tips.
- Before kneading the dough, sift the flour through a sieve. This will fill it with oxygen and give the dough a porous structure. The baked goods will turn out fluffy and light.
- To avoid lumps in the dough, all ingredients should be added to the flour.
- At the initial stage, the dough must be kneaded in a bowl with a spoon. When it begins to separate from the container, kneading should be done by hand. Place the mixture on a table previously sprinkled with flour.
- To make the dough rise, that is, increase in volume, cover it with a towel and place it in a warm place. You can significantly speed up this process if you insert several straws into the future bread.
- Do not place the dough in a draft.
- The dough will increase in volume several times if you remove any air bubbles by kneading it a little with your hands.
- After the dough is placed in a baking dish, you should put it in a warm place for 20 minutes. The product will become even more magnificent.
- The future bread must be placed in the oven, preheated to the required temperature.
- A regular toothpick will help determine readiness. If it remains clean after piercing the product, then it is ready.
No one can resist the fluffy, tender crumb of bread with a thin golden crust. It is impossible to overestimate the taste and aroma of baked goods. Homemade bread with dry yeast is prepared quickly in the oven, and the result exceeds all expectations.
11Culinary Etude 01/24/2018

Homemade bread - the sound of these words is magical! It seems that a magical aroma penetrates your nose, and you feel your hand squeezing an elastic loaf and bringing it to your face. Such bread was not cut, but was necessarily broken into pieces
The familiar word “chunk” comes from the word “to break.” The baker's hands put a soul into the bread that cannot be wounded with a knife. Anyone can make bread at home. Even in an ordinary, antediluvian, Soviet-style oven without numerous functions, you can bake a real masterpiece with a crispy crust. Shall we check?
Dear readers of Irina’s blog, I have been baking homemade bread for many years. In the summer - in a small stove that lives in the yard, and in the winter - in the oven. Do you think that baking good bread at home is very difficult? Now I will give you recipes with photos that will convince you otherwise!

In the early nineties, I worked in a bakery for my husband's uncle. It was a small bakery, built back in the thirties by my uncle's father. Two hundred kilograms of bread came out of the vaulted oven every day.
Uncle Vasya kneaded the dough with his hands, and I shaped the bread. It was very hard work. I once joked that if only they could invent a bread that doesn’t need to be kneaded at all. Many years have passed, and a similar bread has appeared! It is called “no-knead bread.”

How to bake rye bread in the oven at home. Recipe with step-by-step photos
We will bake this loaf from a mixture of rye and wheat flour. Beginners in bread baking should not immediately take up baking bread at home from 100% rye flour - it is really difficult.
Pure rye homemade bread, like pre-war Borodino bread, should be baked only with sourdough. I recommend mastering simple recipes first, and then taking on more complex ones.
For beginners, I advise starting their baking journey with no-knead bread. It was invented by American baker Jim Lahey. A few years later, the recipe created a real sensation.
New York Times food columnist Mark Bittman, under the name “The Great Bread,” presented the amazing bread on the pages of a reputable and reputable publication after attending a baking master class.
Having seen quite a few gastronomic miracles in his time, Bittman was struck by the fact that with the help of ordinary household kitchen utensils, without special techniques and equipment, spending a tiny amount of physical effort, you can get fantastic quality bread with a thin crispy crust and a magnificent crumb.
The secret is that with prolonged proofing and sufficiently high humidity, gluten develops well, on which the condition of the dough depends. And the conditions under the lid of the cast iron pan in which baking is usually done provide optimal conditions for obtaining the famous crust. That's all!
The most famous recipe for bread in the oven
It is my pleasure to present to you the most famous recipe for oven-baked bread.
We will make the dough with dry yeast, but you can also use regular “wet” yeast. In the text, the word “pulish” refers to thick dough.
Poolish ingredients
- 180 g peeled rye flour;
- 180 ml water (25°C);
- One gram (0.25 teaspoon) dry yeast.
Dough ingredients
- all poolish;
- 420 g wheat flour;
- 250 ml water (18-20°C);
- Four tablespoons of fermented rye malt;
- Five tablespoons of boiling water (used to brew malt);
- 15 g sugar;
- 14-16 g salt.
First you need to make a thick dough. Pour heated water into a mug and add yeast.
Pour the water with yeast into sifted rye flour, placed in a bowl with a capacity of about half a liter, mix well with a fork, and place in a plastic bag for 180 minutes to rise. Ready poolish in the photo.

Sift the wheat flour (I use a three-liter plastic container), put all the dough, brewed malt, salt, sugar into it, pour in water.
Mix and rub thoroughly with your fingers until a homogeneous color is obtained.
The dough will turn out sticky and watery - that’s exactly how it should be. Do not add flour under any circumstances!
After half an hour, use a spatula to fold the dough into an envelope.

Close the container with a lid. Fermentation will occur for twelve hours at a temperature of 22-23°C.
After twelve hours, the dough will almost reach the “ceiling” and become “bubbly”. Now you need to dump it on the table, thickly sprinkled with rye bran, wheat or rye flour.
Fold into an envelope using a spatula.
Load into a wicker basket or any suitable container (after placing a clean cloth in it, onto which flour or bran is generously sprinkled).
The seam should face up. In other recipes the opposite recommendation is found. Try this and that. Choose what is most convenient for you.
To be sure, sprinkle a little flour on top and wrap the edges of the towel. Allow to proof at 22-23°C for ninety minutes. The photo shows the suitable dough.

Turn on the oven, heat to 200°C. Twenty minutes before sending the bread for baking, place a container with a lid in the oven. The best thing is a massive cast iron pan. My household does not have this luxury. I used a well-worn enameled, holey “pensioner”.
After twenty minutes, remove the dish from the oven, open the lid, and pour out the risen dough.
Replace the lid and return the pan to the oven.
Bake for fifty minutes. Reminding that each oven has its own character, to which you need to adapt. You may need more time to bake the loaf.
Remove the finished product from the oven, wrap it in a towel, and let it cool completely. You can eat homemade rye bread after three to four hours, otherwise it will seem damp. The photo shows a cross-section of the product.

Homemade wheat bread. Simple, proven recipe
This is a no-knead wheat bread recipe. I suggest this as the simplest one, tested many times. Look how cute the homemade bread is in the photo.
You always want to come back to it; it captivates with its ease of implementation, minimal amount of yeast, delicate, porous crumb and excellent taste. I won’t say anything about the aroma - you can add a lot of superlatives yourself!
Ingredients for the dough
- 250 g wheat flour;
- 90 ml warm (30°C) water;
- 60 ml yeast water;
- 4 g salt.
Yeast Water Ingredients
- 200 ml warm (30°C) water;
- 1/4 teaspoon dry yeast.
Dough ingredients
- The whole dough;
- 250 g flour;
- 180 ml water;
- 1/4 teaspoon dry yeast;
- 4 g sugar;
- 4 g salt.

How to bake in the oven
Let's make yeast water. To do this, dissolve a quarter teaspoon of yeast in water. Let's pour out the 60 ml we need from the resulting liquid. This can be done using a beaker or a regular disposable syringe. We won't need the rest of the water.
Mix all the components of the dough in a bowl with a capacity of about one and a half liters. We will place it in a plastic bag for twelve hours. Ambient temperature - 22-23°C.
Sift the flour into a deep container, add salt, sugar, yeast, water, all the dough, mix with your hands, eliminating any lumps. Place the container in a plastic bag.
After fifty minutes, use a regular plastic paint spatula to fold the dough into an envelope and leave to ferment for another 1 hour and 20 minutes.
Generously cover the table with flour through a strainer, tip the liquid risen dough into it, shape the bread, place it on a sprinkled linen towel placed in a bowl with a diameter of approximately 24-26 cm, sprinkle flour on top, cover. Let rise in a warm place for 90 minutes.
Bake in the same way as rye bread in the oven, only 40 minutes. Remove from the oven, wrap in a towel, and place on a wire rack to cool.
Here you can clearly see the process of preparing a similar product. The video is in English, but everything is clear.
Homemade yeast-free bread recipe
Sometimes homemade sourdough bread is called “unleavened”. This is not entirely correct, since sourdough, in addition to lactic acid bacteria, also contains yeast. Only you bred them yourself, and didn’t buy them in a store.
I want to introduce you to yeast-free bread - we will bake it with soda. Country Soda Bread is quite popular in Ireland. For beginners in bread baking - a real find!
Yeast-free homemade bread turns out fragrant, somehow very homely, rustic. It exudes the comfort and warmth of home. It stays fresh for no more than a day. Then it’s better to make toast or toast with eggs. But usually he does not live to see the second day of his life.
I give you a simple Irish recipe for bread without yeast in an almost authentic version. It is not at all difficult to prepare it at home. I will be glad if you like it!
Ingredients
- 385 g of premium wheat flour;
- 135 g whole grain wheat;
- 320 ml buttermilk, whey or kefir;
- One teaspoon of soda.
How to bake
Mix sifted flour with salt and soda. Make a “well”, gradually pour liquid into it, knead a pliable, sticky dough, dump it on a table dusted with flour.
Knead without fanaticism, roll into a ball. Make cross-cut slits at the top, 1-2 centimeters deep.
Bake in the oven at 200°C for half an hour - forty minutes. Check readiness with a toothpick - it should come out dry from the thickest part of the loaf.
Wrap the finished homemade bread in a clean cloth and cool.

Yeast-free bread at home with hop sourdough
I have already said that any homemade sourdough bread is only conditionally “yeast-free”. Any starter contains yeast that you have grown. But there are no “store” ones in it - that’s true.
Ingredients
- 420 g flour;
- 280 ml water;
- Two teaspoons of liquid honey;
- 5 tablespoons of hop starter;
- One heaped teaspoon of salt;
- Vegetable oil.
How to bake
Pour 120 ml of lukewarm (30°C) water into a bowl, add starter, honey, a couple of tablespoons of flour, and stir. You will get a mass of thick sour cream - “fed” sourdough or sourdough. It should “come to life” and “bubble” after about 120 minutes of being warm.
Add the remaining sifted flour, warm (30°C) water, knead a soft, wet dough. The mixture will be quite lumpy at first - no big deal.
Wet your hands with vegetable oil, knead until smooth, cover the dishes with film, and leave to ferment at a temperature of 22-23°C for 14-16 hours.
We form a loaf and bake it in the same way as homemade rye and wheat bread without kneading. The baking process in the oven takes approximately 50-60 minutes. Hop bread is placed to proof not only in a round shape, but also in an oblong shape. In this case, it is convenient to bake it in a cast iron casserole dish.
Sourdough for homemade hop bread
Ingredients
- 500 ml water;
- A glass (250 ml) of dry hop cones;
- 1 dessert spoon of honey or sugar;
- 60 g flour.
How to cook
Pour a glass of hops into boiling water (tamp the cones well in the glass). Cook over low heat until the water is reduced by half. Strain and squeeze out the hops. Leave in a warm place overnight or for 8 hours.
Add honey or sugar, flour, stir, leave for 36-48 hours in a warm place. When the volume of the starter doubles, it “bubbles” properly and begins to fall, then we can talk about its readiness. We store the ripened homemade starter in the refrigerator.
Here is a video where you can see how to make homemade sourdough bread from fresh hop cones.
Borodino bread at home according to a recipe from 1940
To bake delicious homemade Borodino bread in the oven, you need to prepare a starter for rye bread and perform a number of technological operations that are quite difficult for a beginner. The proposed video shows in great detail and accurately how to bake real Borodino hearth bread at home according to a recipe from 1940.
Dear readers of Irina’s blog! I hope that my simple recipes for homemade bread will give you the desire to bake a fragrant loaf for the joy of everyone at home. If you have any questions, write them in the comments to this article - I will definitely answer everyone.
See you again!
With sincere wishes of good health and good luck.
Irina Rybchanskaya, blog author Essay by a Culinary Amateur
Dear friends, January 27 marks the Day of the complete lifting of the siege of Leningrad. The happiest period of my life is associated with the great CITY - being a student. The romance about Leningrad performed by the brilliant Andrei Mironov, I hope, will evoke in you the same feelings as in me - pure tears of love and admiration for courage and fortitude.
see also


