Part of the ancient folk costume for men in Norway is the bactus. This wardrobe element has found its role in today’s times. This is a fairly versatile item that you can easily knit with your own hands. It is worth consciously approaching the choice of shape, pattern and color.
Option "Breakwater"
To knit this product, use the diagrams and descriptions for knitting bactus. So, prepare a yarn of medium thickness. The value of 150 or 200 g depends on the length of the future product. Prepare a marker and knitting needles No. 3, 4.

You can distinguish such varieties, as can be seen in the photo of knitting bactus.

The front surface is used for these purposes. This means using exclusively knit stitches in the knit rows. In purl rows it is necessary to use purl loops.

The next option is to use purl stitch. It is performed in the opposite order to the previous type. That is, purl loops are used in the front rows, and knit loops are used in the purl rows.


If you are interested decor We suggest visiting the website of our partners.
Description
It is worth considering in more detail the instructions on how to properly tie bactus. The process occurs in three steps, each of which has its own characteristics and distinctive points. They are worth paying attention to.

During the first stage, the mating process begins. Use simple knitting patterns for beginners to ensure the product turns out the way you planned. Over time, you can complicate the technique, improving your skills.

Cast on 3 loops, knit row 6 in stockinette stitch. Then add 1 stitch inside and place a marker. After this, you should change the pattern, knit 6 rows with purl stitch. At the end, do not forget to repeat the previous step - add 1 loop.

It is necessary to repeat this step-by-step knitting of bactus with your own hands until the product reaches a length of 40 cm. You should be careful, add one loop on each side, alternate different types of satin stitch.

The next step is to obtain a rounded profile. To achieve this effect, you need to add 1 loop inside in the 4th row. On the outside, 1 loop should be removed. The length of subsequent knitting should be approximately 30 cm.

The last stage is to achieve even greater inversion. To do this, you need to close 4 loops at the beginning of the 6th row. Then you should add 1 loop. The increase occurs at the end of the row in even numbers, at the beginning - in odd numbers of rows. The result is aesthetic, attractive teeth.

After this, you need to tie the product to the length you need. Close the loops using knitting needles No. 4, a beautiful and original scarf is ready.


Simple options
It is worth noting that bactuses made in the classic style are made using garter stitch. In this case, all loops are knitted with facial loops. Carius is knitted with stockinette stitch, for example. This is one of the interesting varieties of triangle.

The advantage of such models is that in cold or rainy weather they will definitely keep you warm. This product is universal, suitable for both parents and children.

For beginners, the process is not difficult. To do this, you need to familiarize yourself with the master class on knitting bactus with knitting needles. In general, to knit a stylish, quite beautiful charm you will need approximately 1 - 2 skeins of yarn. For knitting, the best option for knitting needles would be No. 4, 5. The positive thing is that the fabric rises quite quickly during the process.

Note! You should not knit on thin spitz dogs. This is unacceptable for knitting bactus, as tight knitting looks a bit rough. It is not able to form soft folds, which makes the product uncomfortable to wear.


During knitting, you should guide the needles from the tip to the center, gradually moving to the other end of the scarf.

Experienced professionals advise beginners to pay attention to the following nuances. It is necessary to make yarn overs in order to increase the fabric, knitting with rolled knit stitches in the purl rows. Use a centimeter to measure the exact middle of the product. The optimal width of bactus is considered to be 28-30 cm.


If you are interested in a detailed overview of modern home appliances, we recommend visiting the Internet resource: tehnikaportal.ru
The product is quite fashionable, it can complement not only a winter look, but also a summer one. It is necessary to combine stylish details and show imagination.

conclusions
A truly beautiful and versatile product that is a must-have in your wardrobe is bactus. There are many options for its manufacture. Use the diagrams and follow the advice of the masters to ensure that your product is the best.

Choose the technology that suits you and make your dreams come true.


Photo of bacti with knitting needles


Bactus is a triangular knitted scarf (or headscarf) that can be made in various patterns and complemented with pom-poms or decorative beads. This product is knitted quite simply and quickly, and even beginners can do it. Baktus with knitting needles is performed in two main ways:
- Knitting begins from one of the side ends of the product, followed by adding and then decreasing loops.
- Knitting begins from the middle of the product, followed by adding loops in each odd row.
To make our bactus, we used the second method. In this case, you can try on while knitting and stop at any time when the required size of the product suits you completely.
As part of our master class, a small bactus was knitted for a 6-year-old girl. Its dimensions were as follows: width 102 cm, sides 63 cm.
YOU WILL NEED
- (50 g/160 m, 55% cotton, 45% polyacrylic) 2 skeins;
- №4 – 4,5;
- scissors;
- hook.
PROCESS DESCRIPTION
The peculiarity of knitting bactus from the center is that in each row the first three and last three loops will be edge loops. We will knit them with knit stitches behind the front wall in EVERY row (including purl rows).

- the first yarn over is made after the first three edge loops at the beginning of the row;
- second yarn over just before the center loop;
- third yarn over immediately after the center loop;
- fourth yarn over before three edge stitches completing the row.
These steps must be repeated on every odd (front) row.

 The bactus we described is one of the simplest to perform, and is intended mainly for beginning craftswomen. The general principle of making this product is standard, however, to complicate the task, you can choose any pattern or combination of patterns, then the process will be a little more complicated, and the result much more interesting. The main thing is to turn on your imagination!
Triangular scarves or bacti have slowly but surely taken over the knitting world. And this is not surprising. After all, if a classic shawl requires a certain look (especially an openwork one), then bactus will easily fit into almost any wardrobe. And you can knit such a scarf from almost any yarn.
In total we will consider 5 options for knitting scarves:
Classic triangular
Semicircular
With a wide central part
Tied from bottom corner
Scandinavian scarf.
For each option, a general description will be given, according to which you can knit bactus from any yarn.
⠀
Recommendations for choosing yarn
For the winter you can take alpaca, alpaca with wool, smooth or fluffy in a cord.
Merino and any mixtures with it, cashmere, yak are suitable for autumn and spring.
For the summer, you can knit a scarf made of linen or cotton.
The average yarn consumption for a scarf is about 200-250 grams, depending on the meter of yarn.
The optimal footage is 250-300 meters per 100 grams of yarn and knitting needles 3.5-4.
The knitting should not be tight, the fabric should be flexible and drape well.
Part 1. Classic triangular scarf

Triangular scarf knitted from the middle.

The triangular scarf is the most common type of scarf. It is knitted from the middle and takes the shape of an isosceles triangle by making four increases (two along the edges and two around the central loop).
Design options:
Stockinette stitch with the addition of shadow patterns;
Front stitch with the addition of openwork patterns;
Original design of the central loop (patent loop, several loops, “pigtail”, etc.);
Knitting a scarf in stripes of yarn of different colors;
Various options for making increases: * yarn overs knitted with a simple loop (then we get a hole in the place of the increase), * yarn overs knitted with a crossed loop (there is no hole in the place of the increase), * increases from a broach, * raising the loops of the bottom row.
As you can see, there is a lot to choose from, it all depends on what yarn you are knitting with, for what season and in what style. Medium weight yarns (e.g. wool, wool blends, merino, merino blends) look great in scarves without holes, with the addition of simple shadow patterns and garter stitch. From thinner yarn you can knit a light scarf with openwork, you can use thin merino with silk or summer yarn.
So, the principle of knitting a classic triangular scarf very simple.
To beautifully design the beginning of knitting, you need to make a set of loops with a “ribbon”.
To do this you will need waste thread (preferably cotton) and a hook. From a waste thread you need to crochet a chain of 4-5 air loops and secure the thread. In the tubercles of the resulting loops, cast on 3 loops with a working thread and knit 7 rows with garter stitch (knit all loops in each row). Lumps form on the edge; they need to be picked up with the left knitting needle and knitted. Then unravel the waste thread, while simultaneously removing the loops on the left knitting needle. They can also be knitted with knit stitches. As a result, there should be 9 loops on the right needle. The three loops along the edges form the border, and the central ones form the body of the scarf.
Row 1: K3, yo, knit to marker, yo, re-slip marker, k1 (center stitch), re-slip marker, yo, knit to last 3 stitches, yo, k3.
Row 2: K3, purl to last 3 stitches, k3.
That's all! The principle of knitting is these two rows. In the front rows we make increases (in the description these are yarn overs), in the purl rows we knit everything according to the pattern (or according to the pattern, if you add it). Yarn overs can be knitted with a simple purl (then there will be a hole in the place of the increase) or a crossed loop (then there will be no hole).
Part 2. Semicircular scarf
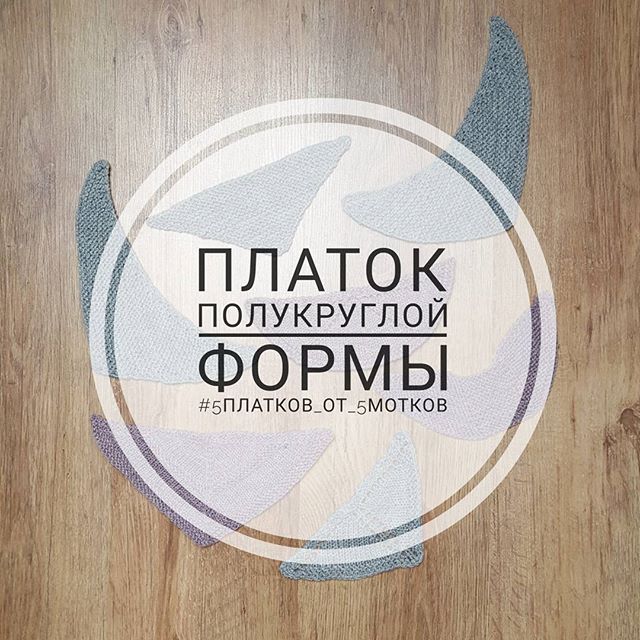
Semicircular scarf.


This scarf is knitted similarly to a triangular one, but increases are made in other places, due to which the scarf takes on a semicircular shape.
Increases can be made in various ways, by yarn overs, from broaches, by lifting the loop of the bottom row. If you knit the yarn overs with a simple loop, there will be a hole in the place where the increase is made; if it is crossed, there will be no hole. The scarf in the photo is knitted from Naturafil Alpaca Nublado yarn
from three skeins.
Design options:
Stockinette stitch with the addition of shadow and/or openwork patterns;
- knitting in stripes from plain and sectionally dyed yarn (2 rows of one yarn, 2 rows of colored yarn). This option looks very impressive, especially if the stripes are made of yarn in contrasting colors. When knitting in strips 2 rows wide, you do not need to break the thread each time. If you change the thread at the beginning of each front row and do not tighten the threads, then their change will be almost imperceptible.
Original border along the body of the scarf. This scarf model allows you to knit a border along the body. The simplest version of the border is garter stitch, which will repeat the border that runs along the edges of the scarf. More complex - various variations on the theme of leaves, diamonds and even braids.
Description of knitting
The beginning is a set of loops with a ribbon.
To beautifully design the beginning of knitting, you need to make a set of loops with a “ribbon”. To do this you will need waste thread (preferably cotton) and a hook. From a waste thread you need to crochet a chain of 4-5 air loops and secure the thread. In the tubercles of the resulting loops, cast on 3 loops with a working thread and knit 7 rows with garter stitch (knit all loops in each row). Lumps form on the edge; they need to be picked up with the left knitting needle and knitted. Then unravel the waste thread, while simultaneously removing the loops on the left knitting needle. They can also be knitted with knit stitches. As a result, there should be 9 loops on the right needle.
Row 0: K3, P1, place marker, P1, place marker, P1, K3.
Row 1: K3, yo, knit to marker, yo, knit to marker, yo, knit to marker, knit over last 3 stitches, yo, k3.
Row 2: K3, purl to last 3 stitches, k3.
Repeat rows 1-2 until the scarf reaches the desired size. After this, you can perform 3-5 rows in garter stitch and bind off the loops.
Or tie a border along the body of the scarf, while simultaneously closing the loops of the body.
After the body of the scarf of the required size is knitted, a certain number of loops are cast on the knitting needles to knit the border.
The border is knitted in turning rows, with the last loop of the border being knitted together with the body loop closest to it, thus joining the border to the body and closing the loops of the body of the scarf.


Part 3. Shawl with a wide central part

Shawl with a wide central part.


The principle of knitting such a scarf is 4 increases in each front row: one on each edge and 2 along the central part.
The easiest way to knit this type of scarf is garter stitch (in all rows all stitches are knitted).
In this case, the scarf turns out to be very flexible, especially if it is knitted from chain yarn.
You can wear it with the wide part forward, placing the ends behind the neck. The width of the flat part in this case should be approximately equal to ¼ of the circumference of your chest.
You can diversify this model by knitting various patterns in the central part - openwork, shadow or relief patterns. In this case, the scarf will have a face and a backside.
Description of bactus in garter stitch .
Knitting a scarf with a wide central part begins with a simple cast on. The number of loops is equal to the number of loops in the central part + 6 loops. For example, the central part is 30 sts. Then you need to cast on 36 loops on the knitting needles and mark the central 30 loops with markers when casting on.
Abbreviations:
faces - front loop;
PN - right (reverse) yarn over - throw the working thread onto the right knitting needle, moving from left to right, under the thread;
LN - left (straight) yarn over - throw the working thread onto the right knitting needle, moving from right to left.

Row 1: K2, PN, K1, PN, re-shoot marker, K30, re-shoot markers, FN, k1, FN, k2.
2nd row: knit all the loops, while knitting the yarn overs crossed, the right ones - behind the back half-loop, the left ones - behind the front half-loop.
Row 3: K2, RS, k to marker, RS, re-slip marker, K30, re-slip marker, FN, k to last 2 stitches, FN, k2.
Row 4: knit all rows, knit yarn overs crossed.
Repeat 3-4 rows. Close the loops freely, like front ones.

Part 4. Scarf from the corner
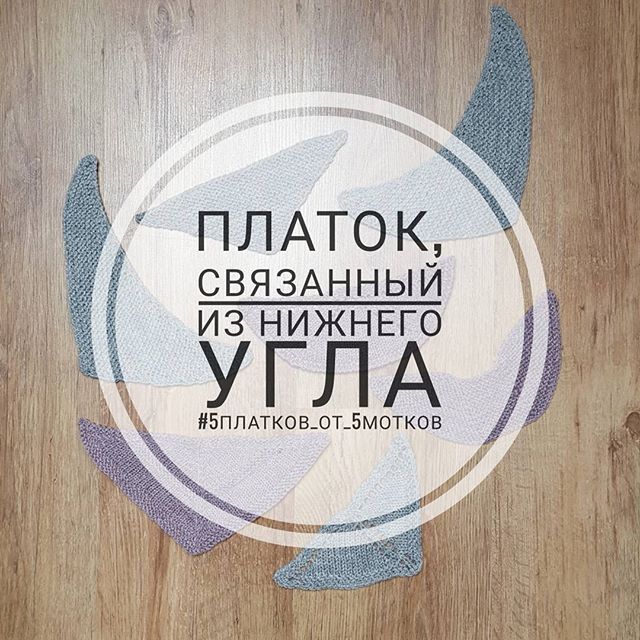
Scarf knitted from the bottom corner.
This is the simplest scarf of all the options. This scarf is best knitted from yarn with an unusual texture, fluffy, or boucle.


In the photo, the scarf in the color of a dry rose is knitted from Nako Paris yarn, and the dark purple one is made from Naturafil Superfine Alpaca delgado yarn. In both cases, the yarn consumption is 200 grams. The lilac bactus alternates stripes of stockinette and garter stitch.
This scarf is knitted from the bottom corner, 2 increases are made in each front row, due to which the bottom corner is sharp. But it also depends on how you block the scarf.
It is important to remove the edge loops as knit stitches at the beginning of each row, and purl them at the end so that an elastic braid is formed along the edges.
Design options:
Garter stitch;
- alternating stripes of knit and purl stitch or garter stitch;
- adding openwork patterns.
Description of knitting.
Cast on 3 stitches on needles.
- Row 1: remove the edge, yarn over, knit 1, yarn over, purl the edge.
- Row 2: remove the edge stitch, knit to the last stitch, purl the edge stitch. Knit yarn overs crossed
- 3rd row: remove the edge, yarn over, knit to the last loop, yarn over, edge - purl.
- Row 4: remove the edge stitch, knit to the last stitch, purl the edge stitch.
Repeat 3-4 rows until the scarf reaches the desired size, close the loops loosely, like front ones.


Part 5. Scandinavian scarf
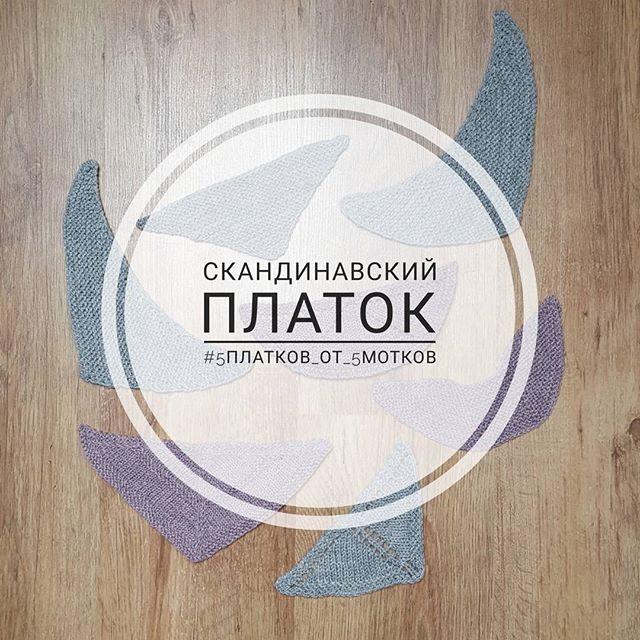


This is the most difficult scarf to make. The triangular shape is formed by simultaneously performing increases and decreases on both sides of the scarf.
There are two possible knitting options - from the wide side to the corner and from the corner to the wide side. In both cases, the shape of the scarf is the same.
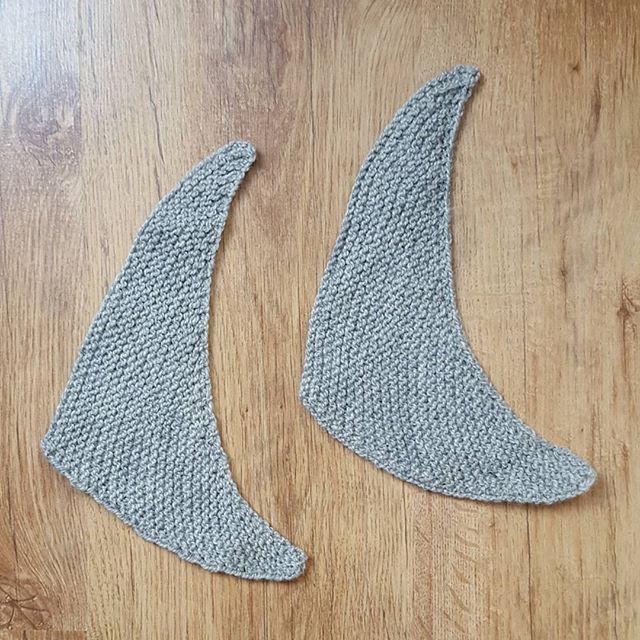
In the photo with samples, one is knitted from the corner, and the second from the wide part. As you can see, the difference is barely noticeable. But we will consider both knitting options.
Design options:
- garter stitch knitting,
- adding openwork and shadow patterns (some patterns require knitting from bottom to bottom, in this case it is more convenient to knit from the wide part to the corner),
- tassels at the ends of the scarf.
Classic version- This is knitting from the wide part to the corner.
A certain number of loops are cast on the knitting needles, then in each front row 2 decreases are made from the right edge of the scarf, and in every second front row (that is, the 4th row in a row) - increases from the left edge of the scarf.
When knitting this way, you need to know exactly how many stitches you need to cast on to start knitting. To do this, you need to knit a sample, wash and dry it, calculate the knitting density and find out how many loops you need to cast on to ultimately get 130-140 cm along the edge of the scarf.
Another important feature is that on the decrease side the edges must be knitted at the beginning and at the end of the row (at the beginning - knit, at the end - purl), and on the increase side at the beginning of the row, remove them, and knit purl at the end.
Second option- knitting a scarf from the corner towards the wide part. In this case, increases are made in each front row (2 loops are added at a time), and decreases are made in every second front row. At the same time, there is a peculiarity of knitting edges. On the increasing side, knit the edges at the beginning and at the end of each row (knit at the beginning, purl at the end), and on the decreasing side, remove them at the beginning of the row and purl at the end.

Description of knitting option 1 from the wide part (for Naturafil Merino medium yarn, 100% merino wool, 90 m in 50 g).
Cast on 180 stitches on size 6 needles. Continue knitting with knitting needles No. 5.
Installation row (wrong side): all stitches are knit.
1st row (face): 1 knit, 2 loops together with a tilt to the right, 2 loops together with a tilt to the right, knit to the last loop, purl.
Row 2 (wrong): remove the edge, purl to the end of the row.
Row 3 (knit): k1, k2tog, k2tog, knit to last 2 stitches, increase, k1, p1.
Row 4 (wrong): remove the edge, purl to the end of the row.
Repeat from rows 1 to 4 until there are 3 loops left on the knitting needles, knit them together. As you knit, add patterns (shadow and/or openwork) at your discretion. There is an excellent video on knitting a Scandinavian scarf from a wide edge on the channel Svetlana Kolomiets. We recommend watching it if you need a more detailed analysis of knitting.
Option 2 of the Scandinavian scarf - from the corner.
I repeat that the shape of the scarf turns out to be identical to the first one, you just need to close the loops of the last row more loosely so as not to tighten the edge.
Description:
Increase - knit 2 from one loop, knitting it first at the back, then, without removing it from the left knitting needle, at the front wall.
Cast on 3 loops.
Set-up row: k1, increase, p1.
Row 1: k1, inc 2, p1.
Row 2: Slip 1, purl to end of row.
Row 3: knit 1, increase 2, knit 2 together tilted to the right, purl 1.
Row 4: Slip 1, purl to end of row.
Row 5: k1, inc 2, knit to last stitch, purl 1.
Row 6: Slip 1, purl to end of row.
Row 7: k1, 2 increases, knit to last 3 stitches, k2 together with a slant to the right, purl 1.
Row 8: Slip 1, purl to end of row.
Repeat rows 5 to 8 until the scarf reaches the required size. Cast off the stitches loosely using larger needles.
If you knit stitches in the purl rows (except for the edge stitches), you will get a garter stitch bactus. In this case, patterns are not needed.
https://5motkov.ru/blog/view/2243/
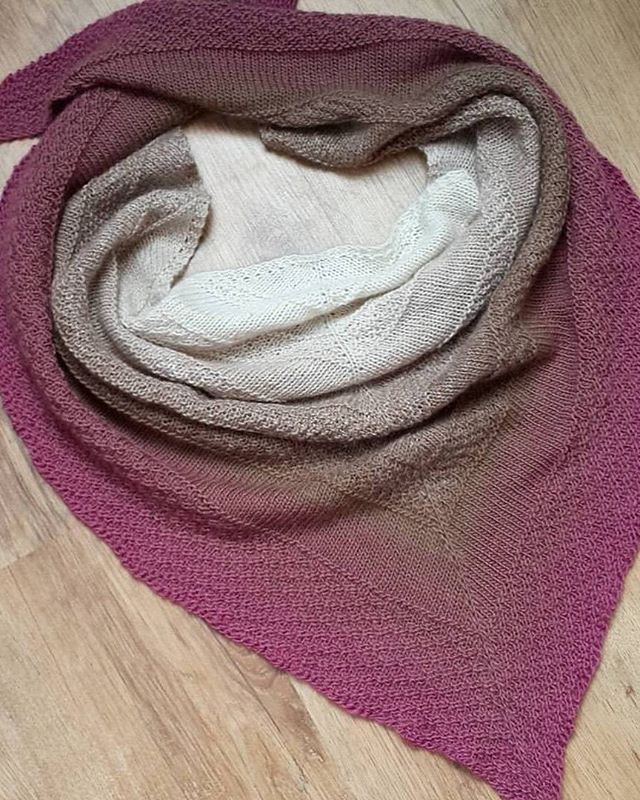
Baktus is an interesting neck accessory that has become very popular recently. This is a triangular scarf or scarf that is tied around the neck with a middle angle forward. Bactus is a wonderful and interesting alternative to a snood or scarf. It can be intended only for beauty and completing the image, or it can be warm, woolen, and in addition to the aesthetic function, also perform a practical, warming one. Let's take a closer look at how to knit such a warm, yet very beautiful and stylish bactus with knitting needles.
For work we will need:
- Yarn. For this model, the sectional dyed thread Alize lanagold batik was chosen. Coloring such a thread creates an interesting effect of transition of shades in the product.
- Knitting needles No. 3 or 3.5.
- Beads with a wide hole for decorating the ends of bactus – 6 pieces.
- Scissors.
When everything is ready, let's start. It's important to understand the principle when working on this thing. Knitting is very simple and fun. We use 3 types of knitting:
- Stockinette stitch or stockinette stitch. In the front rows there are facial loops, in the purl rows there are purl loops.
- Net. Knit row: Yarn over, 2 together and repeat until the end of the row. Purl row - purl all stitches, including yarn overs.
- Garter stitch: knit stitches in both purl and knit rows.
These are simple types of knitting that even beginners can do.
Now in detail the stages of creating a bactus:
Bactus is a triangle. We start knitting from the center of the longest side of the triangle.

We put 2 loops on the knitting needles and knit 6 rows in garter stitch.

There are 2 loops on the knitting needle, raise 5 more loops, returning along the side of the knitted bar. In total there are 7 loops on the knitting needle.

We distribute the loops like this: 2 – the edge of the bactus, we always knit them in garter stitch, that is, always with knit stitches. 1 loop – the beginning of the main fabric of one side of the bactus, 1 central loop, 1 loop – the beginning of the second side of the bactus and 2 outer loops. This will be the base on which we will make additions on both sides of the central loop to expand the bactus fabric. You can hang a marker on the central loop, but when knitting it will be visible anyway.
Next we knit as follows.
All front rows: 2 outer loops in garter stitch, add a loop from the broach between the loops, then all the front loops of the bactus fabric to the central loop. Yarn over in front of the central loop and knit the central loop. Next, everything is in a mirror image: after the central loop, yarn over, knit all the loops up to the outer two, increase from the broach between the loops, the outer 2 loops in garter stitch. We knit the wrong side like this: the last two loops are in garter stitch, we add a loop from the broach between the loops, then purl all the loops, including yarn overs to the outer two loops, again we add a loop from the broach between the loops, the last 2 loops are in garter stitch.

Important! We make additions in the front rows after the last 2 loops from the broach, on the sides of the central loop of the yarn over and again before the last 2 loops from the broach. In purl rows only near the outer loops from the broach.
This way we knit any number of rows. This will be the smooth part, which we will alternate with mesh. Before starting and after the mesh, it is important to knit 1 row from the wrong side with facial loops.
We knit the mesh according to the same pattern with the same additions: add after the 2 outer loops from the broach

and on the sides of the central loop

Only in the main fabric we do not use stocking stitch, but a mesh stitch. After the mesh, we knit the purl row of the main fabric with facial loops. This way we will have a beautiful relief frame on both sides of the mesh.
Alternate rows of stocking stitch and mesh as you want

We knit the edge of the bactus in several rows (5-6 rows) in stocking stitch and close the loops.
The bactus itself is ready. Now let's decorate it with tassels. To do this, we will make three tassels from the threads that are left over from knitting:
We wind the thread several turns (35-45) around 4 fingers of the palm.

We pull a piece of thread from one edge and tie it tightly.
We form the head of the brush by pulling it with thread.

String a couple of beads on top of the tassel.

Now we tie the tassels along the edges of the bactus and hide the thread. The stylish accessory is ready.

Baktus have long replaced scarves for many. They look very feminine and gentle. In this master class we will knit a soft and beautiful bactus. Here is a simple pattern that anyone can master.
To knit bactus we will need:
- Yarn Alize angora gold – skein;
- Knitting needles No. 4.
How to knit bactus with knitting needles
First you need to cast on 13 stitches.
For bactus, you can take a skein of a single color or with batik colors. You can also simply use 2-3 skeins of different colors.
And then we knit a row with purl loops. Now we perform the front row with facial loops. And in it we will decide on the edge and central loop. We knit 3 edge stitches (they can be knitted in stockinette stitch, purl stitch, or garter stitch). Next, we make an increase by doing a yarn over. We knit 3 more loops. And we make a yarn over. Now we knit 1 loop (this is the center of the bactus) and yarn over again.
We knit 3 loops. And we make a yarn over. And then we knit the remaining 3 edge loops. We knit the purl row with purl loops. In those places where we have yarn overs, holes have formed.

Next we will repeat knitting. That is, we knit 1 row of the front row and make increases in it after and before 3 edge stitches. And we also perform increases before and after the central loop. We do not make any increases on the purl row.

Having knitted several rows, the places of increases will already be clearly visible.

We knit 23 centimeters (if you measure the middle of the bactus) and move on to the openwork strip. We knit it like this. In the purl row we knit all the stitches except the central one with knit stitches. You will get a groove on the front side.

Next we knit the front row. And 1 purl regular. Then we knit 3 edge stitches. Next we make a yarn over and knit 2 loops together. Yarn over and 2 loops together again. And so on to the edge loops. We should alternate yarn over and knit stitch. Before the edges, we make a yarn over and knit them.

Next we knit the purl row. And then the facial one. In the facial increase. Now from the wrong side we knit the front row again so that a groove of purl loops appears on the front side of the bactus.

And then we knit 7-10 centimeters simply as we knitted before the pattern. That is, alternating the front row with yarn overs and the purl row.
