Probably, it happens to many that you want something sweet and tasty, but you don’t feel like baking at all. There is not always a desire, free time. And then cakes without baking come to the rescue. There are a huge number of them on the Internet now. And it can even be difficult to figure out which recipes are delicious and which are not! What is worth cooking, and what is not worth it. So that later it would not be a pity for the time and money spent.
I want to present to your attention a cake that is easy to prepare, it turns out very tasty. It costs very little. And even less cooking time. It can be considered a cake, or just a delicious dessert.
During the time that I have been preparing such a cake, there has not yet been a single person who would refuse to eat a piece. Not only that, everyone will certainly ask for more supplements. And usually, after the cake is put on the table, after 10 - 15 minutes there is not a single, even the smallest piece left of it.
Children are generally ready to eat it at least every day. My granddaughter, having eaten it the day before, comes back the next day and asks if there is any cake left. And not only the granddaughter, the husband also looks into the refrigerator, and not finding it there, wonders “why she did so little.” And all because there is not much of such a dessert.
Such a dessert cake is especially good in the summer. When you take it out of the refrigerator, with fresh fruits and berries, it is simply impossible to resist such a delicacy.
Let's make this cake today. Summer is just around the corner, there is an abundance of berries and fruits on the market. When, if not now, to prepare it.
Jelly cake without baking - a very tasty recipe
Fruits and berries can be used absolutely any. The ones you have in the fridge, or the ones you love. You can also use only berries, or only fruits.
Biscuit for the cake can be purchased ready-made, or you can bake it yourself. In the recipe, I will give two options for baking a biscuit. One is in the microwave, the other is in the oven.
We will need:
- banana - 1 pc.
- kiwi - 1 pc.
- peaches - 2 pcs
- apricots - 5-6 pcs
- strawberries - 0.5 tbsp
- raspberries - 0.5 tbsp
- sour cream - 0.5 l
- gelatin - 3 tbsp. spoons (30 gr)
- sugar - 1 cup
- biscuit -250-300 gr
Cooking:
1. Bake a biscuit. See the recipe below.
2. Soak gelatin in boiled cold water. Leave to swell for 30 minutes.
3. Wash berries and fruits, peel as needed. Let the water drain and dry with a paper towel.

4. Cut bananas, kiwis, peaches and apricots into slices. Pieces are better to make tangible, large. It will be nice when large-cut fruits come across in a piece of cake.
5. Sort the berries, remove the stalk. Today I use raspberries and strawberries. Strawberries are already “departing”, and I managed to collect only small berries from the garden. If you have them larger, then the cake will look more bright and beautiful!

6. Cut the biscuit into cubes 2.5x2.5 cm in size. I baked the biscuit in the microwave, it turns out to be light in color. In my opinion, such a biscuit is more suitable for our white dessert.

If you bake it in the oven. Then it will turn out more ruddy. In this case, the crusts can be cut off and eaten. Kids love to be around at the moment. Ruddy, fried warm crusts they, oh, how they like it!
7. Cooking sour cream jelly cream. Beat sour cream with sugar using a mixer. It is advisable to use non-liquid sour cream. Fat content can also be taken differently, depending on your preferences.
I use 20% fat sour cream.
8. After the gelatin swells, melt it in a water bath to a liquid state.

9. Pour in a thin stream into sour cream, stirring constantly. Mix until smooth.
10. Prepare a deep bowl or salad bowl. Line the bottom with cling film.
11. Start collecting the cake.
12. The cake can be assembled the way your fantasy tells you. You can put slices of peaches and bananas down.

13. Then pieces of biscuit.

14. Lightly drizzle with sour cream jelly.
15. With the next layer, lay out the fruits again, or the berries. Mix it with the biscuit. The main thing is to lay out fruits and berries in such a way that they are partially located at the very wall of the salad bowl. Subsequently, when the cake is ready, they will be visible around the edges. And the cake from this becomes very beautiful and appetizing.


16. Periodically pour layers of sour cream and jelly cream. But you need to calculate everything in such a way that the cream is the last layer.
17. When assembling the cake, do not hesitate, the cream after a fairly quick time will begin to harden, turn into jelly. We need to fill it up before then.
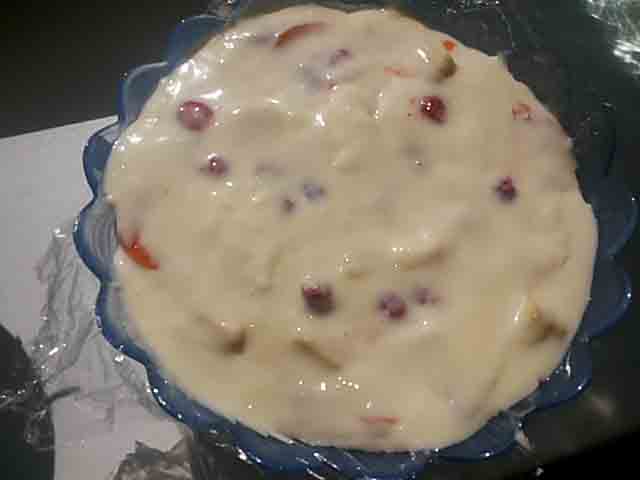
18. And so, the cake is assembled. The last layer, a layer of sour cream. Cover it with cling film on top and put it in the refrigerator to cool. Minimum cooling time 2.5 - 3 hours. If it is possible to keep it in the refrigerator for longer, then this will only make it better.
19. We cut the finished cake into pieces, and serve either with tea or simply as a dessert.

20. We eat with pleasure, and prepare to listen to sincere words of gratitude and praise.

The next day, prepare to be asked to make the same cake again. But in order not to repeat yourself, prepare an equally tasty, and just as easy-to-prepare dessert -. Or a dessert that is more difficult to prepare, but so tasty that it is absolutely worth all the work expended - this is delicious
Well, now the promised biscuit recipes.
Biscuit in the microwave in 5 minutes
When I first came across this recipe, I thought it was a joke. How can you bake a biscuit in 4-5 minutes. I immediately set out to try it out. And what do you think? It turned out that the biscuit can be baked. Quite tasty even. And just right for our today's delicacy.
Of course, his color turns out to be unusual, light. Yes, and it will not rise very much. So we use a minimum of ingredients. If you add ingredients, then it is quite possible to bake such quick biscuits as the basis for cakes.
Let's not languish for a long time, let's start cooking. From this amount of products, a biscuit of a slightly larger volume is obtained than we need for a cake. This, of course, is not scary, since he does not stay on the table for a long time. If you take half of this amount, then bake in the form of a not very large volume.
We will need:
- Egg - 2 pcs
- Milk - 10 tbsp. spoons
- Oil rast. - 5 tbsp. spoons
- Sugar - 8 tbsp. spoons
- Flour - 6 tbsp. spoons
- Baking powder - 1 teaspoon
Cooking:
1. Mix eggs with sugar using a whisk. It is not necessary to beat vigorously until bubbles. Just enough for the sugar to dissolve.
2. Add flour pre-mixed with baking powder. Baking powder can be replaced with ordinary soda slaked with vinegar. It will be enough to take it on the tip of a knife.
3. Add milk and butter.
4. Start batter.

5. Prepare a heat-resistant form. I am using a glass mold. The bottom must be lined with baking paper and greased with oil.
6. Pour the dough into the mold.
7. Bake in the microwave at 1000 watts. To do this, go to the microwave power mode, select 1000 (or 100 is written as a maximum). Then set the time to 5 minutes. That's how long it took me to bake the biscuit.

If the number of ingredients is less, then the baking time must be reduced. If there are more, then the time needs to be increased.
If in doubt over time. Set less minutes than indicated first. When the time is up, take out the biscuit and check it with a toothpick. If, after taking it out, there are no traces of dough left on it, then the biscuit is ready. Or again put the form in the microwave, and set an additional number of minutes.
8. Give the finished biscuit time to cool, then take it out, remove the paper and cut it into pieces.
How to cook a biscuit in the oven
A biscuit cooked in the oven turns out to be ruddy, with a beautiful delicious-smelling crust. If you don't have a microwave, then cook the biscuit in the oven.
We will need:
- Flour - 170 gr (1 cup)
- Sugar -150 gr
- Eggs - 4 pcs
- Baking powder - 1 teaspoon
- Rust. Oil - for greasing the mold
Cooking:
1. Mix eggs with sugar with a whisk or a tablespoon until the sugar dissolves.
2. Add flour and baking powder. Mix thoroughly until smooth.
3. Lubricate the silicone mold with oil and pour the dough into it.

4. Preheat the oven to a temperature of 180 degrees.
5. Bake for 35-40 minutes until done.
6. Remove the finished biscuit, let it cool, then remove it from the mold.

And he and the other biscuit is baked without much difficulty. But if you want to speed up the process of making a cake at all, then just buy a ready-made biscuit in the store.
I hope that today's recipe for a delicious dessert - no-bake cake will be to your taste. In any case, we always have to...

Moreover, it is very easy to prepare it by following the step-by-step instructions. When you cook it, you will even be surprised how easy it is!
I want you to succeed. And so that you please yourself with a delicious and healthy dessert on a hot summer day!
Bon appetit!
