Very soon the brightest holiday of all Orthodox Christians will come - Bright Easter. I am sure that already now, many housewives are starting to collect a variety of buns, cottage cheese paskas, Easter cupcakes, pies and, of course, egg coloring.
There are many ways to paint eggs for Easter. It is this topic that I want to devote today’s article. If you decide to paint eggs beautifully and unusually, then this post is for you. Here I tried to collect the most interesting and original, in my opinion, methods on the issue posed.
This activity is quite interesting, and the most important thing is that the children really like this process. I still remember how, as a child, when my mother painted eggs on Easter, my sister and I also took part in this. Although at that time there were no various dyes, but there were standard set flowers, but we still really liked the end result.
And now you can buy paints in a variety of tones and shades, even pearlescent. But also natural natural dyes no one has canceled them either, and they definitely need to be taken into account. And if you use your imagination, you can get very beautiful eggs who will decorate the festive table with their presence.
Tips and secrets for preparing and coloring Easter eggs
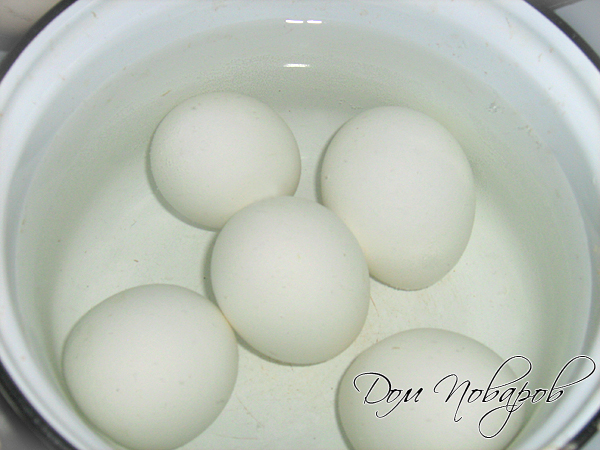
- It is best to use white eggs for painting.
- Before boiling eggs, keep them at room temperature for several hours. Most likely, the shell will not crack until the end of cooking.
- It is necessary to add 1-2 tablespoons of salt to the water.
- If just before coloring you wipe the eggs with alcohol or soap solution, then the paint will lie more evenly and the color will be richer.
- To add shine to painted eggs, after painting they should be thoroughly dried and rubbed. vegetable oil.
Easter eggs - marbled using napkins
By painting eggs this way you will get a very beautiful, marbled, rainbow pattern. Everything is done quite simply, and the result is simply amazing.

We will need:
- boiled eggs
- food colors - yellow, red and blue
- paper napkins
- medical syringe - 3 pcs.
How to paint:
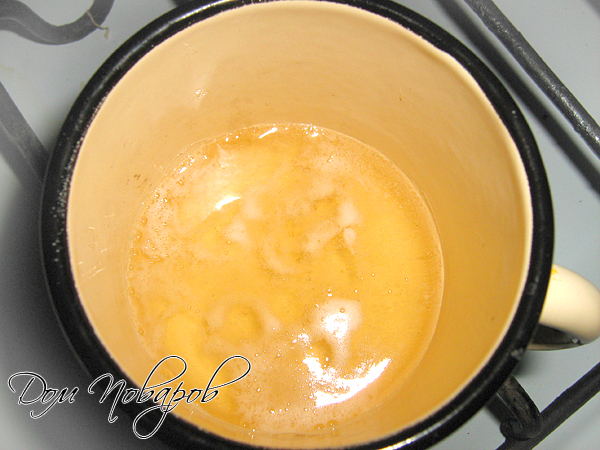
We dilute 3 colors of liquid dyes (yellow, red and blue) in hot water. Follow the instructions on the package, as paints are different and each has a different ratio of liquid to dye.

Wrap the boiled egg in a disposable napkin.

Advice! Wear rubber gloves to avoid getting your hands dirty while painting.
Using a syringe, apply paint to the egg one by one. If you do not have a syringe, you can replace it with a regular teaspoon.


After applying the dye, you need to press the napkin tightly to the shell.

Leave the egg for 10 minutes for better coloring.

Let's unfold it and admire the result. In order to Easter eggs shiny, lubricate them with vegetable oil using a cotton swab.

Rainbow eggs for Easter 2019
By dyeing the eggs using this method, they will receive a rainbow coloring. Great way, which will not take much time and will delight your eye with all the colors of the rainbow.

What do you need:
- boiled eggs
- food colorings
Dyeing method:
Just as in the previous method, in separate bowls we dilute 3 colors of dyes - blue, red and yellow.


First, dip part of the egg into red dye and hold for 2-3 minutes. Let it dry.


We repeat the procedure with yellow dye.


The final step will be blue paint.


The first and second methods can be done simultaneously. And in the end you will get these festively beautiful Easter eggs that will perfectly decorate the holiday table.

How to beautifully paint eggs with nail polish?
Easter eggs turn out very beautifully if you use regular nail polish for coloring. Look how beautiful it turns out.

You will need:
- container with water
- nail polish (various colors)
- eggs (boiled)
Staining procedure:
For this painting method, it would be a good idea to use rubber gloves.

These are the beautiful eggs with a marble tint that you can make using regular varnish. Simply and easily.
We paint it speckled using rice and dyes:
It is very easy to get incredibly beautiful testicles using regular rice. The most important thing is that by using this method and experimenting, you can get a whole palette of different colors.

To do this you need:
- liquid dye of any colors.
- plastic jars of rice
Preparation:
Pour rice into plastic jars.

Pour a little dye and mix.

Place the boiled egg in a container with rice. Cover with a lid or hand and shake several times.


To obtain multi-colored specks, you need to repeat the procedure with the same egg, only with a different color.


Experiment and share your results.
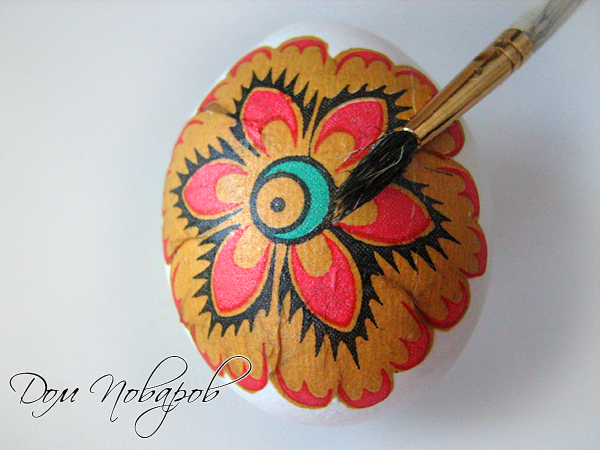
Decoupage Easter eggs 2019
The decoupage technique means that ready eggs We will cover it with stickers. We use colored napkins as stickers. Let's see what happens.

Need to:
- colored napkins
- boiled chicken eggs
- egg white
How to do:
Separate the bottom layer from the napkin.

Cut out the pictures you like.

Coat the egg with white using a brush. Attach a sticker.

Apply the sticker over the entire surface.
As you can see, everything is quite simple. And the result is excellent.
Marble Easter eggs in onion peels with green stuff
Do you want incredibly beautiful marble color Easter eggs. With this method you can achieve this result.

What do you need:
- Onion peel
- Raw eggs
- Zelenka - 1 bottle for 10 eggs
- Nylon (gauze, bandage)
Preparation:


How to paint in onion skins with a pattern?
If you want some unpainted design to remain on the painted egg: be it a leaf or a heart, or something else, then this method is for you.

Take a leaf from any plant or cut out any shape from paper.
Attach the stencil to the egg and cover it with nylon. Tie both ends with thread or elastic.


Boil the eggs in the onion skins for 15-20 minutes. If you want a richer color, cook longer.

Remove the eggs from the bags. Rinse with water.

This is how the drawings turn out. By the way, you can do the same with dyes. You just need to color already boiled eggs, but the technology remains the same. Happy creativity!
Striped Easter eggs - easy and simple
I suggest one more unusual option for painting. Striped eggs turn out to be very unusual and elegant. Everyone will be interested in how you achieved such smooth transitions.

Dilute any food coloring in 100 ml. hot water.

Place the egg in another glass and pour 1/3 of the resulting paint along the wall of the vessel.

After 10 minutes, pour in another 1/3 of the liquid.

After 10 minutes, pour in the remaining dye.

After 5 minutes, remove the colored egg.


By doing this with different colors you can get beautiful striped eggs Easter table. This process will take a lot of time, but the end result, I think, is worth it.
How to dye eggs in rags without dyes
Eggs can be colored without dyes. Silk rags come to the rescue. Men's ties are perfect for this purpose.

How to paint:
Raw eggs should be wrapped in pieces of cloth with the colored side facing the shell. Secure with an elastic band.


Wrap the top in rags and tie tightly.

Place in a saucepan, add water, add 2 tablespoons of vinegar and cook for 20 minutes.

Cut off the shreds. After complete drying, grease the eggs with vegetable oil.


That's the whole painting procedure without dyes. Just really?
Unusually beautiful “marble” Easter eggs
Another way to get “marbled” eggs. It is just as good as using onion skins and greenery. It turns out to be a very amazing drawing.

And this is done like this:
Pour 0.5 tbsp into water with diluted dye. vegetable oil and mix well.

Place the finished eggs in the dye and try to catch as many oil drops as possible on the surface of the egg. The more stains you get, the more beautiful the end result will be.

Blot the colored egg with a paper napkin (towel).
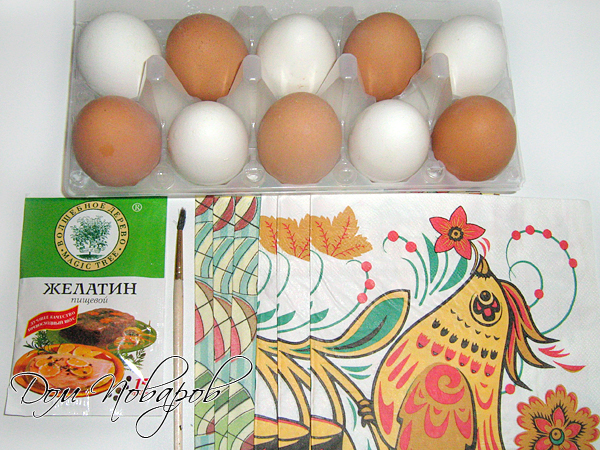
Jelly eggs made from gelatin for the joy of children
Easter is family celebration, and it’s very good when all household members take part in preparing for the holiday. I bring to your attention jelly eggs, in the preparation of which you can involve children.

What you will need:
- Any natural juices - 200 gr.
- Gelatin
How to do:
First, prepare the eggs. Pierce the top of the egg with a knife and pour the contents of the egg into a bowl. Eggs are quite useful for baking, so don't throw them away.

We rinse the empty testicle with water until clean water flows out of it.
Now you need to bake them in an oven preheated to 200 degrees for 10 minutes.

IN natural juice add 10 g. gelatin and stir.

Using a small funnel, pour the juice into the egg cavity and leave overnight until completely set.

We clean the shell and you can use it.

Children will be very happy with these jelly eggs, especially if they take part in preparing them with you.
Used here Cherry juice, Orange juice, Coca-Cola, tangerine juice and tarragon.
Draw on the eggs with markers (felt-tip pens):
And the last method for today is drawings with a marker on finished eggs. It all depends on your imagination. You can draw anything you want. And here is a small selection for you.
We paint colored eggs in the style of “Angry Birds” (angry birds)

You can draw beautiful funny faces (emoticons)


Or these unusual patterns would also look good

And if you don’t want to bother at all, then you can simply label each egg with the color you want)))

If you found the article useful and found something new for yourself, then by clicking on the class you will share it with your friends on social networks. Well, that's all.
I congratulate you on the occasion Happy Easter! I wish you and your loved ones all the best. May your life be as bright and beautiful as Easter eggs. Be healthy and happy. All the best! Bye!
Hello friends!
Are you waiting for the bright holiday of the Resurrection of Christ - Easter? I really do, because I fast and limit myself to meat, dairy products and eggs. But this does not stop me from preparing for the Great Holiday. I have already started studying. And today I found and made a selection about dyeing chicken eggs.
As we already know, our Orthodox Easter falls this year on April 8 on Sunday. One of the holiday rituals, in addition to Easter cakes and Easter cakes, are painted eggs. This tradition arose a long time ago, during the time of the first Christians. In addition, there is an opinion that many eggs accumulated in chicken coops among fasting people in villages. Due to the fact that there was nowhere to put them, it became a custom to paint or paint the eggs and give them to guests and neighbors on Easter.
Of course, that's how it happened. But the egg has long symbolized resurgent life. The most popular dye color is red. This implies the blood shed by Christ for the people. Therefore, it is very important to color the eggs in different colors. But how to do it right? Let's find out!
I’ll also add that it’s better to paint with kids. They really like this business. And even children, starting from three years old, are already actively helping adults.
Basic rules for painting eggs for Easter
Before painting, we will read a few tips on how to do it correctly. Then it will help us avoid some irreparable mistakes. It's better to learn from other people's mistakes, right?
- We buy eggs with white shells. It’s clear even to kids that paint adheres better to a clean white surface and doesn’t change its color. But brown ones can radically change their color when dyed. And any paint on them seems a bit dirty.
- We wash the testicles with a sponge, or with a soap solution.
- To prevent the eggs from bursting or cracking during cooking, it is better to remove them from the refrigerator 1.5-2 hours in advance. During this time they will warm up and become room temperature. Then you can start hot procedures.
- Salt, which is added to the water during boiling, also helps prevent cracks. Enough 2 tbsp. spoons of salt per 2 liters of water.
- If you are going to paint in onion skins, then collect them several months in advance. The more husk, the brighter the color will be. You can also ask for husks at any market from a vegetable seller. I think they won't be greedy. Especially for such a sweet thing as preparing for Easter.
- To dry already painted eggs, use the paper racks in which you bought them.
It is interesting to know that eggs painted with one color are called dyed eggs. Easter eggs will be skillfully painted. Drapes are painted with a scratched pattern. There are also specks - testicles painted with specks, with dots and stripes.
- Rub the colored eggs with vegetable oil. They turn out shiny, bright and beautiful.
Well, now you can definitely get down to business!
How to paint eggs in onion skins so they don't crack
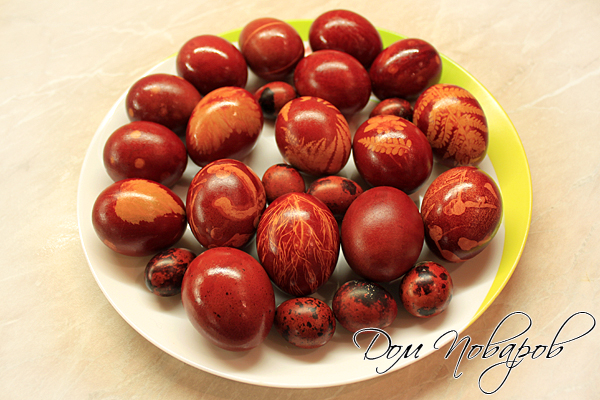
The simplest and most popular way of coloring for Easter is in onion peels. For this purpose, golden or red onions are used. After dyeing, the testicles turn out purplish-brown, yellowish and very beautiful.
This option also saves housewives a lot of time. The eggs are boiled and immediately colored in a decoction of the husks.
We need:
- 4-5 liter saucepan;
- Eggs - 2 dozen;
- Onion peel;
- Vinegar - 1.5 tbsp. spoons;
- Paper towel or newspaper.
Preparation:
1. Prepare the onion skins. We wash it in running water to remove dust and dirt. We also take the eggs out of the refrigerator to warm up. They reach room temperature after 1.5-2 hours.

2. Take a large saucepan and put all the onion peelings there. They should take up 2/3 of the pan somewhere.
Choose old cooking utensils that you don’t mind. Because during the process the pan gets very dirty and it will be almost impossible to wash it.
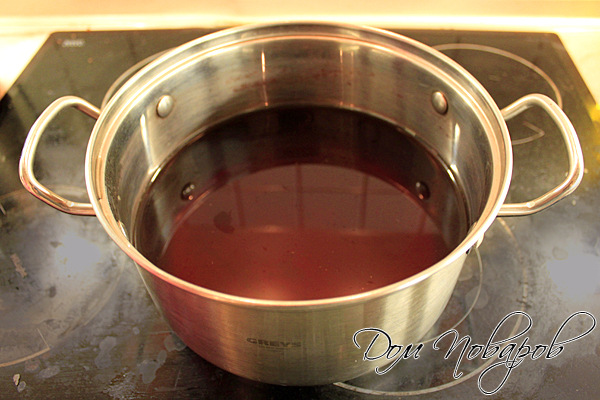
3. Fill with water so that it covers all the husks. Pour in 1.5-2 tablespoons of vinegar. Or maybe 1 teaspoon vinegar essence. Mix the water with a spoon.

4. Wash the warmed testicles with a soft sponge and laundry soap. We carefully place them and bury them in the husk.

5. Place the pan on the fire. When the water boils, reduce the heat and cook for 30-40 minutes. For a more saturated color, you can cook longer.

6. Carefully remove the finished brown eggs with a spoon and place them on prepared paper towels. Do it carefully so as not to get burned.
7. When they have cooled, you can rub them with a cotton swab dipped in vegetable oil. You can stick small stickers on an Orthodox theme and place them beautifully in a basket or plate with indentations for eggs and Easter cake.
My testicles did not crack and turned out to be evenly colored, and vinegar helped me with this. The most important thing is to maintain the temperature; it should be the same before cooking.

That's basically it. Coloring can be complicated and you can create masterpieces like the ones in the photo below. To do this you will need gauze, thread and green leaves. Parsley, dill, and arugula work well.
Before laying in the husk, we apply a leaf of greenery to each egg and wrap it in a small piece of gauze. Tie tightly with thread so that the gauze presses the leaf tightly to the shell. Then we also put them in water with the husks and cook for 40 minutes.
The shell will be completely colored, except for the place where the leaf was attached. And they turn out very original eggs with a green imprint. Beauty and simplicity!
Video about how to dye Easter eggs using dyes
Let's see and try to do the same. After all, there is nothing complicated.
We use dry food colorings and leaves
Let's try to color easter eggs store-bought food dyes and even with leaves. Already above about the method with onion skins I explained a little how this is done. And here I will reveal the secrets in more detail and with step-by-step photos.
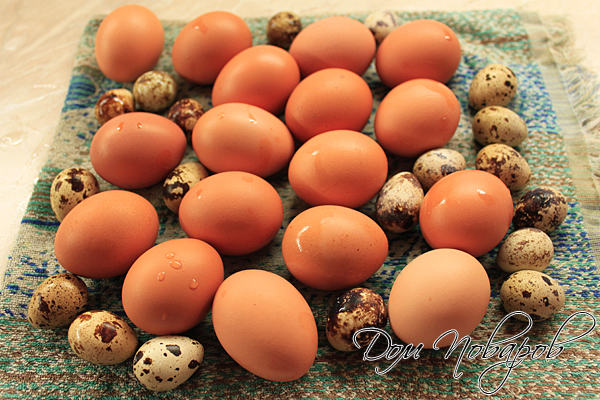
We need:
- White chicken eggs - 2-3 dozen;
- Food colorings;
- Vinegar 9%;
- Gauze,
- Threads;
- Scissors;
- Green leaves;
- Gloves.
Preparation:
1. Warm chicken eggs to room temperature. We wash them with a dish sponge and soap until clean. Then cook in slightly salty water for 20-30 minutes in a cauldron.

2. Place jars on the table where we will dilute the paint. Prepare scissors, pieces of gauze, thread and green leaves.
3. Leaves can be wetted. This way they will stick to the shell better.

4. We put disposable gloves on our hands. They will protect your delicate hands from corrosive paint.
5. Dilute the paint in jars with hot water and pour in 1 tablespoon of 9% vinegar. The amount of water is usually indicated on the packaging of dyes. So follow the clear instructions.

6. Take the finished boiled eggs out of the cauldron and cool slightly. Glue a leaf of greenery - dill or parsley. Wrap in a small piece of gauze. And at the back we tie the ends of the fabric tightly with thread.
7. The leaf should be pressed very tightly to the shell.

8. Place the egg in a jar of paint for 10 minutes. You can turn it a little with a spoon to ensure even color.

9. Take out the finished dyes and place them on a paper egg rack. All excess colored water will drain off, and the eggs themselves will dry well without coloring each other.

And here are the finished beauties! The parsley and dill leaves were well imprinted. Now they can be rubbed with butter and sent to the holiday basket.

Interesting way to paint Easter eggs with liquid paint
Liquid paint is sold in special tubes. After this coloring, Easter eggs acquire a beautiful, pearlescent and shiny appearance. In fact, there is nothing complicated about this. How to do this correctly, watch an interesting video.
Decorate eggs with natural ingredients
The last (or not) way to make dyes is to use natural products. In fact, it is not at all necessary to buy ready-made paints. You can rummage through your cupboards and find a ton of things and products that will perfectly color your eggs in even, solid colors.
I also like the option of coloring with natural ingredients because we paint the eggs without any chemicals. So to speak, we get eco-colors.
We paint with turmeric
Regular ground turmeric root will help us achieve an even yellow color.
To do this, prepare the eggs and warm them. Pour 2 tablespoons of turmeric into a small 1.5 liter enamel ladle and set it on fire.
Place the warm eggs carefully and cook them for 15-20 minutes. During this time, they will be well painted in a delicate yellow tone.

Cool the hard-boiled eggs and rub them with a little vegetable oil.

We achieved yellow color. Let's move on to the blue tone.
Colored with red cabbage
Red cabbage will help us achieve a pleasant blue color. To color, we need to boil clean hard-boiled eggs in advance in a separate bowl.
We cut the head of cabbage into large pieces. Fill in cold water and set to cook for 10-15 minutes.
Place the hot eggs in bowls. Fill them with strained cabbage broth and leave for 5-6 hours until deeply colored. If desired, you can add vinegar to the broth. It sets the color.
Dry the dyes in paper towels or on a paper wire rack. Rub them with vegetable oil until shiny.

We use beets
Ordinary beets will help us get pink colors. To do this, boil the eggs hard in a separate bowl.
Peel the beets and grate about 200 grams per 0.5 liter of water. Fill it with hot water and add hot eggs.

To fix the color, add one tablespoon of vinegar. Leave for 50-60 minutes until deeply stained.
We take out the paints, dry them and you can stick on different stickers on Easter themes.
Marble color with greenery
Well, such beauty can be made with the help of brilliant green and chopped husks. Both environmentally friendly and beautiful. And whoever asks for the recipe - shhh! Don't open it!
This, dear readers, is where I end my writing. If there are other ways of coloring, you can add material in the comments below. This way you can share interesting ways of coloring Easter eggs with other readers.
With coming Happy Holidays- The Resurrection of Christ! See you soon!
Well, dear and beloved, are you already preparing for the holiday of the Resurrection of Christ? You are choosing Easter cake recipes, oh cottage cheese Easter are you dreaming? Would you like to try something new and unusual this year? If there are no resources for global reforms, make some personal discoveries in the field of coloring Easter eggs. Surely, from year to year you resort to the same method of decorating paints - so maybe the time has come for interesting achievements and interesting experiments? Let's figure out how you can paint eggs for Easter, and once you figure it out, you will automatically find the right solution for yourself. Just - mind you! – new!
How to dye eggs for Easter:
Coloring eggs with natural dyes
IN modern world few people think about why it is worth giving preference to natural dyes, if it is much easier to go to the store, buy, pay, mix and get the result. The Pepsi generation, we grew up on the idea of “I want everything at once” and are not ready to spend even a little time if there is an opportunity to get almost the same thing, but without wasting precious minutes. However, if you approach the issue of coloring eggs for Easter from the other side, you can find a lot of advantages in using natural dyes.
First and foremost, this is your health: it is clear that when decorating Easter eggs, the shells are colored, and food dyes, if they get into the food, then minimum quantities, but they get there! Agree, if possible, it is worth making a choice in favor of health, neglecting issues of minor savings.
Secondly, natural dyes– it’s always a miracle, magic, a mystery. Doing something with your own hands, watching with bated breath, waiting for the result and wondering what it will be like - isn’t this something miraculous? Don’t forget that by calling your children for help, you will automatically increase the magic factor: of course, sometimes little hands create unnecessary problems and troubles in the kitchen, but the happy laughter of children is worth it!
Third, natural dyes are sometimes cheaper than store-bought synthetic ones - what could be, for example, cheaper than onion peels or a couple of spoons of black tea, free birch leaves or unnecessary walnut shells?
Let's instill in children a taste for another concept: natural, natural, healthy - it's fashionable, beautiful and modern. Leading by example is the best science, so this Easter we're painting eggs with something you can find in any kitchen!

Onion peel
Perhaps it is onion skins that are the most popular, simplest and accessible remedy for coloring Easter eggs. Thanks to this simple old-fashioned “life hack” you can get a completely diverse range of color shades - from light red to deep brown.
To work, you will need wax, a candle and a special tool - a pissator, which can be replaced with any small diameter metal tube. Draw a design on the egg with a simple pencil, then, having filled the scribbler with wax, heat it over a candle and trace the ornament of your choice with the melted mass. After this, lower the egg into a glass with dye, wait the required time, then remove the wax with a napkin, if necessary, holding the pysanka over a candle - in those places that were closed, the shell will remain with its natural color, but the rest of the surface of the egg will be colored.
Using the same technology you can make multi-colored Easter eggs. To do this, after the first layer wax drawing dip the egg in the lightest paint (for example, yellow), soak required amount time, take it out, carefully dry the egg, apply the design again, and dip it in the next most saturated color (for example, red). Repeat the operation as many times as you want to get flowers. Remove wax only after the last coat of paint.
Don't immediately look at very complex patterns. This, of course, is incredibly beautiful and inspiring, but it’s better to start with primitive drawings, and then, once you get the hang of it, move on to more complex patterns.

Decorative polyethylene films and thermal stickers
The modern industry, with the motto “quick and easy,” offers a lot of “high-speed” options for decorating Easter eggs. At Easter fairs, supermarket displays and market stalls you can find a wide selection of stickers and thermal films for decoration.
With the first ones, everything is simple to the point of primitivism: I took it off the base, stuck it on an egg, put it on a plate and began to admire the result. It would not be amiss to mention that it is still better to color the egg first - small stickers on a white background look bare and dull.
With thermal films, you will have to make several extra movements: wrap the egg in the proposed “bag”, put it in boiling water, take it out after a minute - under the influence of temperature, the special polyethylene contracts, tightly wrapping the egg. Ready. A huge disadvantage of this method of preparing Easter eggs is the difficulty in cleaning: the film is very durable, and in order to remove the contents of the shell, you have to use a knife or scissors.
Options, of course, are of dubious attractiveness and sincerity, however, they cannot be ignored, because they exist and, probably, still have the right to life - for working mothers and women who almost never have days off, this is a good way out of the situation. However, if you have at least 10 extra minutes, it is better to give preference to some “warmer” and “live” option.

Decoupage and other handmade ways to decorate Easter eggs
With minimal skills and a love of crafts, Easter eggs can be decorated in a completely unusual way, using, for example, the decoupage technique. To do this, the surface of hard-boiled eggs must be degreased, then, if desired, painted with any suitable paints (for example, gouache). After this, dilute PVA glue and water in a 1:1 ratio, cut out suitable motifs from napkins, remove the top layer and glue it onto the egg. After drying, the eggs can be additionally coated with a layer of glue. If you do decorative ornaments, you should work with an empty shell and cover the finished egg with acrylic varnish.

For those who know how to hold a hook in their hands, we can advise you to tie the eggs with openwork “cases” - it turns out incredibly tender and cute.

However, even if you take various beads, pieces of lace, sequins, colored ribbons, beautiful ropes and decorate Easter eggs with all this goodness, it will be very vintage, festive, soulful and stylish.
Christ is Risen, dears! Have a beautiful Easter, bright colors and Have a good mood!

Easter has its own customs and traditions, one of which is the painting of eggs. The article will be useful for both adults and children. Easter eggs are a symbol of the great holiday. Housewives treat coloring eggs with trepidation, and many strive to come up with new patterns.
The tradition of dyeing eggs for Easter
There are several versions of the origin of such a tradition.
Version 1.
When Jesus was resurrected, Mary Magdalene came to the emperor with the news. Since such a trip required a gift, she took with her white egg. She told the emperor “Christ is Risen.” The emperor did not believe such news and said that it was as implausible as an egg turning red. And miraculously the egg immediately turned red.
Version 2.
Chickens in Lent laid eggs non-stop. The owners were afraid that they would spoil. That's why we decided to paint fresh eggs in red.
Version 3.
When Jesus was a baby, colored eggs were a source of entertainment for him.
Which eggs should I paint for Easter?
It is customary to paint at Easter chicken eggs: Neither color nor size are important.
IMPORTANT: To ensure even coloring, wash the eggs thoroughly with vinegar and soap. Otherwise the paint will not apply evenly.
What colors are eggs painted for Easter?
Previously, eggs were only painted red.
Now on Easter you can meet the most various options egg painting:
- painting in one color: yellow, green, blue, orange. In fact, the color can be whatever is closest to your soul.
- painting in several colors: many patterns, designs

How to dye eggs red?
Dye eggs traditionally Red color will help:
- Food colorings
- Onion peel
- Beet. Boil the egg along with the whole beets. Cook until you get the desired color. You can just rub it boiled egg beet broth or grated beets

How to color eggs with onion skins?
- Take a saucepan filled to the top with onion skins
- Fill with water not to the very edge
- Let it cook for 45 minutes. Cooking time depends on the desired paint color
- Let the infusion cool
- Place the eggs in their shells and cook for 10-15 minutes after boiling.
- Cook until you see the desired color
IMPORTANT: The eggs must be completely submerged in water. Turn them over to ensure even coloring.

Food coloring for Easter eggs
Eggs can be colored with natural and non-natural food dyes.
WITH unnatural dyes everything is clear: you go to the store, buy food coloring of the desired color, dilute the dye in water, put an egg in the water with the dye until you get the desired color.
IMPORTANT: Coloring with such dyes usually gives a more uniform color. But this makes it feel unnatural.

WITH natural dye the question is more complicated. Many natural dyes can be used depending on the desired color of the final egg.
Yellow.
Turmeric will help color an egg yellow. Painting technique:
- Add 2 tbsp to 0.5 liters of water. turmeric, 1 tbsp. table vinegar
- Place eggs in water
- Cook until done

Pink color.
Gives pink color to eggs cranberry juice, in which boiled eggs lie until the desired color is obtained

Dark brown color.
Boil eggs in strong black tea.

Blue color.
Red cabbage will help you get the blue color:
- Finely chop 2 heads of cabbage
- Pour 0.5 liters of water into the pan
- Add 6 tbsp to the water. table vinegar
- Add cabbage
- Leave to infuse overnight, stirring first
- In the morning, add boiled eggs to the infusion until the desired color is obtained.

Easter egg painting
Painting eggs will look equally good on pre-painted eggs or on eggs natural color.
Painting with permanent marker.
A simple way to paint Easter eggs for those who know how to draw.

Painting with paints.
For painting you only need paints and brush thin. You can use the simplest acrylic paints.
IMPORTANT: Using this method, you can decorate the egg with your child and paint it to your liking.

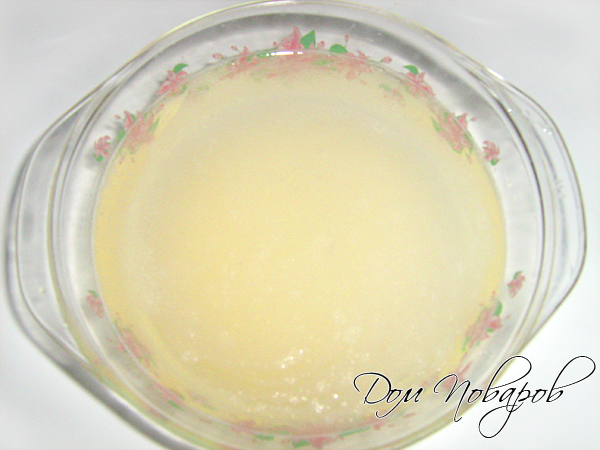
Painting with powdered sugar.
- Prepare powdered sugar
- Add as much water as needed until you get a thick, homogeneous mass.
- Apply a pattern pastry syringe with sugar mixture
- Let the egg dry
Wax painting.
- To paint with wax you will need wax pencils or wax paints.
- Select the tool you will use to paint: knitting needle, needle, awl, copper wire
IMPORTANT: Copper wire will keep the wax hot for a long time, which will allow you to draw more lines at a time
- Heat the wax to 65 C
- Dip the tool in wax and apply the design

If you do not have the makings of an artist or cannot come up with the desired pattern, use stencils.
- Print the stencil
- Select paints and apply them to a sponge or brush
- Place the stencil on the egg
- Blot with a sponge or brush over the stencil
- Remove the stencil and dry the egg

How else can you paint eggs for Easter?
Colored floss threads.
Wrap the egg completely with different colored floss threads and hard boil the egg.

Beautiful napkins.
- Buy beautiful napkins with a pattern suitable for the holiday
- Cut out the elements you want to transfer to the egg
- Prepare gelatin according to package instructions
- Dissolve the gelatin granules by heating it
- Apply the cut out pattern to the boiled egg
- Using a brush, brush the prepared gelatin over the top.
- Align the pattern from the center to the edges

Paper.
- Cut out figures, stripes, patterns from paper
- Attach paper of your choice to the egg
- Wrap the egg tightly with nylon or gauze
- Dip in desired dye. If necessary, cook in dye.
- Wait until the egg is completely dry
- Removing the paper


Silk.
- Cut a piece of silk in the desired color
- Wrap an egg in it
- Wrap gauze or nylon on top and secure
- Pour water and 3 tbsp into a saucepan. vinegar
- Boil the wrapped eggs in water with vinegar for 20 minutes after boiling.

- Roll a wet egg in rice
- Wrap with gauze
- Dip in dye
- After staining, open the gauze and let dry

Marble effect.
First way.
- Choose two dyes that match in color (preferably light and dark)
- Paint an egg in one of them
- Pour the second into a bowl and add a few tbsp. vegetable oil (depending on the volume of water)
- Mix water with oil
- Dip the egg completely into the water once so as to catch as many fat bubbles in the water as possible.
- Blot with a napkin
- Let dry


If dishes are prepared for family and guests, then eggs are presented to all acquaintances and strangers. From the children who bring the news of the Resurrection of Christ in the morning, to work colleagues. "Christ is risen!" - they say at the same time. “In truth he is risen!” - they hear in response and receive an egg in return.
What are Easter eggs?
Interestingly, painted Easter eggs have their names depending on how the eggs were painted. Krashenki are plain eggs, specks are eggs covered with multi-colored spots, which are obtained using droplets of wax. And if we paint eggs and scratch out the design, we get drapanka. Separately, it is worth noting the Easter eggs. This is not just an Easter attribute, but a work of art! Drawings on eggs are made with a special tool - a scribbler.
The article collects how known methods painting eggs, which everyone knows very well, but perhaps they have forgotten the nuances, is also more interesting and “unhackneyed”. In addition, we will talk about quick options how to paint eggs beautifully with the least amount of labor, about methods of decorating them that you can do with your child, and about such in original ways, where you can let your imagination run free and expect great results! For convenience, all 20 methods are divided into thematic blocks.

The key to the start - preparing the eggs for painting
Whatever method you choose, it is very important to properly prepare for the process. The result will directly depend on this. Here are a few secrets that will help eliminate the possible pitfalls that await those who do not know them. And you can order all the ingredients you need, including eggs, in the Instamart service, there is an application for Android and iPhone - the first delivery is free.
- First: never start boiling eggs without first removing them from the refrigerator at least an hour or two before coloring. The eggs should be at least at room temperature to prevent them from breaking during cooking. There is another way to prevent the eggs from exploding. They need to be pierced with a thin sharp needle. However, the first option is much simpler and safer.
- Second: when cooking, add 1 tbsp. l. table salt per 1.5-2 liters of water. It is believed that this is done to prevent the shell from bursting. In fact, it is correct to say that salt will prevent the protein from leaking out and forming white “growths” if the shell suddenly cracks.
- Third: the eggs should be washed thoroughly, perhaps even using a dish sponge. This is done so that the paint lays more evenly. You can also wipe the testicle with soapy water or alcohol.
- Fourth: you can dye eggs for Easter not only chicken eggs, but also quail ones. It turns out very interesting and unusual! We also pre-keep them at room temperature, rinse and cook for 4-5 minutes.
- Fifth: in order for the paint to stick better, vinegar (9%) is added during the painting process. On average, 1 tbsp. l. for 1.5 l. water.
- Well, one last piece of advice. on how to color already colored eggs festive look. Rub them, after wiping them dry, with vegetable oil.
How to dye eggs in onion skins
First: classics of the genre - onion skins and its variations
Traditional purplish-red, brown or dark yellow eggs are obtained by dyeing them with onion skins. In this case, it is used as the husk of ordinary onions, and red. When calculating the color, you can use this hint as a guide. If you take the peels of 8 onions to 2 cups of water, you will get a red-brown color.
- Prepare a dye solution. To do this, add onion peels to a pan of water.
- Bring to a boil and simmer for about half an hour.

- Let the broth cool. During this time it will brew.
- Strain the “paint”, discarding the husks.

- Immerse the prepared eggs in the solution so that it completely covers them.
- Boil eggs in onion broth over low heat “hard-boiled”, that is, 12-15 minutes.
- Cool them quickly with cold water to make peeling the shells easier.
- If the eggs have not received the required shade during this time, return them back to the coloring solution.
Second: tandem of husks and brilliant green
Very interesting option- burgundy-green or brown-brown eggs. To perform them, you will need onion peels, brilliant green (standard bottle, 10 ml per 1.5 liter), nylon stocking (or gauze), gloves (to protect the skin of your hands from brilliant green).
- Mash the husks into small pieces. You can also grind it in a blender.
- Roll the washed eggs, while they are still wet, in the husk so that the pieces stick to them.

- Secure the husks tightly onto the eggs with a nylon stocking.
- Place them in the boiling water.
- Add brilliant green to the water.

- Boil the eggs until hard-boiled (12-15 minutes).
- Now pour over them with ice water and free them from the nylon.
Third: coloring in husks with patterns
You can diversify the coloring with onion peels if you first apply a patterned figure to the egg and secure it with a piece of nylon. In this case, to obtain a pattern, you can take what you have at hand. For example, leaves of parsley, parsnip, dill, peppermint, fresh or dried flowers. The dry material must first be soaked with hot water and then applied to the egg.


Secure the chosen motif - a leaf or flower - tightly with a nylon stocking (or bandage, gauze) and carry out the standard staining with onion peels. Then remove the stocking, remove the stencil for the pattern and an egg will appear, painted with onion skins, but with an imprint of a leaf or flower in the natural color of the shell.
Using the same principle, you can decorate a speck with chaotic dots the color of an unpainted shell. For this wet egg Before coloring, roll in onion skins in rice, crushed peas or millet, or attach a piece of lace to it. Secure the rump or lace pattern with a stocking nylon. 
You can get a variety of patterns without using a fixing material:
- for straight lines of natural shell color on the egg, put money elastic bands on it;
- any pattern can be made from masking tape, plaster, self-adhesive paper, or simply paint the egg with wax crayons;
- You can get checkered eggs if you put fishnet stockings or a vegetable net on them.
Methods with dyes - natural and not so
Fourth: gifts from nature - natural dyes

- Pour water into a 1.5 liter saucepan and add natural pigment - the source of color.
- Bring to a boil, let simmer a little and leave to infuse for half an hour.
- Strain the broth, pour in 1 tbsp. l. 9% vinegar and place the eggs in a saucepan.
- Cook over low heat until at least tender (12-15 minutes). If the color doesn't come out well - up to half an hour.
- If coloring is not successful within half an hour, leave the eggs in a saucepan with the coloring solution overnight.
Fifth: a scientific alternative to natural dyes - food colors

Multi-colored flowers on young grass, what could be fresher and more attractive for Easter? To make them quickly and without special troubles, you can buy a special Easter set in the store. When choosing it, please note that dyes vary in the method of application.
One of the options is paint that needs to be applied directly to boiled egg. The other is powder or tablets for diluting the colored solution. Eggs are dipped into it and kept there until the paint takes on.
The dye packaging should indicate the dyeing method. Ready to use liquid paint there is nothing complicated. It is applied to the prepared egg, distributed evenly and allowed to dry. Method of painting with waterborne dyes general case looks like that:
1. Boil the eggs.
2. In narrow deep containers(for example, glasses or tea cups) with cold water, pour 1 tsp. vinegar (9%) and dilute the dye.
 |
 |
3. Place eggs in them. The solution should cover them.
4. Keep them there until they color.
5. Dry the paints.
Sixth: a string from the world - a colorful egg

A riot of colors in one egg is a way of dyeing with floss threads. Very simple and beautiful:
- Wrap multi-colored floss threads around a raw, room temperature, pre-washed egg. Combine colors and thread placement as your imagination dictates!
- 2. Boil them in the usual way until hard-boiled (12-15 minutes).
- 3. Remove the threads.
Seventh: fabric transfers
Transfer a beautiful pattern from fabric to an egg? It is quite possible. You just need to take the choice of fabric seriously. In our age of extremely developed chemical industry and the desire to reduce the cost of a thing at any cost, you can run into dyed fabric chemically. Despite how beautiful the drawing is depicted on it, it is better to refuse to use it. Examples of permitted material could be a Pavloposad scarf or a silk tie with an interesting pattern.
- Place the selected fabric with the right side on the egg. Secure it by stitching along the contour.
- You can additionally secure the material on top by wrapping the egg in a nylon stocking or white cotton cloth.


- Add 9% vinegar to the cooking water (3 tablespoons per 1.5 liter saucepan) and hard boil the eggs (12-15 minutes).
- Drain the water, cool the eggs and remove them from the cloth. The pattern should appear as delicate contours on the shell.
Painting with children

Both adults and children look forward to Easter with equal impatience. Give the kids the opportunity to make a beautiful craft egg and give it, for example, to their grandparents. By engaging in such creativity, we encourage children’s desire to do beautiful things and give it to loved ones. And it’s also very interesting and fun!
Eighth: craft egg

You can make a perky chicken out of dye:
- Color the egg yellow food coloring. Although chickens can be of other colors: blue or pink, for example. Even a child from 3 years of age can handle coloring with colored powders or tablets diluted in water. Of course, under the supervision and sensitive guidance of an adult.
- Cut out parts for decorating the chicken from colored paper: eyes, wings, tail, beak, scallop. And also: a bow - if it's a girl or a bow tie - if it's a boy. You can also use decorative fluff from a craft store. It turns out funny and very cute!
- To fix the prepared parts, use gelatin glue. To do this, soak the gelatin as indicated on the package. Drain off excess liquid and heat the granules until they dissolve. There is no need to bring it to a boil.
- Apply gelatin glue with a brush to the parts, egg and gradually turn it into a chicken!
Ninth: funny faces
Show your children that they can draw on eggs in unique ways. But since this is a product and is then eaten, the colors must be natural. For example, it is very easy to make edible “gouache” from cocoa powder. She can draw the face of an animal, the face of a funny weirdo, or even a portrait. You can also draw eyes, but it will be more interesting to glue ready-made ones from a craft store. 
- Boil the eggs. If necessary, color with food coloring, for example, if you are making a lion's face, use yellow.
- Pour a little cocoa into a tablespoon warm water until thick sour cream.
- Place the finished eggs on stands, such as lids plastic bottles, and draw.
- Let the chocolate gouache dry.
- Then glue the eyes with gelatin glue if they initially do not have an adhesive base.
Tenth: wax crayons (pencils)
This is a method for school-age children. Since you will have to work with a hot, freshly boiled egg.

- Remove them from the pan and dry with a towel.
- Place the egg on a stand, such as a bottle cap.
- Start drawing the design with wax pencils. The wax will diverge from the heat and create bizarre transitions and overflows. Choose your colors carefully!
- You can color eggs in this way not only with pencils, but also by sprinkling them with wax crumbs. To obtain it, rub crayons on fine grater. And then they pour it onto a hot, freshly boiled egg.
- Another way to decorate with wax crayons is to melt them and dip an egg into it
Save time
When a woman is not only a housewife, but also the main breadwinner in the family, there is not much time for home life. Moreover, Easter eggs are painted on Maundy Thursday. This activity is not postponed until the weekend. Therefore, if you don’t have time, you can resort to “quick” ways to make Easter eggs.
Eleventh: thermal film stickers
Once and done - this is about one of the most simple ways creating an Easter mood using thermal stickers. How beautiful they are: with Gzhel and Khokhloma paintings, with intricate patterns, butterflies, flowers, church scenes, as well as with rabbits, kittens and even children’s cartoon characters! If you plan to use thermal stickers, choose eggs that are not the largest in size. Otherwise, they simply will not fit into the thermal base. Stickers can be applied to unpainted boiled eggs, and they can also be used as a backup option if the shell suddenly cracks during coloring.
Please note: eggs in thermal stickers have a shorter shelf life than, for example, eggs colored with peel or food coloring.


- Boil the eggs as usual.
- Place the thermal base on the egg and place it in the strainer.
- Place the strainer in boiling water for a few seconds. As soon as the thermal sticker “hugs” it, pull it out.
Twelfth: festive outfit
Being one of the most important Easter symbols, the egg requires an appropriate outfit. So far we have talked about its coloring, but you can do it differently. Boiled egg Just wrap it in bright foil. Voila! And it is in the spotlight. And in addition it will be decorated with exquisite decoration. 
- Boil the eggs.
- Cut multi-colored foil (available in office supply stores) into rectangular pieces large enough to wrap the egg.
- Prepare decorative elements or just use confetti.
- Wrap the cooled eggs in foil. Attach the decor to them with glue.
Flight of fancy
If standard traditional ways coloring eggs seems boring and monotonous, let your imagination fly and follow it like a white rabbit.
Thirteenth: Rainbow Power
This method is a variation of coloring with food coloring. The combination of colors, the depth of painting, the number of layers... All this is selected individually. Therefore, such paints are 100% original. However, in order for the eggs to turn out like in the picture, you need high-quality dyes that give rich colors. You need to breed them according to the instructions. Another tip: you need to start with light tones, gradually resorting to darker and darker ones, and end with the darkest ones. 
- Boil the eggs.
- Take one and paint it completely the lightest color.
- Dip the painted egg into paint a tone darker, but not completely, but halfway.
- Wait for the paint to set. Then drain it.
- Next, do the same, applying paint in layers.
Fourteenth: eggs “on style”
Easter, originally a religious holiday, has now become more secular. Therefore, eggs are not only traditionally painted red or a pattern corresponding to the holiday is applied, but they also approach this activity more simply and creatively. For example, eggs will turn out stylish if you apply a pattern to them with a permanent marker. You can come up with a coloring page yourself or get ideas from the Internet.

- Boil the eggs, be sure to hard boil them.
- Place them on stands and mark your chosen design with a permanent marker.
- After finishing work, let it dry. This will take about an hour.
Fifteenth: stencil work
This method is relatively traditional. We find a stencil, apply it to the egg, and paint it with natural or food coloring. A flight of fancy should manifest itself in the choice of stencil. Here everyday experience, information from books, magazines, and the Internet can come to the rescue. Or maybe you have family symbols. The main thing to remember is that the chosen color and stencil must be in harmony with each other. 
- Choose a design for the stencil.
- Apply it to ultra-thin paper (tracing paper).
- Wet the paper until it becomes pliable and can be easily applied to the egg.
- Fix the attached stencil firmly on the egg with a nylon stocking or bandage (gauze).
- When the preparation for coloring the eggs is completed, do it in any way: onion skins, food coloring. Only if the eggs are colored with onion peels, they do not need to be boiled first. And if you choose the method of coloring with food coloring, then they must be hard-boiled beforehand.
- Remove the fixing material and stencils from the finished, cooled eggs.
Sixteenth: marble effect
Those who decide to paint eggs marble will need artistic flair. It's not difficult to do this. The main thing is to choose colors beautifully and purchase high-quality dyes. 
- Boil the eggs.
- Paint them in a light color dye: yellow, orange, blue. Let dry.
- Dilute a dark color dye in a deep narrow container (in a glass, tea cup): purple, brown, dark blue. Add 1 tsp to each cup of dark solution. vegetable oil. Stir until the spoonful of oil breaks up into many small oil droplets.
- Dip light colors into dark dye. Ideally do this once.
- Let dry. Marbled eggs are ready!
Options for decorating ready-made colored eggs
If simply coloring eggs is not enough and your soul asks for artistic continuation, choose one of the proposed options. Turn your paint into a work of art!
Seventeenth: 3D decor
Quite a labor-intensive, but worth it method. To decorate eggs you will need a wax or paraffin candle, as well as a variety of cereals, small pasta, confectionery topping and whatever else your heart desires. 
- Take the finished paint.
- Light a candle and use melted wax (paraffin) to apply a pattern on it. Do this very carefully. The flame should not touch the shell, otherwise a gray soot mark may remain.
- Dip the egg in the material of your choice for decoration. You can also place decorative elements onto the adhesive base by hand.
- When the work is dry, you can grease the decorated surface with vegetable oil for a more presentable look.
Eighteenth: sugar lace
Eggs in voluminous lace are very stylish, festive and go perfectly with any traditional pattern on paint. To make them, you will need powdered sugar (about a glass) and water. If you don’t have powdered sugar on hand, you can make it yourself. For this you need granulated sugar and a coffee grinder. 
- Slowly pour water into the powdered sugar until you get a white mass of thick consistency.
- Place the decorative sugar mixture in a pastry syringe.
- Take the finished paint.
- Apply a pattern to it.
- Let dry.
Nineteen: decoupage technique

In order for a picture to appear on the dye, it is not necessary to apply a thermal sticker to it or transfer the pattern from the fabric. You can remember the decoupage technique. It is designed to decorate not only plates and furniture, but can also be transferred to the plane Easter decor. To do this, we will have to use beautiful napkins or their elements and gelatin glue. To prepare the glue, gelatin is soaked according to the instructions on the package. Then the excess moisture is drained and heated, without bringing to a boil, until the granules dissolve.
- Take a nice napkin. Tear out an interesting fragment with your hands (without using scissors). Remove the top layer - that's what we'll use.
- Prepare gelatin glue.
- Apply the selected fragment to the paint.
- Apply gelatin glue over the napkin using a brush. This should be done from the center to the edges.
- Let dry.


Twentieth: drapanki
Colored eggs with a white pattern can be made not only by applying a stencil. The design can be scratched onto the surface of an egg painted with onion skins using a stationery knife or a thick, sharp needle. This method is labor-intensive, but is applicable when you plan to make a thin, elegant pattern on the egg, which is difficult to achieve by applying a stencil. 
- Make dye using onion peels.
- Draw a pattern on it with a simple pencil. You can do without it if you feel confident or have your hands full.
- Go along the pencil line with a stationery knife, scratching the outline.
Easter is a family holiday that gives hope for the future and faith in miracles. Touch a piece of beauty too - choose the method you like and paint eggs for the Easter table. There is only one drawback to coloring eggs using the methods described. It may turn out so beautiful that you will be sorry to eat it!
