The most delicious homemade ice cream is in our selection! Prepare what you like - ice cream, creamy, chocolate!
- cream from 33% - 200 ml;
- milk - 100 ml;
- egg yolks- 2 pcs.;
- sugar - 60 g;
- vanilla pod - 1 pc.

Mix milk with sugar in a small saucepan with a thick bottom. Using a knife blade, cut the vanilla pod along its entire length, remove the seeds and also add to the milk mixture. Thanks to vanilla, the ice cream will be filled with a delicious natural aroma, but in the absence of this ingredient you can get by with a bag vanilla sugar or a pinch of vanillin. Heat the mixture until hot, but do not bring it to a boil.

In another container, gently beat the egg yolks using a whisk. IN in this case we just need to achieve homogeneity - we should not beat the mass, otherwise foam may form on the surface, which will complicate the process of preparing the ice cream.

Pour hot milk into the mashed yolks in a thin stream, continuously stirring the mixture.

Pour the resulting mixture into a saucepan, place on low heat and cook until slightly thickened. It is important not to overheat the milk, otherwise the yolks may curdle! To avoid this trouble, choose a thick-bottomed pan for cooking the cream and cook over low heat. Also, do not forget to continuously stir the cream, especially at the bottom (it is most convenient to use a silicone spatula for this).

We check readiness as follows: run your finger along the silicone spatula. If the mark remains clear and does not float with cream, immediately remove the pan from the heat.
Tip: if the yolks still curdle, you can grind the mixture through a fine sieve or puree with a submersible blender. However, unfortunately, it is no longer possible to avoid the eggy taste of the ice cream. In this case, it is better to remove the pan from the heat sooner rather than later.

Cool the freshly prepared cream until room temperature. At the same time, whip the cold cream until thick.

Add the cooled cream to the whipped cream mixture and mix. Chill the mixture in the freezer for 3 hours. During this time, it is necessary to remove the container 5-6 times and mix the mass thoroughly to avoid the formation of ice crystals and to obtain a smooth and uniform texture.

When the consistency of the workpiece becomes similar to soft ice cream and is difficult to mix, transfer the mixture into a silicone mold, cover with a lid and put it away. freezer for another 3-4 hours (can be left overnight).

Before serving, let the frozen ice cream sit for a while at room temperature. Then scoop up the slightly melted mixture with an ice cream spoon and form into balls. If desired, complement the dessert with chocolate chips, mint leaves or berries.

Recipe 2: homemade ice cream - creamy ice cream
- 500-600 grams of whipping cream (fat content from 30%)
- 100 grams of powdered sugar (or fine sugar)
- a pinch of vanillin

Place chilled cream, powdered sugar and a little vanillin in a deep bowl. Beat until fluffy and stable foam is achieved, 4-5 minutes.

Place the whipped mixture in Plastic container.

Place in the freezer overnight.
We take out the ready-made ice cream, let it thaw a little and you can put it in bowls.

This ice cream can be made in different ways - with the addition of cocoa (carob), frozen berries - it is especially tasty with honeysuckle (only the berries must first be pureed with a blender, and then added to the whipped mixture and beat again).

Recipe 3: how to make homemade ice cream sundae?
The recipe for homemade ice cream sundae can be reproduced at home, it will turn out very tasty, natural and taste like the Soviet ice cream.
- egg yolks (4 pcs.);
- milk (300 ml);
- cream (33%, 300 ml);
- powdered sugar (180 g);
- vanillin (½ teaspoon).

So, first of all, bring the milk to a boil and then cool it to approximately 30 degrees.
Add powdered sugar to the yolks and vanilla sugar.

Whisk.

Pour in milk. Beat again.

Place on low heat and stir until the mixture thickens. As everyone around advises, you can check the thickness by running your finger along the spatula - if a clear mark remains, the mixture is ready.

Let cool to room temperature and then chill in the refrigerator.
Meanwhile, whip the cream.

Mix with cooled cream.

We transfer the entire mixture into a container in which it will be convenient for us to mix the future ice cream with a blender.

Then take it out and quickly (so that the ice cream does not have time to melt) mix with a blender.

Place it in the freezer again for 2 hours. We repeat the procedure 2-3 more times with an interval of 30-60 minutes. Thanks to the blender, the ice cream will have the desired structure. A blender allows you to crush ice crystals and form an airy mass.
When the ice cream is completely frozen, take it out and use a special spoon to make balls. You can first put the ice cream in the refrigerator for about 15 minutes so that it melts a little - this will make it much more convenient to make balls.

Place the ice cream in bowls and sprinkle or top with whatever you like. I - grated chocolate. Homemade ice cream tastes just as good as store-bought ice cream, and its content is guaranteed to contain no “extra” additives. Recipe tested.

Recipe 4: homemade ice cream and milk ice cream
- milk - 1 glass;
- butter - 25 grams;
- egg yolk - 1 piece;
- sugar - ½ cup;
- vanilla sugar - 5 grams;
- starch - ½ teaspoon.

In a deep, convenient container, mix sugar, starch and vanilla sugar.
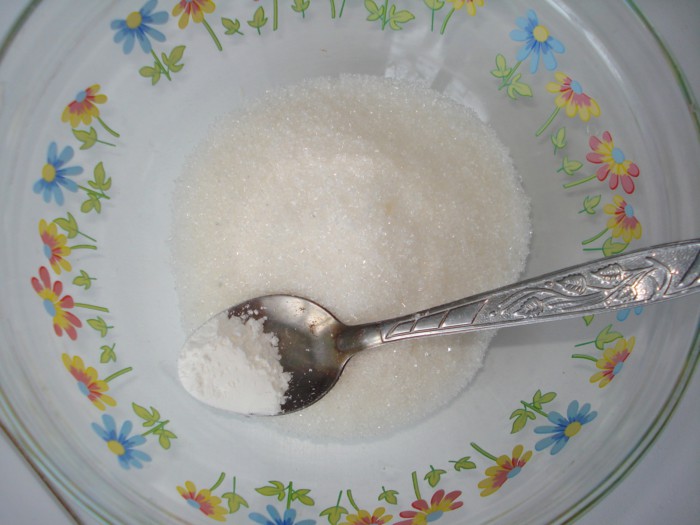
Add one egg yolk.

Grind the mixture until smooth. Pour in a little milk.

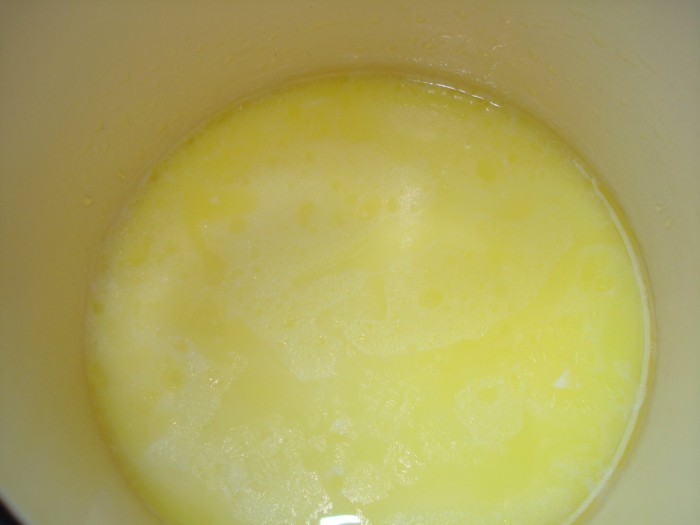
Place the remaining milk on the fire. Add 25 grams of butter. The butter must be real, consisting of 100 percent cream from cow's milk. Bring the mixture to a boil.
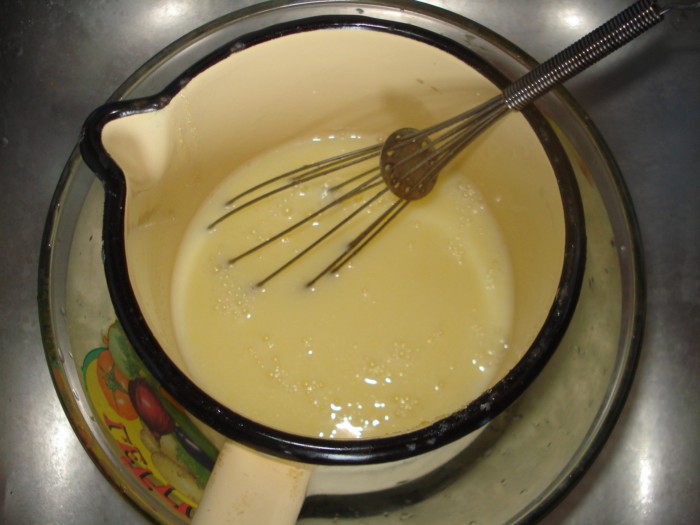
Pour in egg mixture into boiling milk. Stirring, bring to a boil. Remove from heat and send to cold water. Cool, stirring occasionally.
Pour the cold mixture into molds. It could be large shape or small portions. I have a big one Silicone molds and molds for small cars.

Place the molds in the freezer for a couple of hours.

Ice cream from small molds will be ready in 30-50 minutes. Take it out silicone molds very simple.
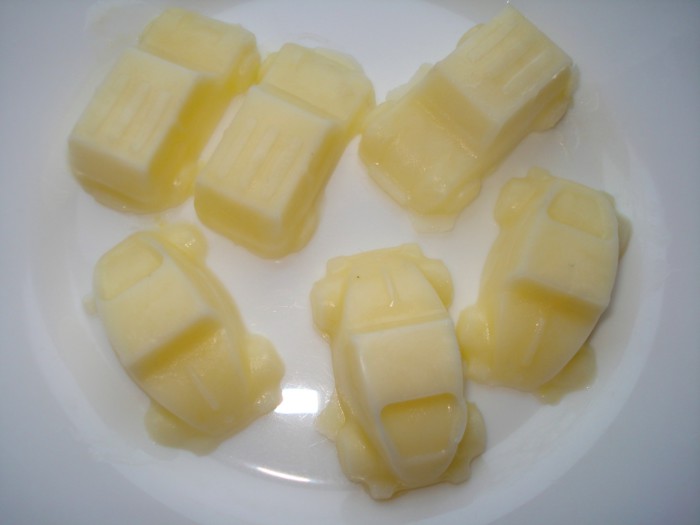
From large shape, spoon ice cream onto serving plates. It is incredibly tasty, tender and aromatic.
Recipe 5: how to make ice cream at home
- 0.5 liters of cream (the higher the fat content, the tastier the ice cream will be)
- ¾ cup sugar
- 4 chicken eggs
- Chocolate chip cookies (or other flavors)

Break eggs into a bowl and add sugar.
Beat well with a fork and grind the sugar. Pour in the cream and mix well again.
Pour the resulting mixture into a small saucepan and place over very low heat. Stir constantly, do not bring to a boil, otherwise the eggs will curdle. Remove from heat when the mixture begins to thicken; the consistency should resemble liquid sour cream.
In total, the pan will spend 15 - 20 minutes on the fire. Well, you can also find out the readiness of the desired consistency by running your finger along the spoon. If the spoon is covered in cream and a fingerprint remains, the mixture for homemade ice cream is ready.
After removing from the stove, pour the mixture into any container convenient for freezing. In general, you can use any plastic container suitable for food products.
Add any filling (in this case, crushed cookies, or you can use berries, chocolate chips or pieces of fruit).
Let sit for about an hour until the mixture cools slightly (the mixture will cool faster if you place the container in a sink with cold water). Then transfer the container with the mixture to the freezer. Homemade ice cream will harden and gradually thicken. The thickening time can range from 5 to 6 hours, so it is better to do it at night or in the morning so that you can enjoy it by the evening.
Before serving, remove the container of homemade ice cream with cream from the freezer and place in the refrigerator for 20 minutes. Roll the prepared ice cream into small balls using a tablespoon (if you don’t have a special ice cream spoon) and place in tall glasses, bowls or plates. Ice cream can be decorated with grated chocolate or berries. Serve immediately. Bon appetit!
Recipe 6: how to make ice cream from milk? (step by step photos)
- milk - 2.5 cups
- sugar - 1 glass
- vanillin - to taste

Pour milk into homemade saucepan, bring the milk to a boil, then remove the pan from the stove and let the milk cool to a temperature of 36 degrees.

Add sugar and vanillin to the egg yolks (if you want to make vanilla ice cream and not a regular ice cream). Mix well and grind the mass. To do this, you can use a blender.

Stir the resulting mass constantly, pouring milk into it in a thin stream.
Heat the final mixture over low heat, while continuing to stir. The mixture should become thick.

Cool the resulting mixture and our cream first, then place it in the refrigerator.
Pour the cream into a separate bowl. Whip the cream until it becomes thick.
Add whipped cream to the cooled cream and mix the mixture.

Transfer the mixture into a plastic container, cover with a lid, and place in the freezer for one hour. Then we take out the slightly frozen mixture, beat it with a mixer and place it in the freezer again. We repeat the procedure again.

Then we leave the mass of future ice cream in the freezer for 3 hours. Now our ice cream is ready. To soften the ice cream slightly, place it in the refrigerator for 20 minutes before serving.
No one can argue that this sweet delicacy is so loved by adults and children that they are ready to eat it in both hot and cold weather. The time of year has ceased to be a determining factor when choosing ice cream as a dessert. This can be confirmed by the always full freezers in stores, where even in the middle of winter there remains a good choice variety of ice cream. Thanks to this, you can enjoy the taste of dessert at any time, but that’s not all. When you learn how to make ice cream at home, which will be tastier, easier and healthier than store-bought, there will be no obstacles left for you on the path to true taste bliss.
Honestly, I was skeptical for quite a long time about this possibility of making my own ice cream at home, believing that it couldn’t be so simple and tasty. I thought that it was not for nothing that large productions were so complex, and that the recipes were probably abstruse and inaccessible to the common man.
This is partly true, of course, recipes for store-bought ice cream are not available to us, but are they necessary? I was convinced that they were not needed. After several successful experiments with attempts to make ice cream at home, I realized that homemade ice cream recipes are incredibly simple, and the delicacy itself turns out much tastier and healthier, without chemicals, additives and all kinds of substitutes. All my household members unanimously abandoned store-bought ice cream in favor of home-cooked ice cream, and even began to take part in its preparation, adding their own ideas, flavors and decorations.
I’ll tell you which recipes I tried from my own experience and gave them solid A’s!
Let me start with the fact that I first tried to make the simplest creamy ice cream with my own hands. Or as it is also called ice cream. I think that this is a classic that is relevant for all times and is loved by almost everyone. Add fruits, syrups, chocolate, etc. tastier than dessert be it on a holiday or on an ordinary day. Fresh berries from the garden, jam from stock, syrup from the store, chocolate chips- this is what can be added to the most ordinary creamy ice cream made at home.
How to make ice cream Sundae at home
For myself, I call this recipe for homemade ice cream “Ice cream according to GOST.” I cannot guarantee that this is how the recipe is presented in GOST, because I could not find the original document on the Internet, only its reprints and interpretations on many different sites. But the most important thing that was learned is that all products must be natural and no vegetable fats and substitutes.
The ice cream recipe according to GOST from recognized internet chefs includes:
- cream 30-35% - 500 ml,
- milk - 150 ml,
- granulated sugar (or powdered sugar) - 150 grams,
- egg yolks - 3 pieces,
- vanilla extract/vanilla/vanilla sugar for vanilla flavor.
Making your own ice cream, step by step recipe:
1. A secret that I understood over time and now strictly follow it - the cream for making ice cream at home must be cooled. So put them in the refrigerator in advance.
2. Separate the egg yolks from the whites. In case you don’t remember how to do this, let me remind you: split the egg shell into two even halves and open it so that the yolk remains in one of the halves and the white flows into another container (cup, plate). The white will drain, but not completely, so while continuing to hold the egg over the cup, carefully pour the yolk from one half of the shell to the other, another part of the white will drain. Repeat again if the white remains until there is only one yolk in the shell. Place the separated yolk in another cup or saucer and do the same with the rest of the eggs.
If this “grandmother’s” method is difficult for you, now you can buy special devices for separating yolks in stores. Most of them look like a spoon with slits into which the white flows, while the yolk remains inside.
3. In a separate bowl, grind the yolks with sugar until smooth. Sugar cannot be completely dissolved, so many people use powdered sugar. But even if you have regular granulated sugar, it’s not scary, later you’ll understand why.
4. Pour milk into a bowl with eggs and sugar and stir with a whisk.

5. Pour the resulting yellowish mixture into a saucepan and place on the stove over low heat. It is necessary to heat the mixture, but do not let it boil, otherwise the eggs will cook. To make ice cream thick at home, this mixture must be heated to a maximum of 80 degrees and stirred constantly.
Gradually it will begin to thicken. Egg yolks will help her with this. If you don’t know, then yolks professional chefs They are used to thicken anything from creams to sauces and gravies. This is a method that has long been known throughout the world using natural products.
Don't worry about being used raw eggs in ice cream, it is precisely this heating that will rid them of bacteria, being home version pasteurization. This same heating will help the sugar completely dissolve. Our homemade ice cream will not crunch on your teeth.
To understand that the mixture is ready, you need to dip a spatula or wooden spoon into it. The mixture should remain on the spoon, and if you run it with your finger or knife, the groove will not spread or run off. Something like this.

6. Now this mixture must be cooled to room temperature. To do this, take a larger saucepan and pour ice water from the tap into it, you can add ice cubes. Then place the saucepan with the egg mixture in it, as if you were going to cook in a water bath. Stir the mixture with a spoon for several minutes so that the lower cooled layers mix with the upper warm ones until the whole mass has cooled.
As it cools, the mixture will thicken a little more. Egg yolks keep working!
7. When the egg mixture is ready, remove the cream from the refrigerator and beat it in a large bowl until it forms a nice thick cream. The main thing is not to overdo it so that they do not thicken to the point of butter. This is unfortunately another problem that can arise when making ice cream at home.

I check the doneness of the whipped cream by the fact that it does not flow out of the bowl if it is tilted well, but remains motionless.
8. The next step is to mix the whipped cream and egg mixture. At the same time, add vanilla sugar (1 whole sachet) or vanilla liquid extract(teaspoon) to give the ice cream a vanilla flavor.

Mix everything carefully with a spoon or spatula so as not to knock off the creamy foam. In this case, it is better not to use a mixer. You need to achieve a uniform texture and color. The color should be soft cream thick cream(by the way, it tastes simply amazing. Tested by all household members who control the process).
9. Now the ice cream needs to be frozen. But this must be done taking into account the fact that you will have to take it out of the freezer several times and beat it with a mixer to break up the ice crystals and saturate it with air. This is the only way to get real soft ice cream at home.
Any large container in which it will be convenient to re-beat is suitable for freezing. It could also be the same bowl, covered cling film(we don’t want extra odors from the freezer in the ice cream), a plastic food container with a tight lid will do. Even plastic jars from store products that have already been eaten will do. The main thing is to wash them thoroughly.
Cover the ice cream and place in the freezer for an hour.
10. In this recipe, I prepare ice cream at home without using a special ice cream maker, so after exactly an hour we take out the container with ice cream and beat it again with a mixer.
After an hour it will thicken only slightly and it will be easy to beat. Mix the ice cream thoroughly from the edges to the middle. Cover again and place in the freezer for another hour.
After an hour, repeat the procedure. The ice cream will become thicker and form lumps at the edges of the container. Stir until smooth with a mixer and put back in the freezer.
In my experience, you need to whip the ice cream this way at least 3-4 times, then it turns out airy, like the real thing. If you don’t do this, then its texture when frozen is so dense that it will be very difficult to get it out of the bowl even with a special spoon. Without whipping it makes a great butter brick.
11. After churning several times, leave the ice cream in the freezer for 8-12 hours. Ideally overnight. In the morning, an amazing treat will be waiting for you.
To get it out of the bowl, use special round spoons heated in boiling water. You can do this with a regular spoon. Just hold the spoon in the cup with hot water literally a couple of minutes.

This is how easy it is to make ice cream at home, and not just ice cream, but real creamy ice cream! Help yourself, treat your guests and enjoy incredible deliciousness!
If this recipe seemed too long and complicated to you, move on to the second one, which is difficult to come up with simpler.
The simplest ice cream at home made from cream and condensed milk

I can't help but tell you about it interesting recipe homemade ice cream. On the one hand, it can be called a recipe for the lazy, since a simpler way to prepare creamy ice cream at home has simply not been invented. But on the other hand, the result is very worthy.
The only thing about this recipe that I don’t even consider a minus is that the ice cream turns out very creamy and sweet. That is, completely non-dietary. But if you are not a follower of strict diets, this is simply unimaginably delicious. Of all the friends I treated to this ice cream, everyone was happy, and the children generally squealed with delight, because the delicacy is better than any candy.
What is the secret of this homemade ice cream recipe? The fact that only 2 ingredients are used, plus vanilla for taste.
- natural cream 30-35% - 500 ml,
- condensed milk - from 200 ml.
- vanilla sugar or vanilla essence taste.
Why is the measure “from” indicated for condensed milk? It's simple, the more condensed milk, the sweeter the ice cream will be.
After several tests carried out with in different quantities Condensed half of the recipe, I found a combination of products acceptable to our taste: 1 part condensed milk to 2 parts cream.

I started my tests with the simplest proportion of a standard half-liter package of cream and standard can condensed milk in 380 ml. It turned out simply amazing, but much sweeter than the usual store-bought ice cream or the ice cream according to the recipe above, made from milk and cream. There was clearly less sugar there.
Another cooking feature: the taste and quality of ice cream at home will depend on the taste and quality of cream and condensed milk. Bad, cheap cream with a suspicious unnatural composition from little-known manufacturers spoiled everything. Condensed milk with vegetable fats and milk powder spoiled everything. No, we were not poisoned, but the taste suffered greatly. There was a strange mealiness on the tongue or an unpleasant vegetable fat settled on the lips.
Therefore, the most important principle of choice: always take proven tasty and high-quality cream and condensed milk with a good uniform consistency and sufficient thickness. 30% cream cannot be liquid like milk, it simply will not whip into an airy mass. Condensed milk that is not made from whole milk can spoil the taste and consistency. Choose everything wisely and it will turn out very tasty.
Making ice cream at home from cream and condensed milk:
1. Before preparing the ice cream, thoroughly cool both the cream and condensed milk. A couple of hours in the refrigerator, no less. This is necessary so that the products are well whipped into foam.
You can also cool the beaters of the mixer with which you will beat.
2. Whip the chilled cream until it is thick and airy until it is fluffy enough to not flow out of the plate. Well whipped cream is similar to cream.

3. Add vanilla sugar (1 sachet). Then, without ceasing to beat at low speed, pour in the condensed milk. You can mix the condensed milk with the cream with a wooden spoon or spatula until you get a homogeneous consistency. The mass will turn out to be a little more liquid than the cream was before, with a pronounced vanilla scent and a delicate creamy tint.
4. Pour the future ice cream into a container for freezing. A large bowl that can be covered with cling film, a plastic food container with a tight lid, or, for example, boxes and containers of store-bought ice cream that you have eaten a long time ago are suitable for this.

In fact, the main thing is that the container can be tightly closed and placed in the freezer. Foreign odors stick very easily to this creamy mixture.
5. Now the most important thing that will turn our delicacy into real ice cream - every hour it must be stirred or whipped at low speed with a mixer.
Why is this necessary and why is it so vital? The thing is that the secret of ice cream is that the creamy mass is filled with air. According to GOST of Soviet ice cream, up to 200% air in the mass of ice cream was allowed. Can you imagine how airy and delicious it turned out?
From my own experience, I will tell you that when I did not churn the ice cream at home at least three times, it turned out to be too hard and it was extremely difficult to remove it from the mold. One tablespoon was bent almost irrevocably, despite its pre-heating in boiling water. And eating ice cream that melts on your tongue is much tastier.
The whole process of mixing/churning comes down to the fact that you need to remove the ice cream from the freezer, open the lid and beat it thoroughly directly into the freezer container. Do this several times until you realize it has become too thick to whisk.
The freezing speed depends on the volume of the container and the power of the freezer, so it may be different for everyone. Small flat trays freeze much faster than a large bowl. For small containers, it is advisable to beat the mixture after half an hour, rather than an hour.
6. Ice cream at home from condensed milk will be ready in about 8-12 hours. You can serve it on the table!

Homemade creamy ice cream with Kit Kat and Oreo
And this is how you can diversify this simple recipe for making homemade ice cream by adding your favorite chocolate cookies Oreos and Kit Kat waffles.
For children this is a real holiday, just like for any other real sweet tooth. This yummy can replace cake with children's party or simply enjoy as dessert.
Now that you are armed with the knowledge of how to prepare delicious and natural creamy ice cream at home, there is a chance that you will long forget about store-bought analogues with dubious ingredients and scary E-additives. Take care of your health and the health of your children!
Bon appetit and more festive mood in the kitchen!
Making ice cream at home is not as difficult as it seems from the very beginning. The main thing is to strictly follow all recipe recommendations and use only suitable products.
It should immediately be noted that “Plombir” ice cream can be prepared at home different ways. Some people make it with milk or cream, while others add extra chicken eggs, vanillin, as well as such fillers as various fruits, syrups, berries, nuts, chocolate, cocoa, etc. With them, your dessert will turn out much tastier and higher in calories.
A simple recipe for ice cream “Plombir” at home
With the onset of summer and hot days, many people try to cool their bodies by eating such tasty and delicate dessert like ice cream. Buying it in a store is not difficult. Today this product produced in large quantities and has a huge range.
However, experts say that store-bought “Plombir” does not always meet all quality and safety requirements. It doesn’t matter how much it costs or what company produces it.
In connection with all of the above, we recommend making Ice Cream ice cream at home. In fact, there is nothing complicated in preparing such a delicacy. Moreover, it can be served as a stand-alone dessert or used to create various cocktails.
So how to make “Ice cream” at home? To implement the simplest and quick recipe we will need the following set of products:
- whipping cream with a fat content of 30% or more - about 500-600 ml;
- powdered sugar (you can use fine beet sugar) - approximately 100 g;
- aromatic vanillin - 2 medium pinches.
Cooking method
Before you make Ice Cream at home, you should prepare the base for it. For this we decided to use heavy cream for whipping. They are pre-cooled and placed in deep dishes. Next add powdered sugar and a little vanillin. Using a high-speed blender, whip the cream continuously for 7-10 minutes. During this time, they should increase several times in volume and transform into a very stable and creamy mass.

After the ice cream base is ready, it should be cooled. To do this, put the sweet whipped cream in a plastic container, then close it tightly and put it in the freezer overnight.
As soon as the mass hardens, it is taken out and left warm for several minutes. Having partially thawed the product, soft ice cream is carefully taken with a spoon and placed in bowls.
“Ice cream” prepared at home can be served in different ways. Some sprinkle it with cocoa, while others decorate it with frozen or fresh berries. This dessert is especially delicious with honeysuckle. However, before adding these berries to ice cream, they should first be pureed in a blender. The resulting mass must be added to the ice cream and beaten thoroughly again.
Surely many people born in the Soviet Union remember the taste of the ice cream that was sold in stores. Today it is quite difficult to purchase such a delicate and soft dessert. Therefore, we recommend making your own “Ice Cream” at home according to the Soviet recipe. For this we need the following components:
- high-fat whole milk (use only cow's milk) - 130 ml;
- heavy cream (30% fat) - 300 ml;
- beet sugar is not very coarse - 100-150 g;
- egg yolks - 3 pcs.
Cooking process
The presented recipe for “Ice cream” at home requires the use of high-fat whole milk. As for cream, it should be at least 30%. Otherwise, the ice cream will not be as tasty as you would like.

Not very coarse granulated sugar is added to the egg yolks and ground in homogeneous mass using a regular spoon or fork. The sweet spice should be adjusted according to your personal taste.
After the yolk mass turns white and becomes homogeneous, whole milk is poured into it, and then the entire contents of the dish are placed in a water bath.
Stirring regularly, cook the ingredients until very thick. low heat. After this, the creamy mass is removed from the stove and cooled to room temperature. In the meantime, they begin to prepare other products.
The heavy cream is pre-cooled, then thoroughly whipped and placed in the freezer for a few minutes. Next, the product mixing procedure is repeated again. In this case, the cream should form fairly stable peaks.
After the described actions, the yolk mass and milk product combine and mix well. Then it is again sent to the freezer, where it is kept for about 40-60 minutes.
The almost frozen mixture is re-beaten using a mixer and again placed in the freezer. These actions should be performed about 2-3 more times. This is necessary to prevent the formation of large pieces ice, and it turned out very tender and tasty.
How to serve?
Now you know soviet recipe ice cream "Plombir" at home. After the dessert has been whipped and frozen several times, it is removed from the freezer and kept at room temperature for some time. Next, the soft delicacy is placed in ice cream cups and sprinkled with grated chocolate or decorated with fresh berries, nuts or fruits.
The taste of this dessert is quite similar to that of the Soviet ice cream. Therefore, we do not recommend buying ice cream in a store, but rather make it yourself using simple and affordable products.

Making delicious ice cream with egg whites
Now you have a general idea of how to make Ice Cream ice cream at home. However, it should be noted that there are a great many ways to prepare such a delicacy.
In the recipe described above, in addition to milk and cream, we used egg yolks. In this section, we decided to tell you how to make Ice Cream ice cream at home using proteins. To do this, you need to purchase the following set of components:
- store-bought cream with high fat content (more than 30%) - 300 ml;
- fine beet sugar - approximately 100 g (a little more, to taste);
- chilled egg white - 3 pcs.;
- powdered sugar - approximately 80 g;
- freshly squeezed lemon juice - from ½ fruit;
- vanillin or vanilla sugar - use according to your taste.
Step-by-step preparation
It's best to start making this ice cream the night before. In this case, by morning you will receive real ice cream, which you can enjoy all day long.
So how to make “Ice cream” at home? Heavy store-bought cream is mixed with medium-sized sugar, and then vanillin is added to it and placed on very low heat. In this composition, the ingredients are boiled for about 30 minutes. At the same time, they are regularly stirred with a large spoon.
After implementation heat treatment, remove the hot sweet mixture from the stove and strain through a sieve. After cooling the cream at room temperature, place it in the refrigerator. At this time, begin processing the egg whites. They are whipped into a stable foam, gradually adding fresh lemon juice and powder.

Having carried out the described steps, remove the cooled cream from the refrigerator and also beat it using a blender.
Having combined both air masses together, they are placed in a container with a lid and sent to the freezer. In this form, the ice cream is kept throughout the night or a little longer.
We present it to the table
After keeping the milk-protein mass in the cold, it is taken out and laid out in bowls. After flavoring the dessert with sweet syrup or cookie crumbs, it is presented to guests along with a dessert spoon. This delicacy turns out very tasty and tender. It can be eaten immediately or saved for a special occasion.
Making chocolate-vanilla ice cream
It’s quite possible to make ice cream at home without cream. To do this, you don’t need to purchase expensive components or devote a lot of free time.
So how to make “Ice cream” at home? To do this you need to prepare:
- cocoa powder - about 150 g;
- full-fat cow's milk - approximately 350 ml;
- fresh pistachios - 100 g;
- vanilla pod - 1 small pc.;
- powdered sugar - approximately 200 g;
- egg yolks - 3 pcs.
Making ice cream
To make this dessert, pour 150 ml of full-fat cow's milk into a small saucepan, and then add cocoa powder to it. After mixing the ingredients until a homogeneous mass is obtained, add the seeds of the vanilla pod and place on medium heat.
After the milk mass boils, remove it from the heat and allow it to cool completely. Once the mixture reaches room temperature, add the remaining full fat milk and immediately beat with a blender. These actions should be carried out over several minutes, adhering to the highest speed.

Having received a homogeneous and fluffy mass, add pistachios to it, which are chopped into fine crumbs in advance. In this case, a few spoons are left aside. They are useful for decorating ice cream.
After the described steps, the egg yolks are ground together with powdered sugar. The resulting homogeneous mass is added to the milk-chocolate mixture and whipped for a long time. This procedure promotes the formation of a very fluffy and uniform base. Place it in a container with a lid and put it in the freezer for about a day.
Serving ice cream to the table
After the chocolate-vanilla ice cream is frozen, it is taken out and placed in ice cream cups. Serve this unusual delicacy It is advisable to bring it to the table only after it has been decorated with pistachios. If you have nut syrup on hand, you can also pour it over the finished dessert.
Now you know how to make Ice Cream ice cream at home. It should be noted that these are far from the only methods of preparation. homemade dessert. Using various fillers in the form of berries, fruits, nuts, chocolate, syrup, cocoa and other products, you can significantly change not only taste qualities ice cream, but also its energy value.
Apricot ice cream is quite popular among children. To prepare such a delicacy, you need to add to the milk base a small amount of fruits, pre-cooked with granulated sugar. By analogy, currants, raspberries, gooseberries, plums, bananas and other products can be added to ice cream. With these components homemade ice cream will turn into the appropriate color, and will also become more aromatic and tasty.

It is impossible not to say that the finished delicacy can be used not only as regular dessert, but also use it for preparing various drinks.
In a family with children, the question of how to make ice cream at home without an ice cream maker will never lose relevance. We have selected best recipes this cold delicacy, but first it makes sense to learn the basic principles of making homemade ice cream.
How to make homemade ice cream
Modern freezers are able to provide a temperature below 15 degrees required for making ice cream, so you can make it at home without an ice cream maker. It is enough to have molds or at least a plastic container, purchase products, choose a recipe and make it, taking into account the following recommendations:
- The fattier the ingredients in the ice cream, the tastier it will be, but this also happens.
- Products need to be fresh and of high quality, this applies to milk, berries and fruits, and chocolate.
- Syrup and other ingredients are added to ice cream at the first stage, pieces of fresh fruit, candied fruits, and flavorings are added to the ice cream at the last stage, when the dessert is already cooled in the freezer.
- To avoid ice formations, you can add a little alcohol, such as liqueur. This will help give the dessert an additional pleasant aroma.
- Beat the ice cream with a mixer or whisk; the blender will separate it.
- Ice cream made at home without an ice cream maker needs to be cooled gradually: first, just in the refrigerator for about an hour, then in the freezer for several hours.
- Ice cream should be stirred at least once an hour, at least if it is prepared in a container large enough in volume.
Knowing these rules and following them, you are simply doomed to prepare delicious ice cream using any of the recipes below.
Homemade ice cream (“English cream”)
Ingredients required:
- egg yolks (raw) - from 2-3 chicken eggs,
- sugar - half a glass,
- milk (at least 3.2% fat) – 400 ml,
- cream (at least 20% fat) – 200 ml,
- vanillin - on the tip of a knife,
- strawberries, banana, chocolate, syrup, liqueur - as desired and in any quantity.
Cooking process:
- Prepare necessary products. Boil the milk immediately. If you decide to use them, wash and cut the berries and fruits, break the chocolate into pieces. Separate the yolks from the whites.
- Heat the milk (ideally in a water bath).
- Beat the yolks with sugar.
- Continuing to heat the milk, add the resulting mixture in a thin stream and simmer until thickened.
- Pour in the cream and stir with a mixer.
- At this stage you can add syrup.
- Pour into molds and refrigerate.
- After an hour, transfer to the freezer.
- After half an hour, add the remaining ingredients, stir, return to the freezer.
- After 3-4 hours the ice cream is ready.
Ice cream without eggs
Ingredients required:
- cream (from 33 percent) – 0.25 l;
- selected milk (from 3.2% fat content) – 0.3 l;
- powdered milk – 30-40 g;
- sugar – 80-100 g;
- vanilla sugar – 5 g;
- starch (preferably from corn) – 10 g.
Cooking process:
- Dilute the starch with liquid milk in an amount of 50 ml.
- Mix sugar, crushed in a coffee grinder to powder, including vanilla, with dry milk and dilute with the remaining milk.
- Heat the milk mixture, add the diluted starch, stirring. Once the mixture thickens, remove from heat and strain. Cool to room temperature, then put in the refrigerator for another half hour.
- Whip the cream until soft peaks appear. Stir into the main mixture using vertical movements.
- Place in a container and place in the refrigerator. Stir vigorously every 15 minutes.
- Transfer to the freezer. Stir three times within an hour. Stir twice more at one hour intervals.
- Place in paper cups and wait a few more hours.
The ice cream that you have loved since childhood will be ready to eat. If you can get wooden sticks, eat with them: you will get indescribable pleasure.
Ice cream

Ingredients required:
- heavy cream – 500 ml,
- condensed milk – 200 ml,
- cream liqueur – 50 ml.
Cooking process:
- Mix everything and put it in the freezer.
- After an hour, pour into molds.
- Continue to chill in the freezer for 6 hours.
If you don't have much time to make homemade ice cream, use the recipe below. It is simple and allows you to get quick results.
Orange cottage cheese ice cream
Ingredients required:
- fat cottage cheese (18 percent) – 0.2 kg;
- condensed milk – 100-150 ml;
- heavy cream (33 percent) – 150 ml;
- sugar – 60 g;
- butter – 30 g;
- water – 40 ml;
- orange – 1 pc.;
- white wine (sweet, semi-sweet) – 20 ml;
- vanilla sugar – 5 g.
Cooking process:
- Grate the zest from the orange and squeeze the juice out of it.
- Mix sugar with water and heat until it dissolves.
- Add juice and zest. Wait for it to boil.
- Pour in the wine. Stir. Immediately remove from the stove. Leave to cool.
- Beat cottage cheese with condensed milk. Whip the cream separately. Combine, beat together.
- Place in the refrigerator for an hour, then put in the refrigerator for the same amount of time. Beat every 20-30 minutes with a mixer or whisk.
- Transfer the ice cream into bowls or cups, pouring orange syrup over each layer.
Leave it in the freezer for another 8-12 hours, after which you can taste a cooling dessert, the likes of which you definitely won’t find in the store.
Creme brulee
Ingredients required:
- whipped cream - half a liter;
- boiled condensed milk – 0.2 l;
- flour - a tablespoon;
- vanillin - on the tip of a knife;
- yolks - from a pair of chicken eggs;
- milk – 150 ml.
Cooking process:
- In a bowl, mix 80 ml of cream, yolks, flour, vanillin, boiled condensed milk. Grind until you obtain a homogeneous (without lumps) composition.
- Heat the milk, pour the sweet mixture into it, whisk, cook until the cream is thick.
- Remove from the stove and let it cool.
- Whip the remaining cream, combine with the prepared cream (necessarily already cooled).
- Continue to cool first in the refrigerator, then in the freezer, stirring first 2-3 times within an hour, later once an hour.
If you love Creme Brulee ice cream, you will probably be pleased to be able to make it at home.
Chocolate ice cream
Ingredients required:
- cream 30% – 300 ml,
- cocoa - three large spoons,
- sugar – 3 large spoons,
- salt, vanillin - a pinch.
Cooking process:
- Mix 100 ml of cream with sugar and cocoa, heat until the sugar dissolves.
- Cool in the refrigerator.
- Mix everything and beat until thick.
- Place in the freezer for several hours, stirring occasionally.
Chocolate lovers will surely appreciate this cold treat recipe.
Strawberry ice cream
Ingredients required:
- fresh strawberries - half a kilo,
- yogurt – 250 g,
- sugar - half a glass,
- vodka – 2 teaspoons,
- lemon juice - a teaspoon.
Cooking process:
- Finely chop the washed and dried berries.
- Sprinkle it with sugar, pour vodka, stir, leave under a napkin for a couple of hours.
- Pour lemon juice into the strawberries, add yogurt, stir again.
- Grind everything with a blender or strain through a sieve.
- Cool for an hour in the refrigerator.
- Stir and place in the freezer.
- After an hour, stir again and leave in the freezer until completely frozen.
Instead of strawberries, you can use other berries and fruits. Delicious ice cream is made from banana and avocado. It is important to eat it within 48 hours after making it, because homemade ice cream is made without preservatives.
Elena Pronina
It's hard to find a person who doesn't like ice cream, this wonderful dessert will not leave anyone indifferent. But few people know that making real ice cream at home is not so difficult. There are many recipes for this delicacy that even a novice housewife can implement. Ice cream is prepared with milk and cream with the addition of fruits, nuts, chocolate and candied fruits.
How to make ice cream at home with milk?
You will need:
- Milk - 1 l
- Sugar - 250 g (1 glass, faceted)
- Vanillin
- 4 eggs.
Making ice cream at home is quite simple, but there are small nuances that you need to understand before you get started. This dessert is prepared only using yolks; it is better to choose homemade milk, but if this is not possible, then it doesn’t matter, take store-bought milk with the highest percentage of fat content. Before making ice cream from homemade milk, it must be boiled - this will kill bacteria and make the product safe. To prevent the milk from “running away” during boiling, grease the edges of the pan with a piece of butter (in a circle).
Cook the ice cream over low heat, stirring constantly, without leaving for a minute, otherwise the yolks may curdle.
Step by step recipe:
- Take a clean enamel or glass pan, pour in the cooled boiled milk, add 100 g of sugar, cook over medium heat. The milk just needs to be heated, it should under no circumstances boil.
- Next, break the eggs, carefully separate the yolks, grind them with sugar (150 g) until they turn white.
- Pour a little warm milk into the beaten yolks and mix well. Then pour the prepared yolk mass into a saucepan with milk, reduce the heat.
- Add a little vanilla, but do not overdo it, otherwise the ice cream will taste bitter. Cook, stirring constantly (until the mass thickens), otherwise there is a high probability of the eggs curdling. You should get custard English cream medium thickness.
- After the first bubbles appear, remove the pan from the heat, let the cream cool, then pour the ice cream into a plastic container and place it in the freezer.
- After 30-40 minutes, the ice cream is mixed, the operation is repeated 4-6 times (until the dessert completely hardens). If you have a special ice cream maker, then the need for mixing disappears by itself.
Ice cream at home hardens in about 6-8 hours (depending on quantity). After which you can take it out and place it in bowls, decorate with candied fruits, chocolate chips, and mint leaves. You can add caramel fresh fruits or syrup, thereby getting a new interesting taste each time.
How to make caramel pecan ice cream at home?
You will need:
- Cream - 2 cups (500 ml)
- 5 eggs
- Milk - 1 glass
- Hazelnuts - 200 g
- Sugar - 250 g (for ice cream)
- Sugar - 150 g (for caramel)
- Vanilla pod (vanillin).
Making nut ice cream at home is quite simple; the preparation consists of several stages. The first step is to cook the caramel; it is important to remember that it should not be stirred under any circumstances, otherwise the sugar will crystallize, which is extremely undesirable. It is better to take store-bought cream; if you use homemade cream, dilute it with milk in a ratio of 1 to 2.
Step by step recipe:
- Peel the hazelnuts, fry them in a dry frying pan or dry them in the oven at 160°C for 15-20 minutes. The nuts should become golden brown.
- Pour 150 g of sugar into a saucepan, add 4 tablespoons of water, and place over high heat. If you want to stir, then lift the saucepan, tilt it from side to side and put it back to cook (do not stir with a spoon). Cook the caramel until it turns brown.
- Lubricate parchment paper butter, spread it on it hazelnuts, fill with caramel. Once everything has set, grind the caramelized hazelnuts in a blender until very finely ground.
- Pour cream and milk into a saucepan, add 100 g of sugar. Cut the vanilla pod, remove the beans, and add them to the cream. Heat over low heat, but do not allow the cream to boil.
- Break the eggs, separate the yolks, beat them with sugar (150 g). Beat until the mass increases several times and turns white.
- Pour a little warm cream into the whipped yolks, stir, pour in a thin stream into the pan. From this point on, stir constantly and cook until thickened.
- Add chopped nut caramel to the cooled mass, mix thoroughly, transfer the ice cream to a plastic or glass container. Stir the mixture every 30-40 minutes.
Delicious homemade ice cream is ready! You can decorate it with caramelized hazelnuts. To do this, place a nut on a toothpick, dip it in boiling caramel, remove it so that a string of sugar trails behind the hazelnut, and insert the toothpick into the apple. After the caramel has hardened, remove the nuts from the toothpicks and decorate the ice cream with them.

How to make ice cream at home?
You will need:
- Condensed milk - 1 can
- Cream - 1 l
- Sugar - 100 g
- Vanilla sugar - 1 packet
- Gelatin - 10 g.
Making ice cream at home is quite simple; if you choose the right cream, it should have a high percentage of fat content (at least 32%). Country cream is only suitable for liquid; thick cream must be diluted with milk in a ratio of 1 to 4, then it will whip well. It is best to use powdered sugar or fine sugar (large ones may not dissolve completely). You can make a real creme brulee based on the ice cream; in this case, instead of regular condensed milk, you need to use boiled milk.
Step by step recipe:
- Take 10 g instant gelatin- this is 1 level tablespoon, fill it with cold water so that the liquid covers the granules. After the gelatin swells, melt it in a water bath, without allowing it to boil, otherwise the gelling properties will disappear.
- Pour the cream into the blender (mixer) bowl, add condensed milk, regular and vanilla sugar, and start whipping. After about 2 minutes, pour in the cooled melted gelatin and continue whisking until the mass increases in volume. The whisk blades should leave a mark - this is a signal that the ice cream is ready. It is important not to beat the cream, otherwise you will end up with butter instead of ice cream.
- Pour the mixture into a wide container and place it in the freezer. Stir the ice cream every 30-40 minutes, this must be done with special care, otherwise the liquid will rise to the top and form ice - then the ice cream will not work.
At home, you can experiment with the recipe, for example, instead of milk, take condensed coffee or cocoa, then you will get a coffee or chocolate ice cream.
It would be a good idea to add a little liqueur or cognac to a dessert for adults. A pinch of cinnamon or cloves will add some piquancy, and mint leaves will add freshness. It is better to add fruits immediately before eating; if you mix them with ice cream and put them in the freezer, they will turn into pieces of ice, which will ruin the taste of the dessert.
On video - good recipe creamy ice cream:
How to make lemon ice cream at home?
You will need:
- Milk - 250 ml
- Lemon - 1 piece
- Cream - 250 ml
- Eggs - 4 pcs
- Sugar - 150 g.
Making lemon ice cream at home is not difficult at all. skillful housewife. The first thing you need to do is purchase the “right” cream that will whip without problems. It is best to take store-bought cream with a fat content of at least 32%. The amount of sugar in the recipe can be varied to suit your taste.
Step by step recipe:
- Remove the zest from the lemon using fine grater or special device. Roll the lemon on the table, then cut it in half and squeeze out the juice. If the household does not have a citrus juicer, then you can use a regular fork, which is inserted into half a lemon and scrolled clockwise. Make sure that the seeds do not get into the juice, otherwise the ice cream will taste bitter.
- Pour milk into the pan, heat it without letting it boil. Once the first bubbles appear, remove the milk from the heat.
- Pour lemon juice into a saucepan, add zest, add sugar, mix thoroughly.
- Break the eggs, separate the yolks, mix them with warm milk, pour the mixture into a saucepan with lemon juice.
- Cook the mixture over low heat with constant stirring; as soon as it starts to boil, remove the ice cream from the heat.
- Whip the cream into a fluffy foam, best done with a whisk by hand. If you use a mixer, set it to the lowest speed. To make the ice cream sweeter, you can add a little powdered sugar at the end of whipping.
- Carefully pour the whipped cream into the cooled lemon cream. Stir the mixture from bottom to top clockwise.
- Place the ice cream in a plastic container and place it in the freezer. Once every 40 minutes, you need to take out the container and mix the mass either manually (with a whisk) or using a mixer. This is done in order to break the ice crystals, then the ice cream will be smooth and tasty.
Delicious homemade lemon ice cream is ready! Instead of lemon you can use lime, orange or tangerine juice. Interesting taste can be obtained by replacing citrus fruits ripe persimmon, it is cut into pieces and pureed using a blender with an immersion attachment. Using simple recipes, you can delight yourself and your loved ones with delicious, healthy and environmentally friendly desserts without preservatives and harmful chemical additives.
